Autumn Nails 2025 – Stunning Fall Nail Trends and Colours

These autumn nails are perfect for the season. Are you ready to refresh your nails for autumn 2025?
This season is all about warm tones, cosy textures, and a mix of chic classics with bold, modern twists.
But here’s the trick: choosing the right colour and nail shape for your fingers. The same shade can look very different on almond, square, or coffin nails – and the right combination can actually make your fingers look longer and slimmer.
Let’s dive into the latest autumn nail trends with tips on which nail shapes and finger types they suit best.
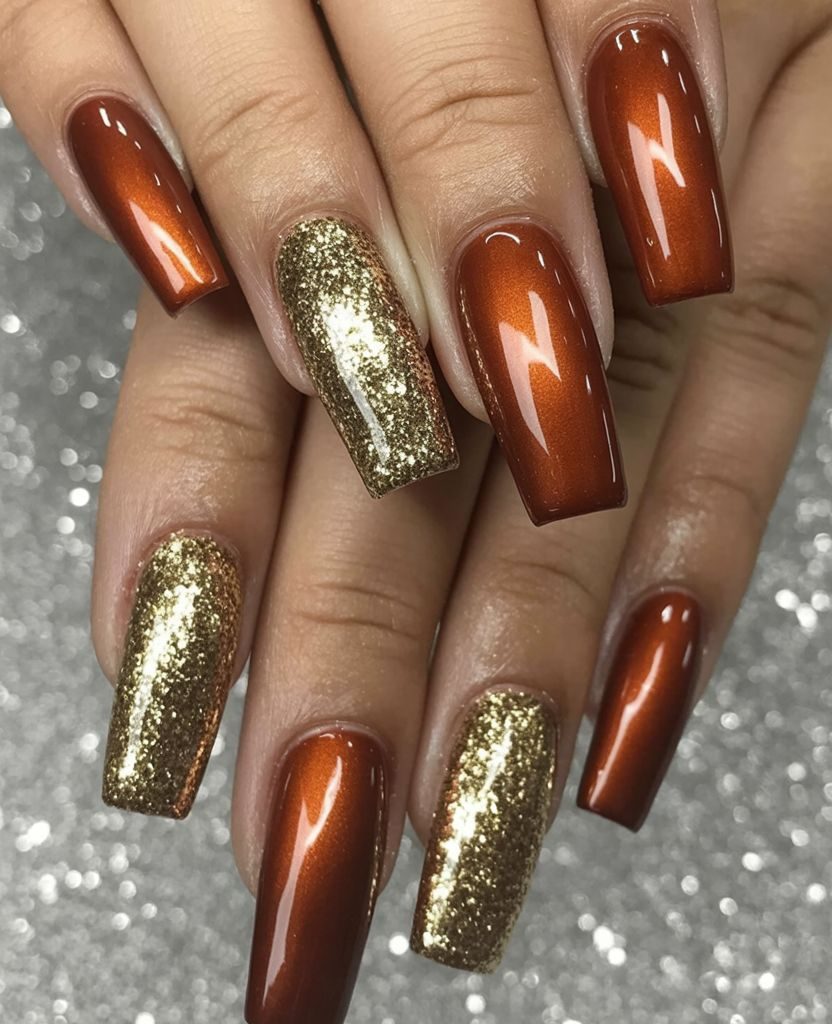
1. Copper Ombre Nails
Copper is the colour of the season! With its metallic warmth, it instantly gives autumn vibes. An ombre style keeps it soft and elegant, while the shimmer adds glamour.
Best for: Almond and oval nails – these shapes elongate the fingers and allow the gradient effect to really shine. If you have shorter or wider fingers, almond is especially flattering.
Create the look:
- Nude base
- Burnt orange
- Copper glitter
- Clear topcoat
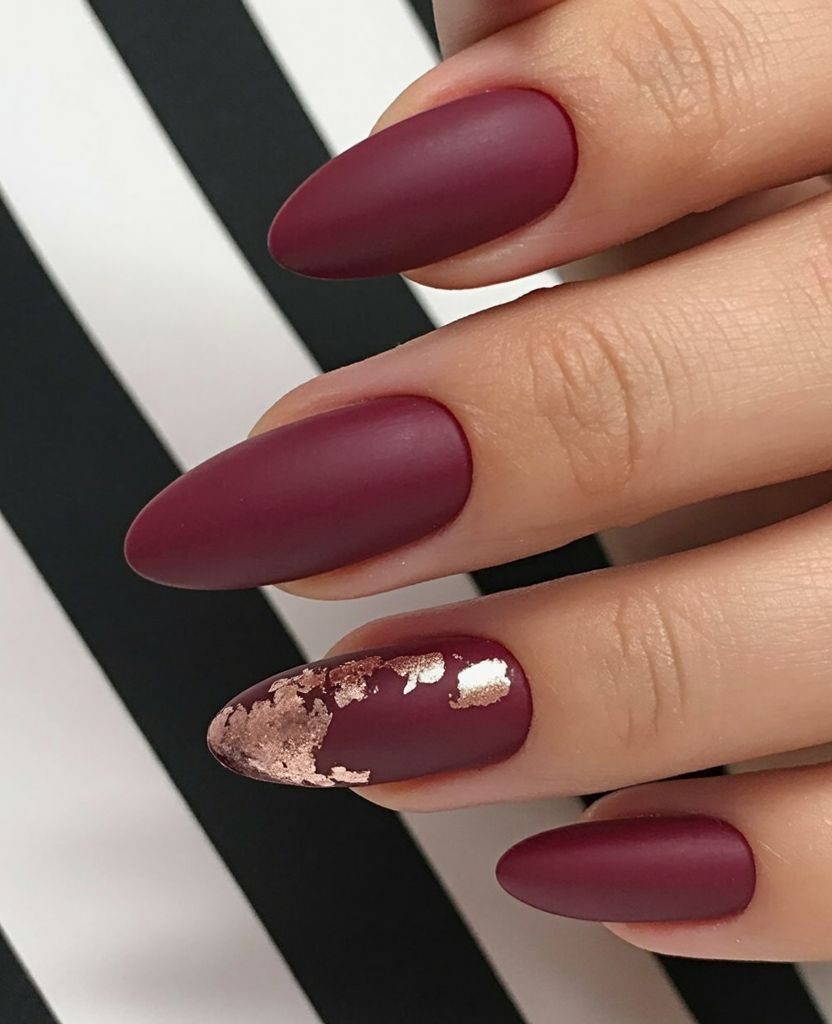
2. Matte Burgundy Nails
Burgundy is always a fall classic, but this year the matte version is trending. It’s bold, chic, and perfect for everyday wear or a night out. These autumn nails are a must-try this year.
Best for: Coffin and square nails – the matte effect looks super modern on longer, squared tips. For slim fingers, almond also works beautifully. These autumn nails are a must-try this year.
Create the look:
- Burgundy polish
- Matte topcoat
- Gold glitter (optional for accent nail)
3. Chocolate Brown Nails
Brown nails are making a strong comeback. From milk chocolate to deep espresso, all shades are popular this year. These autumn nails are a must-try this year.
Best for: Oval nails – the rounded shape softens the dark shade, making it elegant. If you have longer fingers, square nails also look stunning with chocolate tones.
Create the look:
- Brown polish (choose your favourite shade)
- Glossy topcoat
- Nude accent nail (optional)

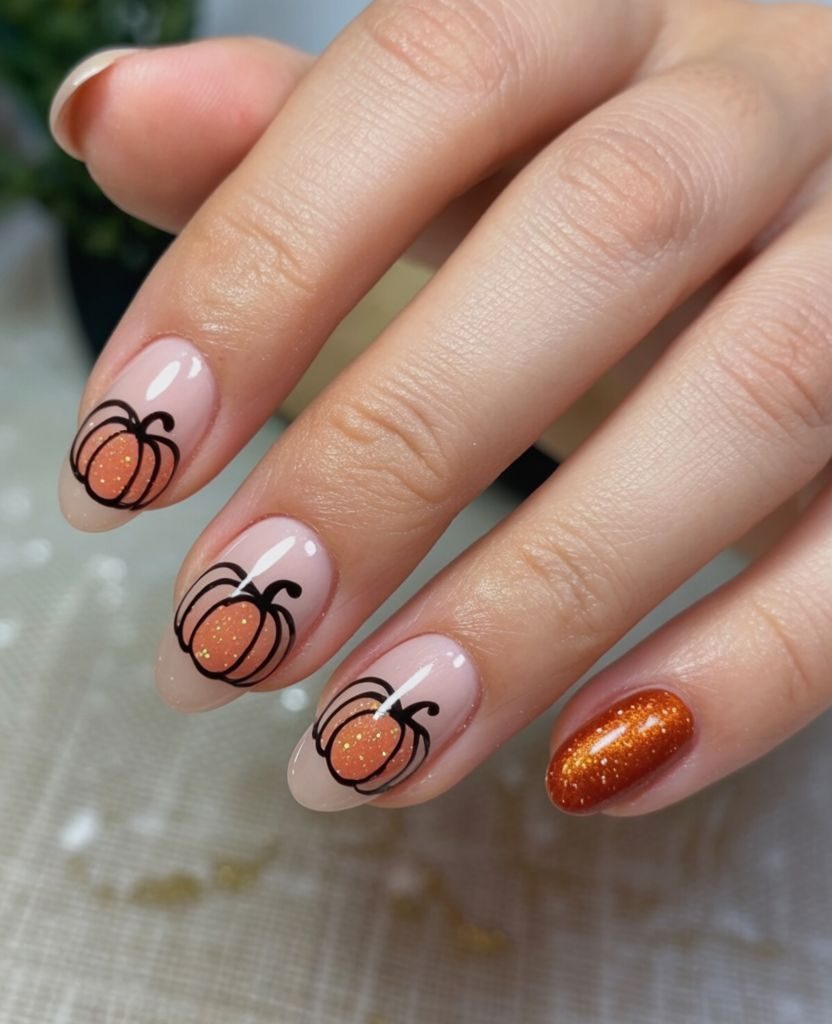
4. Pumpkin Spice Nails
Autumn wouldn’t be complete without pumpkin spice! This look combines orange, cinnamon brown, and golden shimmer for a festive vibe.
Best for: Almond or stiletto nails – the sharp tips echo the playful vibe of pumpkin spice shades. Great for shorter fingers, as the elongated tip balances them.
Create the look:
- Warm orange
- Golden glitter
- Cinnamon brown
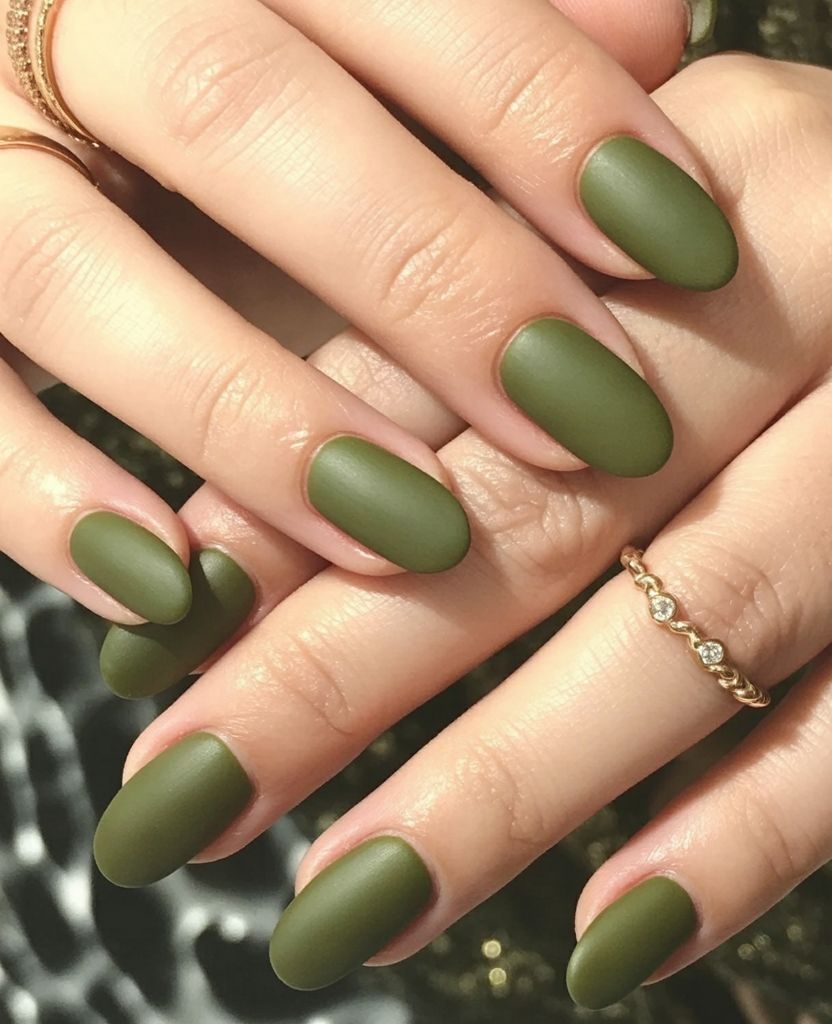
5. Olive Green Nails
Earthy greens are trending in fashion and beauty this season. Olive nails are versatile, classy, and surprisingly elegant.
Best for: Square or coffin nails – olive looks strong and sophisticated on straight edges. If your fingers are slimmer, oval nails give a softer finish.
Create the look:
- Olive green polish
- Matte topcoat for a modern twist
6. Burnt Orange Nails
Nothing says autumn more than burnt orange. This shade flatters all skin tones and is perfect if you want your nails to pop.
Best for: Almond nails – this shape naturally elongates the hand, and combined with burnt orange, it creates a chic autumn statement.
Create the look:
- Burnt orange polish
- Glossy topcoat

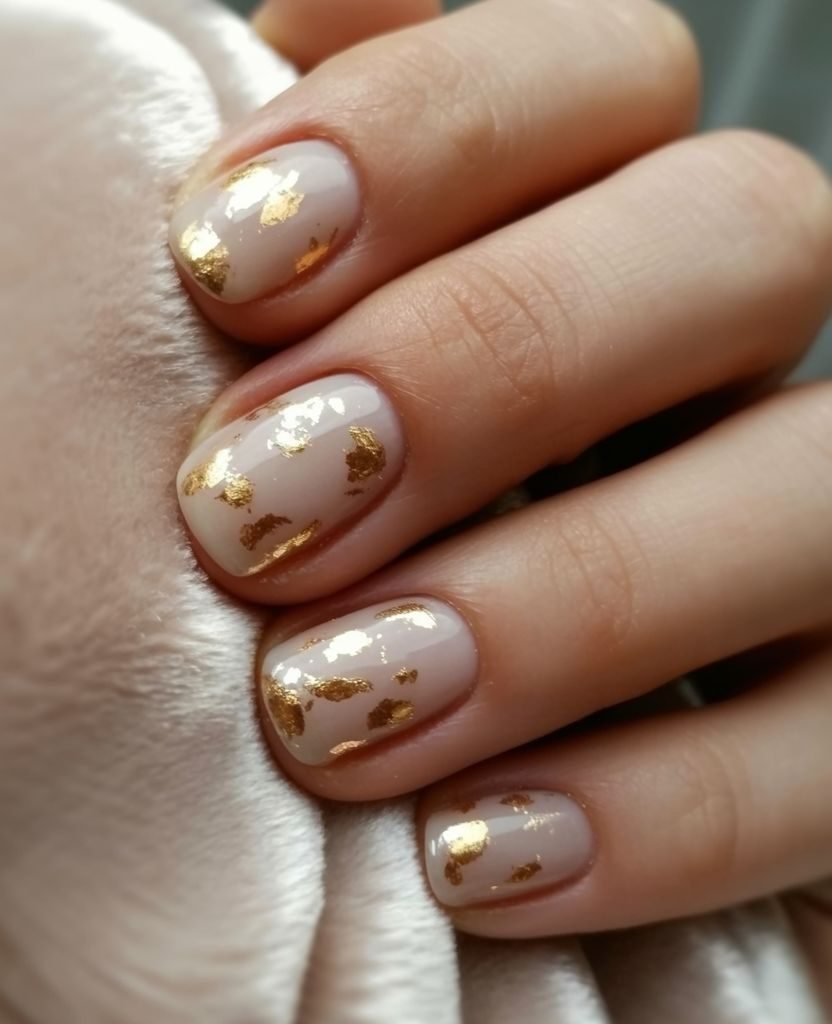
7. Gold Foil Accent Nails
Minimal but eye-catching, gold foil on nude or beige nails creates a chic, artistic look. Perfect for special occasions or even daily wear.
Best for: Any nail shape! But if you want elegance, go for oval. If you want edgy, try coffin or stiletto with foil accents.
Create the look:
- Nude base
- Gold foil
- Clear topcoat
8. Plaid Pattern Nails
Fashion meets nail art with this trend! Plaid designs in burgundy, navy, and beige are popular for autumn 2025.
Best for: Square or coffin nails – the straight lines of the plaid design work best on flat surfaces.
Create the look:
- Base colour (nude or beige)
- Thin brush for lines
- Burgundy, navy, and white polish

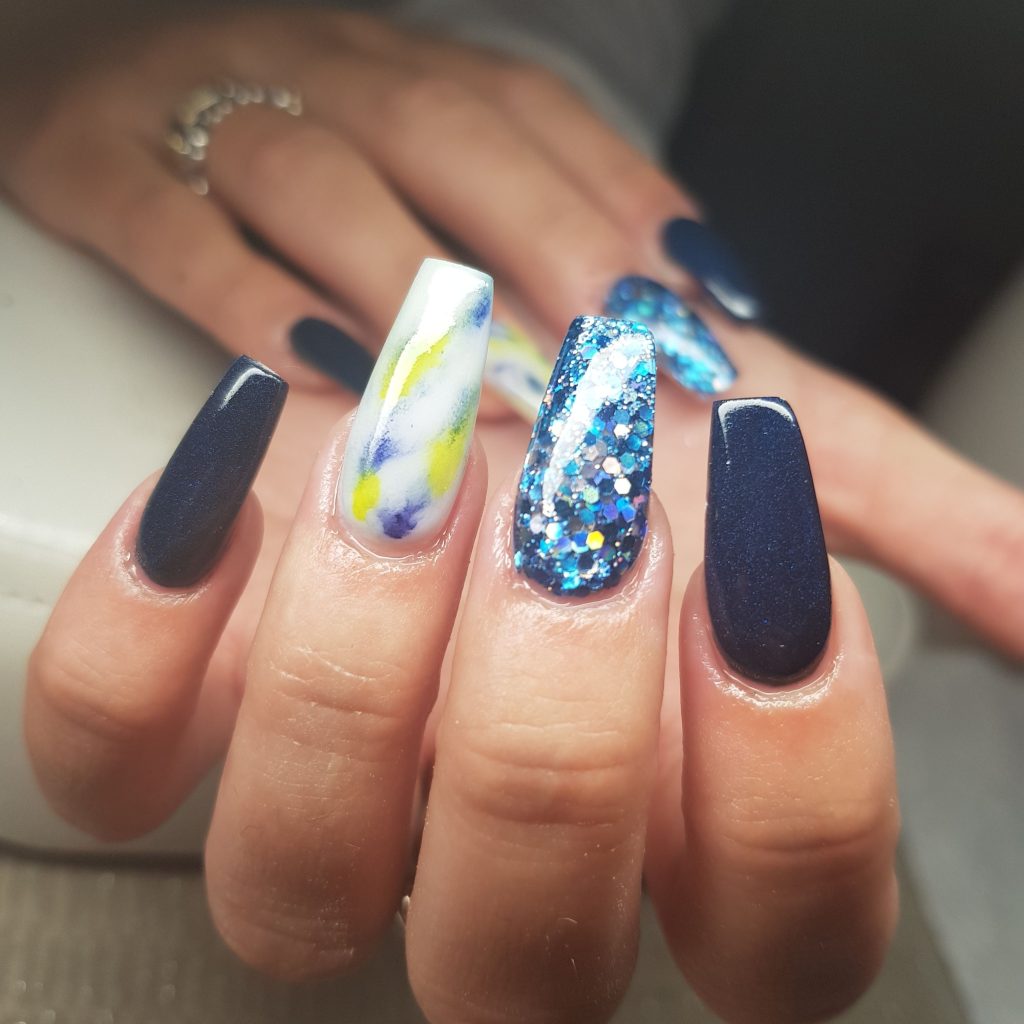
9. Dark Navy Blue Nails
Navy is the new black this season. It’s elegant, powerful, and a great alternative if you’re not into warm colours.
Best for: Coffin and almond nails – navy elongates the nail visually, especially in darker shades, which makes fingers appear slimmer.
Create the look:
- Navy blue polish
- Glossy topcoat
- Silver glitter accent (optional)
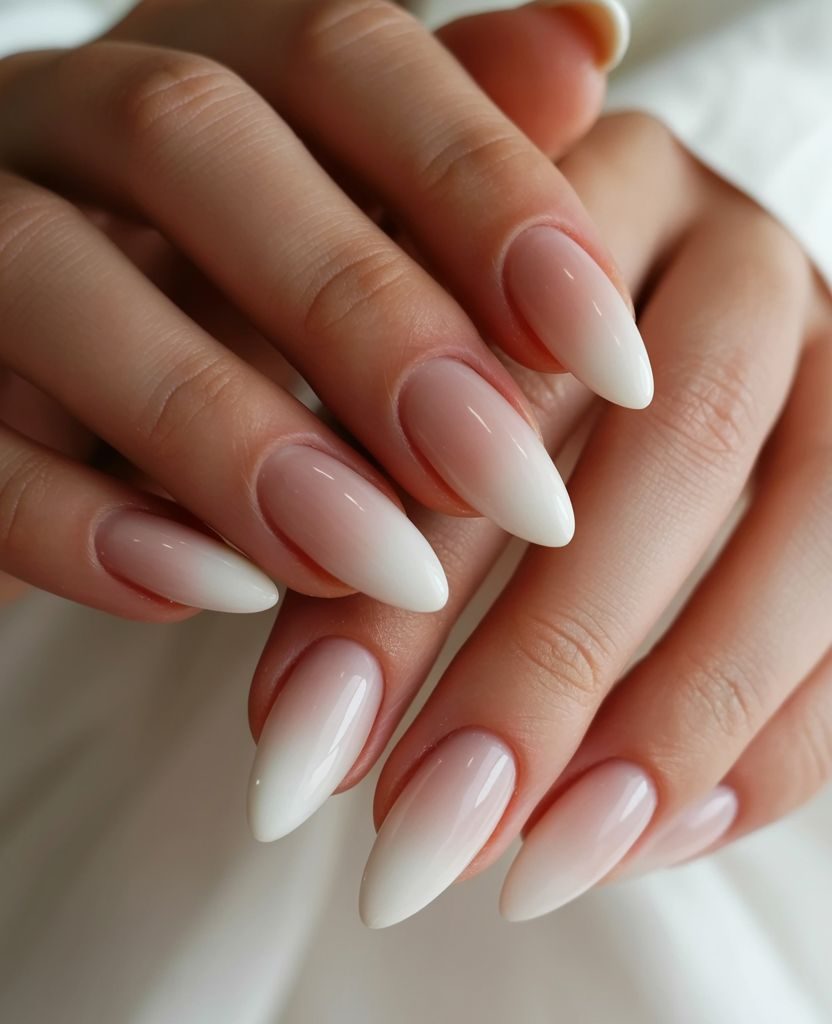
10. Nude Ombre Nails
Soft, elegant, and timeless – nude ombre is still in fashion. This trend is especially flattering on shorter nails, making your hands look polished and sophisticated.
Best for: Round and oval nails – perfect if you have shorter or wider fingers, because the ombre effect makes them look longer without being too dramatic.
Create the look:
- Light nude base
- Taupe tip
- Clear topcoat
Final Thoughts on 2025 Autumn Nails
This autumn is all about warm earthy tones, cosy textures, and a little sparkle. And remember – the secret is not just in the colour, but also in the nail shape you choose. Visit Nails Magazine.
If you have wider fingers, go for almond or stiletto nails to elongate them. If you prefer practical elegance, oval or round nails are timeless. And if you love bold statements, coffin and square nails are your best friends. More ideas on Stylicia.
So, which one will you try first?
Don’t forget to save these ideas for later and share them with your friends who are also looking for autumn nail inspo.
")
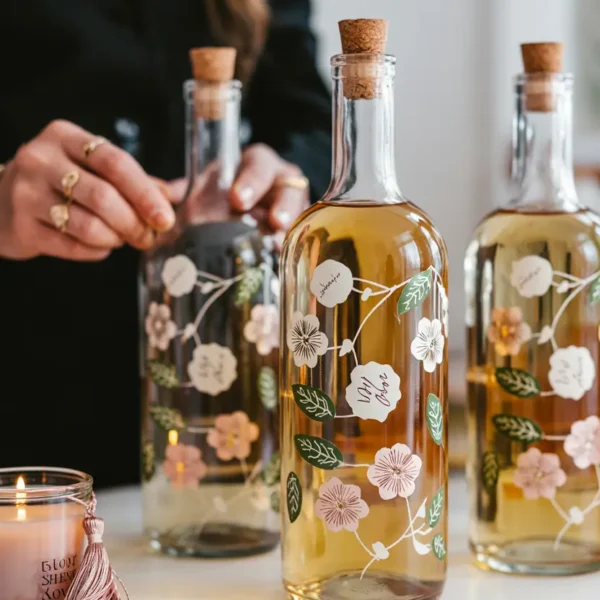
As soon as the leaves start to turn and a crisp chill fills the air, I start craving comforting drinks that warm both body and soul — without the need for alcohol. This apple cider mocktail is everything you love about fall in one chilled glass: refreshing, spiced, and surprisingly simple.
Whether you’re hosting a laid-back autumn party or simply want to treat yourself to a moment of seasonal joy, this nonalcoholic drink for fall checks all the boxes. And let’s be real — who wouldn’t want a no-alcohol martini that still brings festive vibes, cozy aromas, and those beautiful complex flavors?

Why You’ll Love This No-Alcohol Apple Cider
Looking for that cocktail feel without the booze? This nonalcoholic drink for fall delivers everything you love — flavour depth, elegant presentation, and that celebratory vibe — minus the alcohol.
This drink combines crisp apple cider with warming notes of cinnamon and ginger, creating a chilled mocktail that’s both refreshing and layered. Hosting a fall gathering? Pair it with autumn-inspired snacks or dinner and you’ve got a full-on seasonal moment.
Quick Overview
The Mocktail Magic: All the Cocktail Feels, None of the Alcohol
Vibe: A festive, alcohol-free martini-style drink
Time to make: Prep the spiced syrup ahead; the mocktail itself takes under 5 minutes
What you need: Cocktail shaker, ice, martini or stemmed glass
Serves: 1
Want a beautiful drink in a fancy glass that doesn’t include spirits? That’s where mocktails shine. They let you play with garnishes, complex flavours, and pretty presentations — all without the buzz. This apple cider mocktail is easy to make at home.
This apple cider mocktail is a fun, festive favourite of mine. It’s bright, lightly spiced, and super easy to throw together. Want to serve it as a cocktail instead? A splash of vodka, rum, or bourbon works beautifully.
Hosting in October? This is a perfect time to whip up a batch. Add some pumpkin bread or buttery crostini on the side and you’re golden.
What You’ll Need
Let’s talk ingredients and tools:
Apple cider – Look for fresh, unfiltered cider (not to be confused with vinegar!). It’s typically found in the refrigerated section.
Cinnamon-ginger simple syrup – This spice-infused syrup brings warmth and depth. You’ll make it from water, sugar, cinnamon sticks, and fresh ginger root.
Cinnamon sugar – Make your own by mixing sugar with ground cinnamon. This coats the glass rim.
Apple slice – Adds a beautiful garnish. A cinnamon stick works too!
Cocktail shaker + ice + a stemmed glass – For that mocktail presentation.

How to Make Cinnamon Ginger Simple Syrup
Start by making the syrup ahead of time — it adds layers of flavour and lasts for days in the fridge.
Here’s how:
In a small saucepan, combine equal parts sugar and water.
Add cinnamon sticks and sliced ginger root.
Simmer until the sugar dissolves completely.
Let it steep while cooling to infuse extra flavour.
Strain and store in a sealed container in the fridge.
Shake It Up – How to Build Your Apple Cider Mocktail
Ready to make the drink? Here’s how to pull it together in under 5 minutes:
Rim the glass – Dip the edge in apple cider, then into your cinnamon sugar mix.
Shake it up – In a cocktail shaker, combine:
½ cup apple cider
1–2 tablespoons of your cinnamon-ginger simple syrup
Ice
Shake until chilled, then pour into your prepared stemmed glass.
Garnish with an apple slice and cinnamon stick.
That’s it — a stunning autumn party drink in no time.
Want to Spike It?
If you’re in the mood for a cocktail, you can easily adapt this recipe. A shot of vodka, spiced rum, or whiskey blends beautifully with the flavours.
Or try variations like:
Apple Cider Mule – with ginger beer, cider & vodka
Orange Gin & Tonic with Cinnamon
Maple Old Fashioned – for bourbon lovers
Loved this apple cider mocktail? Then you’ll also enjoy our refreshing non-alcoholic punch recipe perfect for any gathering.
A Helpful Tip for Perfecting Your Apple Cider Mocktail
When it comes to mocktails, everyone’s taste buds are a little different — some love their drink sweeter, some prefer a stronger apple flavour, while others enjoy a bolder cinnamon-ginger kick.
That’s why I always recommend making one small serving first before preparing a big batch for a group.
This quick little taste-test helps you decide whether you’d like to:
- add a bit more simple syrup for sweetness,
- boost the spice with extra ginger or cinnamon,
- or keep it lighter and more refreshing.
Once you’ve found your perfect balance, scaling the recipe up for a larger gathering becomes super easy — and you’ll have the peace of mind that everyone will love the final flavour. See more at AllRecipes.
Fall in Love with Mocktails
This alcohol-free, easy fall mocktail is more than just a drink — it’s an experience. Whether you’re sipping it solo on a crisp afternoon or clinking glasses with friends at your next gathering, it brings all the festive warmth of fall — no alcohol required. More drinks on Stylicia.
If you loved this spiced apple cider mocktail, don’t forget to save it to Pinterest, share it with your friends, and give it a try at your next fall gathering!

Your wedding invitation is the first thing guests actually hold in their hands. It sets the tone before the venue, before the flowers, before anything else. So it’s worth thinking about — but not worth losing sleep over.
I’ve gone through enough wedding planning deep-dives to know that the best wedding invitation ideas are the ones that match the actual wedding. A vellum envelope with a wax seal makes sense for an intimate outdoor garden ceremony. It looks strange before a black-tie ballroom reception. The details matter less than the fit.
This is a roundup of wedding invitation ideas across every style, material, and budget — with honest notes on what works and what’s mostly Pinterest aspirational.
Quick Answer
The most versatile wedding invitation format is a flat printed card on heavyweight cardstock with one coordinating envelope. Envelopes lined with a pattern or color add visual interest without the cost of elaborate production. From there, you add one “signature element” — a wax seal, a vellum overlay, a dried flower — rather than doing everything at once.
Wedding Invitation Styles: Find Yours
Minimalist Wedding Invitation Ideas

Minimalist wedding invitations are the most popular style on Pinterest — and one of the most affordable to produce. The formula is simple: clean typography, generous white space, one or two colors, no illustration. Black ink on white or ivory cardstock is the default. A dark green or dusty rose for the date or couple’s names adds warmth without breaking the minimal aesthetic.
What makes a minimalist invite look intentional rather than unfinished: the paper weight. Thin cardstock on a minimal design looks like a budget cut. The same design on 120lb cotton or linen-textured stock looks deliberate. It’s one of the rare cases where the material matters more than the design.
Rustic Wedding Invitation Ideas
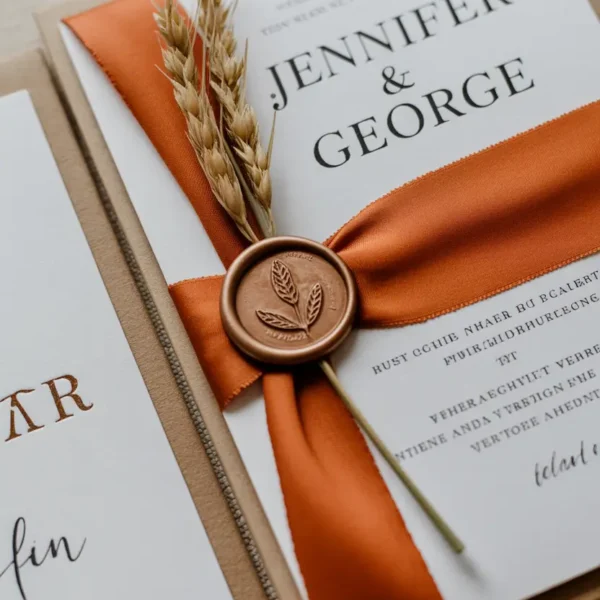
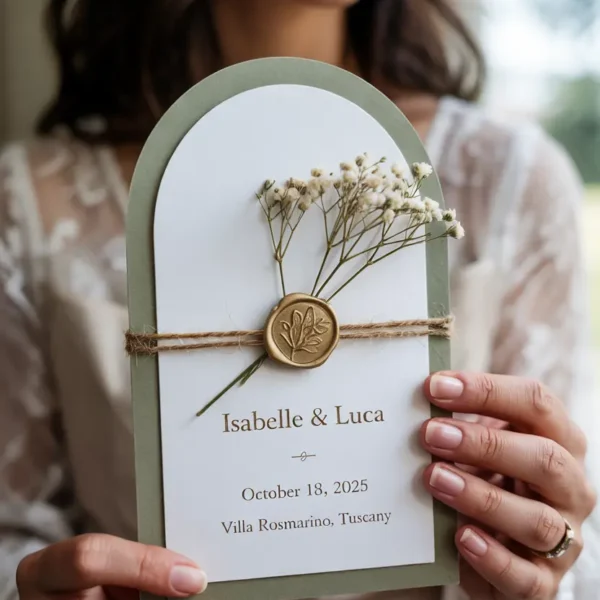
Rustic wedding invitation ideas work best when they use actual texture rather than printed texture. Kraft paper, rough-edged (deckled) cardstock, and natural twine wrapping all photograph well and feel right in hand. A sprig of dried lavender or eucalyptus tucked into the bundle is one of those details that costs almost nothing and photographs well.
For a rustic paper wedding invitation, look for 80–100lb uncoated cardstock in kraft, natural, or warm cream.
Avoid printing on actual brown paper bags — the ink bleeds and the result never looks as good as the Pinterest photo suggests.
Elegant Wedding Invitation Ideas

Elegant wedding invitations usually come down to three things: heavyweight cardstock, letterpress or foil printing, and a cohesive suite. A suite means the invitation, inner envelope, outer envelope, RSVP card, and details card all use the same paper family and palette. When everything matches, it shows.
Gold embossed wedding invitations sit at the top of the elegant category. Thermographic printing gives a raised texture that looks similar to engraving at about a third of the cost.
If the budget allows, letterpress printing — where the design is physically pressed into the paper — has a quality that both photographs and feels unmistakably premium.
Vintage Wedding Invitation Ideas
For a vintage wedding invitation, the typography does the heaviest lifting. Ornate serif fonts, flourished borders, and antique illustration styles (botanical prints, cameos, art deco geometric frames) all feel vintage immediately.
Printing on aged or tea-stained paper is more effort than it’s worth for most people — a good cream or ecru cardstock achieves the same visual effect with less fuss.
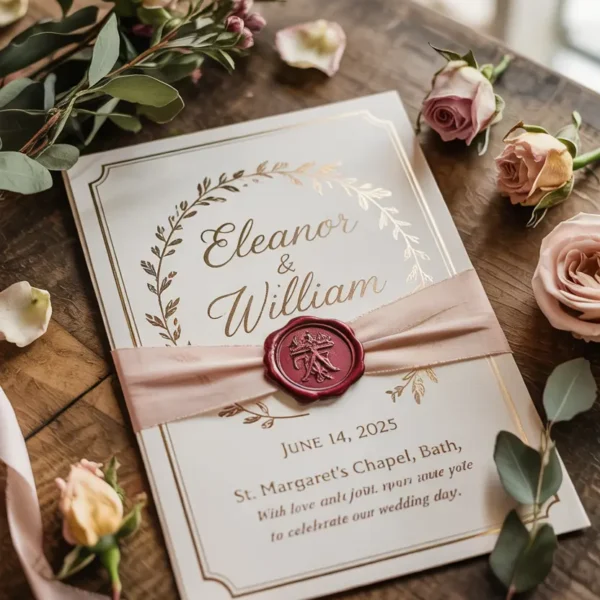
Wax seals work naturally in a vintage context. A classic monogram or botanical stamp seal on a cream envelope ties together the whole look without requiring much effort.
Boho Wedding Invitations
Boho wedding invites tend to lean on watercolor florals, earthy color palettes (terracotta, sage, dusty rose, ocher), and handwritten-style typography. The challenge with boho invitation design is avoiding the version that looks assembled from clip-art.
What works: one strong watercolor element (a floral wreath or a single large botanical illustration), simple typography underneath, and restraint on the number of decorative elements.
What doesn’t work: twelve different decorative elements trying to coexist on a 5×7 card.
Floral Wedding Invitation Ideas
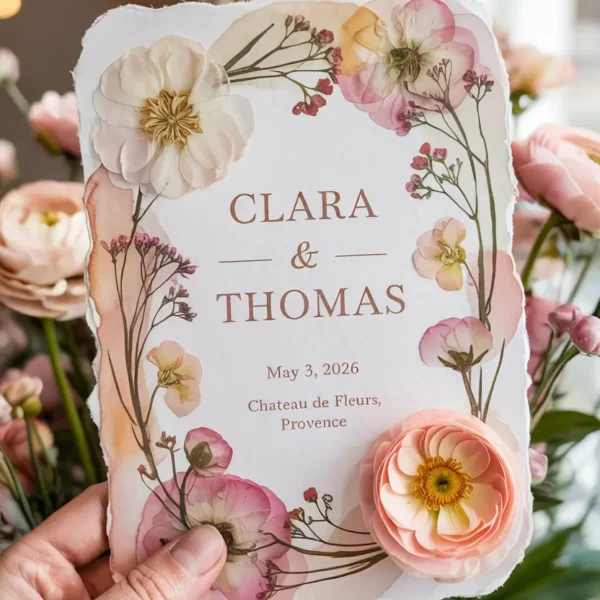
Floral wedding invitation ideas are the broadest category — they range from full watercolor bouquets to a single pressed flower to a botanical line drawing. The most versatile version is a watercolor floral border or corner detail that frames the text without competing with it.
For a peach floral or blush and pink wedding invitation, a loose watercolor wash in the background paired with minimal text looks current and light.
Pressed real flowers can be embedded in handmade paper for a tactile version. It’s labor-intensive to DIY but genuinely beautiful. A few Etsy sellers offer this as a product worth looking into.
Beach Wedding Invitation Ideas
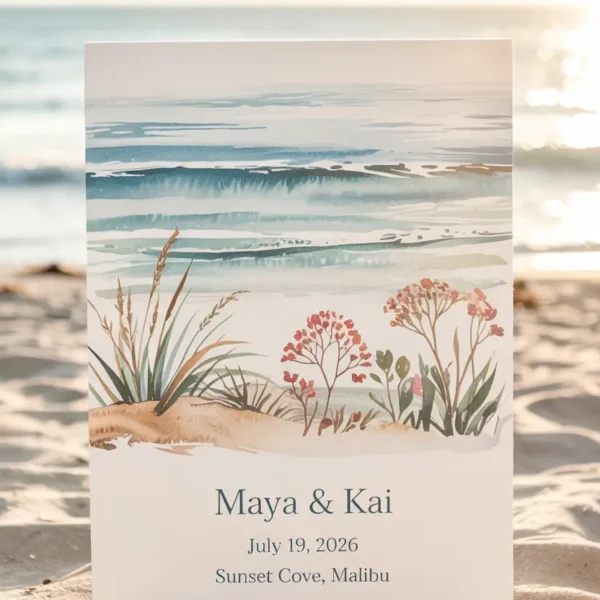
Beach wedding invitation ideas that work are usually not the ones covered in cartoon shells.
The most effective version keeps the palette oceanic without being literal: robin egg blue, seafoam, sand, and white with minimal illustration — a watercolor horizon, a loose botanical coastal plant, or simply the color palette itself doing the work.
For an outdoor or beach wedding invitation, consider a postcard format. It photographs well, mails flat without an envelope (which saves on postage), and has a relaxed quality that suits the setting.
Woodland Wedding Invitation Ideas
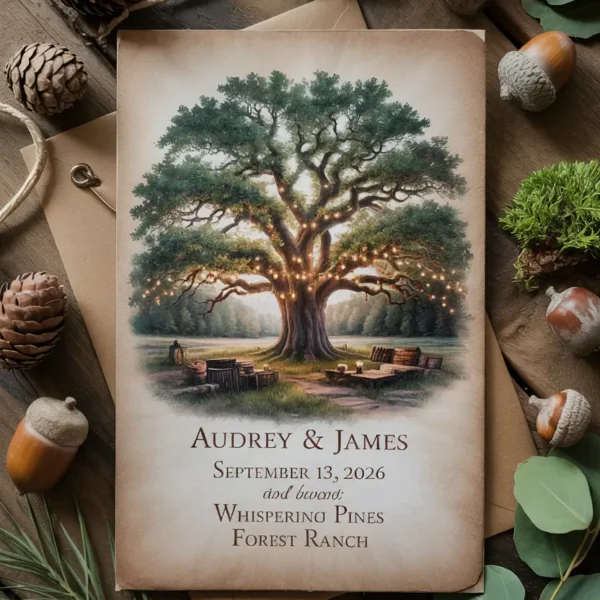
Woodland wedding invitation ideas typically use illustrations of ferns, mushrooms, acorns, or forest scenes. Deep green, forest brown, and cream are the natural color palette.
The most effective versions use a single detailed botanical illustration — a fern frond, a branch with leaves — rather than a full forest scene, which tends to look busy at card scale.
Wedding Invitation Materials That Actually Make a Difference
Vellum Paper Wedding Invitations

A vellum wedding invitation is one of the easiest ways to elevate a basic invitation suite. Vellum is a semi-transparent paper — usually placed as an overlay over the main card, tied with a ribbon, or used as the outer envelope.
The translucent quality photographs well and adds a layered look without spending much.
Practical notes: vellum doesn’t hold ink as well as regular cardstock, so it’s better used for overlays and wraps than as the primary printing surface. Home printing on vellum is possible but finicky — laser printers handle it better than inkjet.
Wedding Invitation with Wax Seal

A wax seal on an envelope is one of those details that adds immediate perceived value. The wax, a seal stamp, and a glue gun (or melting spoon) cost about $20–$30 total and make 80–100 seals easily. Stamps come in monograms, botanical designs, geometric patterns, and classic shapes.
One practical note: wax seals sometimes don’t survive postal handling well.
If mailing, either use flexible sealing wax (it bends without cracking) or seal the inner envelope and use a plain outer envelope for mailing.
Transparent Acrylic / Glass Wedding Invitations
A transparent acrylic wedding invitation is the most visually striking option on this list — and the most expensive. A clear acrylic card with white or gold lettering photographs at a completely different level than paper. They’re typically ordered through specialty printers, run $8–$20 per card, and require padded mailers.
Worth it for a small guest list where the invite itself is meant to be a keepsake. Less practical for 200 guests.
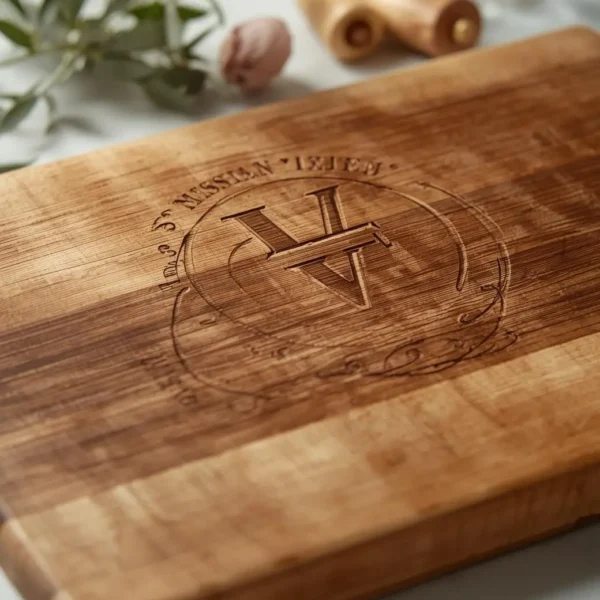
Wooden Wedding Invitations
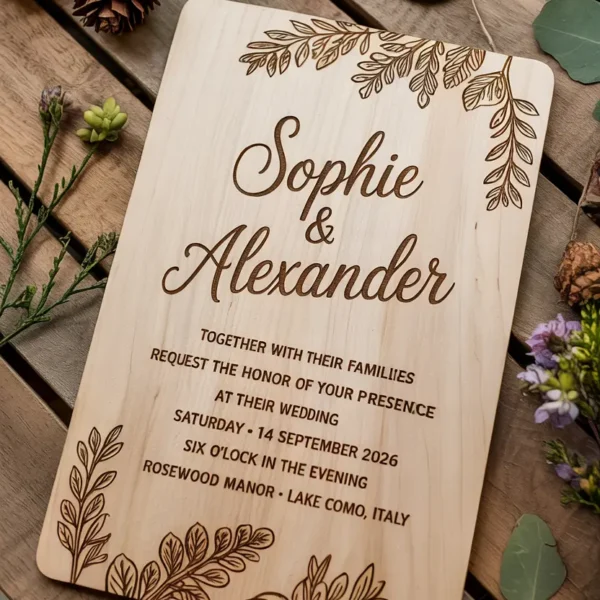
A wooden wedding invitation is laser-engraved on a thin wood veneer — usually birch or maple — and looks beautiful in person. They work especially well for rustic, woodland, and outdoor weddings. Price per unit runs $5–$12 depending on quantity. They’re not lightweight for mailing (expect higher postage), but they’re the kind of invitation guests actually keep.
Handmade Paper Wedding Invitations
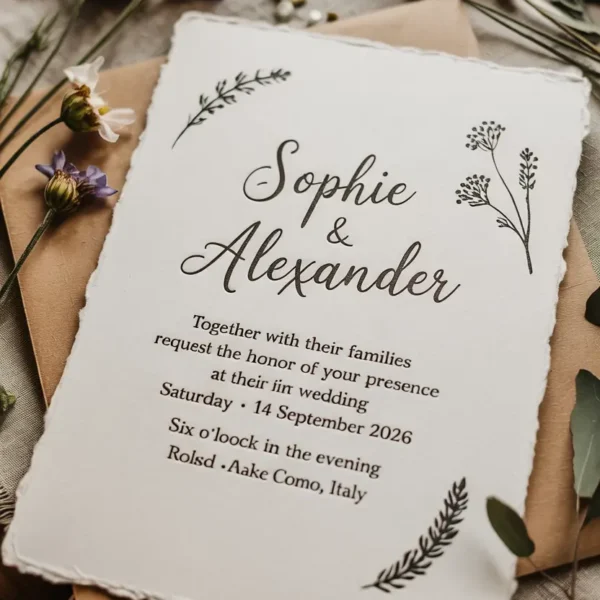
Handmade paper has a texture and deckled edge that no commercially produced paper quite matches. Wedding invites on seed paper (which guests can plant after the wedding) or cotton rag paper add a tactile quality that digital printing on smooth stock simply doesn’t have. Etsy has a strong selection of handmade paper sellers who offer both blank paper and printed invitations.
3D and Interactive Wedding Invitations
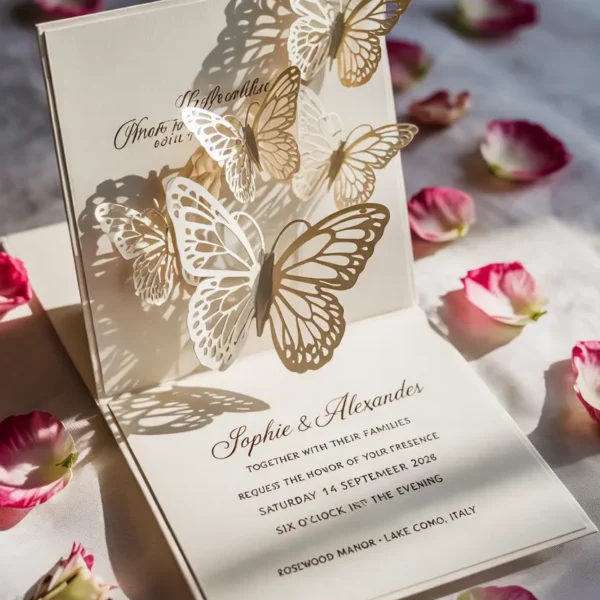
The 3D butterfly wedding invitation — a card that opens to reveal folded paper butterflies — is one of the most-pinned wedding invitation styles on Pinterest right now. Similarly, pop-up invitations and scroll-in-a-bottle formats exist. These are impressive in person and work well for couples who want the invitation itself to be a moment. The trade-off is cost (usually $15–$40+ per piece) and the fact that interactive elements are difficult to mail without damage.
A double arch wedding invitation — the distinctive shape with two curved cutouts at the top — has become a popular alternative to standard rectangular cards. It’s unusual enough to stand out without requiring complex production.
Wedding Invitation Color Ideas
| Color Palette | Works Best With | Printing Tip |
|---|---|---|
| Blush & pink | Romantic, garden, and floral styles | Digital print on warm cream stock |
| Ivory & gold | Elegant, ballroom, formal weddings | Gold foil or thermographic printing |
| Midnight blue | Starry night, celestial, modern weddings | White or gold ink on dark cardstock |
| Pastel palette | Spring, outdoor, cottagecore weddings | Watercolor wash print + minimal text |
| Black & gold | Art deco, glamour, New Year’s Eve weddings | Gold foil on matte black cardstock |
| Sage & terracotta | Boho, outdoor, farm weddings | Earthy ink tones on kraft or cream stock |
| Robin egg blue | Beach, coastal, summer weddings | Paired with white or sand text |
| Opal & blush | Ethereal, romantic, evening weddings | Metallic foil on white or vellum |
Digital Wedding Invitations and Animated E-Invites
A digital wedding invitation works well in more situations than most people assume. For a second wedding, a micro-wedding under 30 guests, or an elopement with a celebration party, digital invites are practical, immediate, and can be genuinely beautiful.
Platforms like Zola, Paperless Post, and Canva all offer animated and interactive e-invite templates. An animated e-invite can include moving elements — falling petals, a starry sky, a watercolor wash animation — that paper obviously can’t do. It’s a different kind of impressive.
Pro Tip
If you’re doing paper invitations for most guests but have a few tech-averse relatives who prefer paper, you don’t have to choose one or the other. Print a small run for those guests and use digital for the rest. This is more common than wedding etiquette blogs would suggest, and nobody minds.
DIY Wedding Invitation Ideas
DIY wedding invitation ideas range from genuinely cost-effective to more time and money than just ordering from a printer. The reality: DIY saves money when you have the right equipment already (a good printer, a paper trimmer, a bone folder) and when the design is simple. It costs more when you’re buying supplies from scratch, learning new skills, and reprinting after mistakes.
How to Design Your Own Wedding Invitations
Canva is the most accessible tool for invitation design — it has hundreds of templates and the results are printable-quality. A few things to get right regardless of tool:
- Set the document size to the exact finished card size (5×7″ is standard) at 300 DPI
- Keep text at least 0.25″ from the card edge to avoid trim issues
- Use CMYK color mode for print accuracy — RGB colors shift when printed
- Request a physical proof from your print provider before the full run
Cheap Wedding Invitation Ideas
The most effective cost-saving strategy: print digitally at a local print shop on paper you supply yourself, rather than ordering through an invitation company that marks up both the printing and the paper. For a budget wedding invitation, this approach can cut costs by 40–60% while maintaining full design control.
Budget Pick
Design in Canva (free) → upload to a local print shop → print on 100lb linen cardstock → add a wax seal you make yourself. Full invitation suite under $1.50 per guest for 100 invitations.
Save the Date and RSVP Card Ideas

Wedding Save the Date Card Ideas
Wedding save the date cards can be simpler than the invitation itself — they’re functional first. A postcard format works well (cheaper to mail, easy to display on a fridge). A magnet save the date is popular for the same reason. For something more personal: a photo save the date with a casual couple photo feels warm and keeps the focus on the people rather than the design.
RSVP Card Ideas for Weddings
RSVP card ideas for weddings have gotten more creative in recent years. A few options that work:
- A small notecard with a fill-in-the-blank line: “We will / will not be celebrating with you” — warmer than checkboxes
- A meal choice card with illustrated food options rather than text only
- A QR code on the invitation that links directly to an online RSVP form
- A funny prompt for guests: “Song that will get you on the dance floor:” — doubles as entertainment later
What Goes in a Wedding Invitation Suite?
A complete wedding invitation set with RSVP typically includes:
- Main invitation card — the primary card with ceremony details
- Details card — reception venue, hotel room blocks, dress code, website
- RSVP card — with pre-stamped return envelope if doing paper
- Inner envelope — addressed to the specific guests invited
- Outer envelope — the mailing envelope
Not every wedding needs all five elements. Adding a wedding website link to the invitation reduces the need for a full details card. Use what the situation actually requires.
Our Pick
Minimalist flat-printed card on 110lb linen cardstock + vellum overlay tied with a satin ribbon + wax seal on the outer envelope. Looks high-end, is achievable at home, and the vellum overlay works with almost any design underneath.
FAQ
What is the most popular wedding invitation style right now?
Minimalist and botanical styles are the most searched and saved. Vellum overlays, wax seals, and double-arch card shapes are all trending upward. Acrylic and wooden invitations have a strong niche following, particularly for rustic and modern couples.
How early should you send wedding invitations?
6–8 weeks before the wedding for local guests; 10–12 weeks for destination weddings. Send save the dates 4–6 months out. Earlier is almost always better — it gives guests more time to make travel arrangements.
How do you design your own wedding invitations?
Use Canva or Adobe Illustrator. Set your document to 5×7″ at 300 DPI in CMYK mode. Choose a simple design — clean typography and one decorative element. Order a proof print before committing to the full run.
Are digital wedding invitations appropriate?
Yes, particularly for micro-weddings, second weddings, elopements with celebrations, and eco-conscious couples. For formal or traditional weddings, paper is still the expectation. There’s no rule against doing both.
What’s the cheapest way to do wedding invitations?
Design in Canva (free), print at a local print shop on your own purchased cardstock, and mail in plain A7 envelopes. Add a DIY wax seal for a premium touch. Budget around $0.75–$1.50 per complete invitation unit.
What is a vellum wedding invitation?
Vellum is a semi-transparent paper used as an overlay on top of the main invitation card, typically tied with a ribbon. It adds a layered, elegant look without requiring specialty printing.
Final Thoughts
The best wedding invitation is the one that feels like the wedding you’re actually having. Pick one signature element — a wax seal, a vellum overlay, a specific color — do it well, and let the rest be clean and simple. That’s the version that photographs well, mails without damage, and feels considered rather than assembled.
Keep Reading on Stylicia
- The Best Wedding Gift Ideas for Every Budget
- Wedding Memory Table Ideas: How to Honor Loved Ones
- DIY Wedding Gifts That Actually Feel Thoughtful
- Unique Wedding Gifts for Bride and Groom

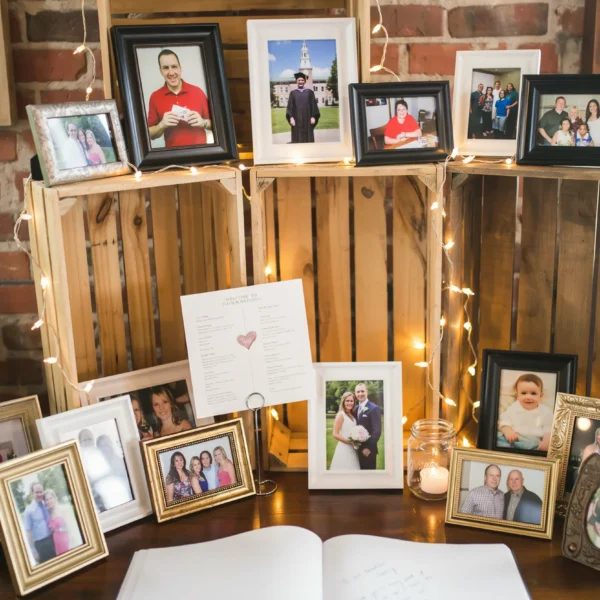
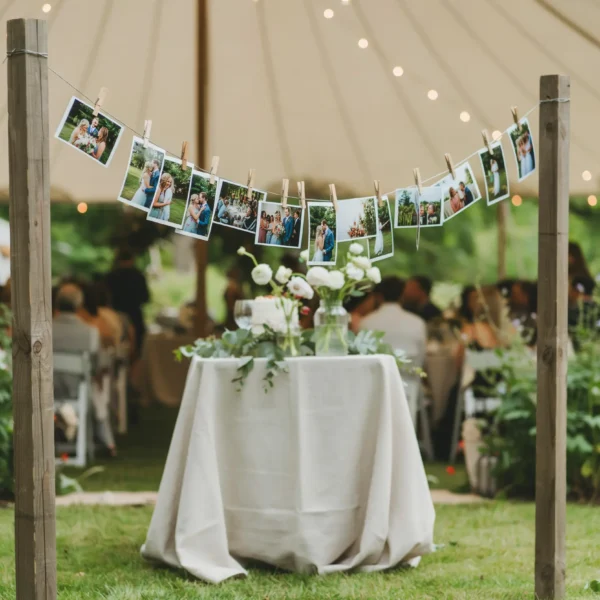
A wedding memory table is one of those things that can feel deeply meaningful or uncomfortably formal, depending on how you set it up. I’ve been to weddings where the memorial table was so elaborate it felt like a separate event, and others where a single framed photo and a candle said everything that needed to be said.
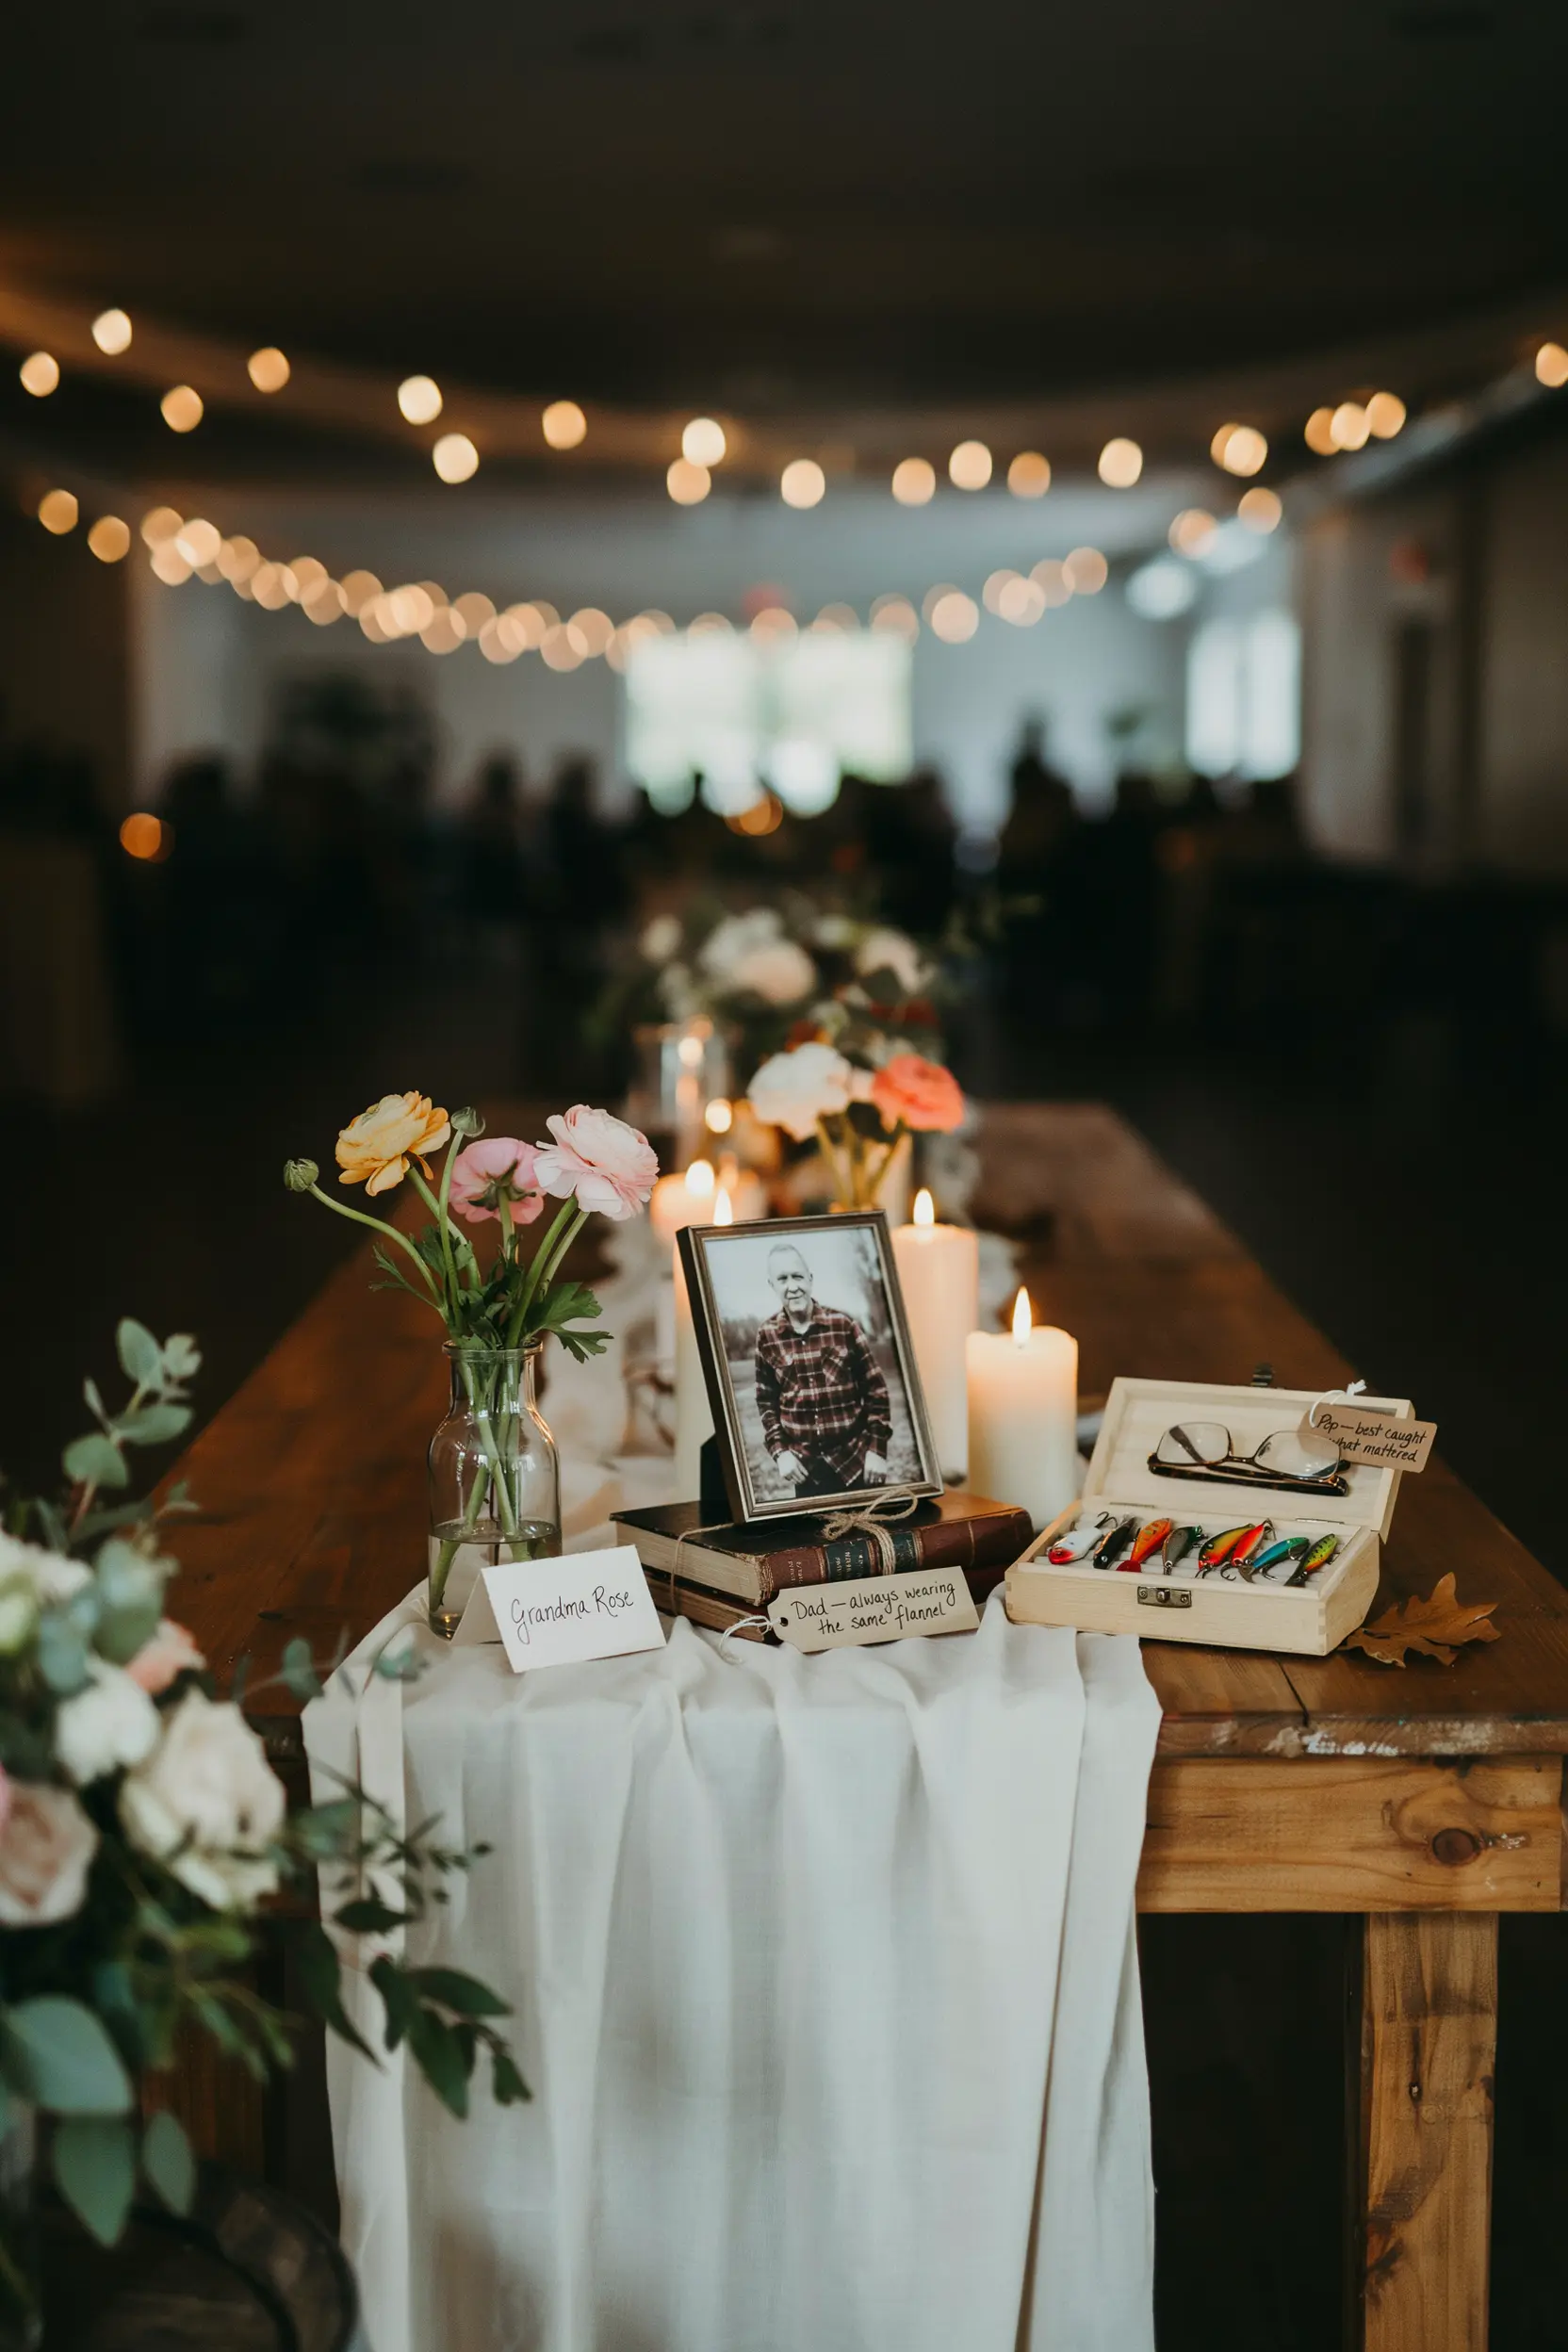
The best wedding memory table ideas are the ones that feel like that person — not like a generic tribute. A grandmother who loved flowers deserves her own vase of ranunculus, not a stock arrangement. A father who always wore the same flannel shirt deserves a framed photo where he’s actually wearing it.
This is a guide to setting up a wedding remembrance table that feels personal, not performative — with ideas for every wedding style, budget, and available space.
Quick Answer
A wedding memory table typically includes framed photos of loved ones who have passed, candles, flowers, and a small sign. Place it near the entrance or beside the guest book so guests see it naturally. Keep it uncluttered — three to five items is usually enough. The goal is a quiet tribute, not a display.
What Goes on a Wedding Memory Table?
There’s no required formula for wedding memory table ideas, but a few elements consistently work well together. According to The Knot, a memory table is one of the most meaningful ways to honor loved ones at a wedding.
Photos
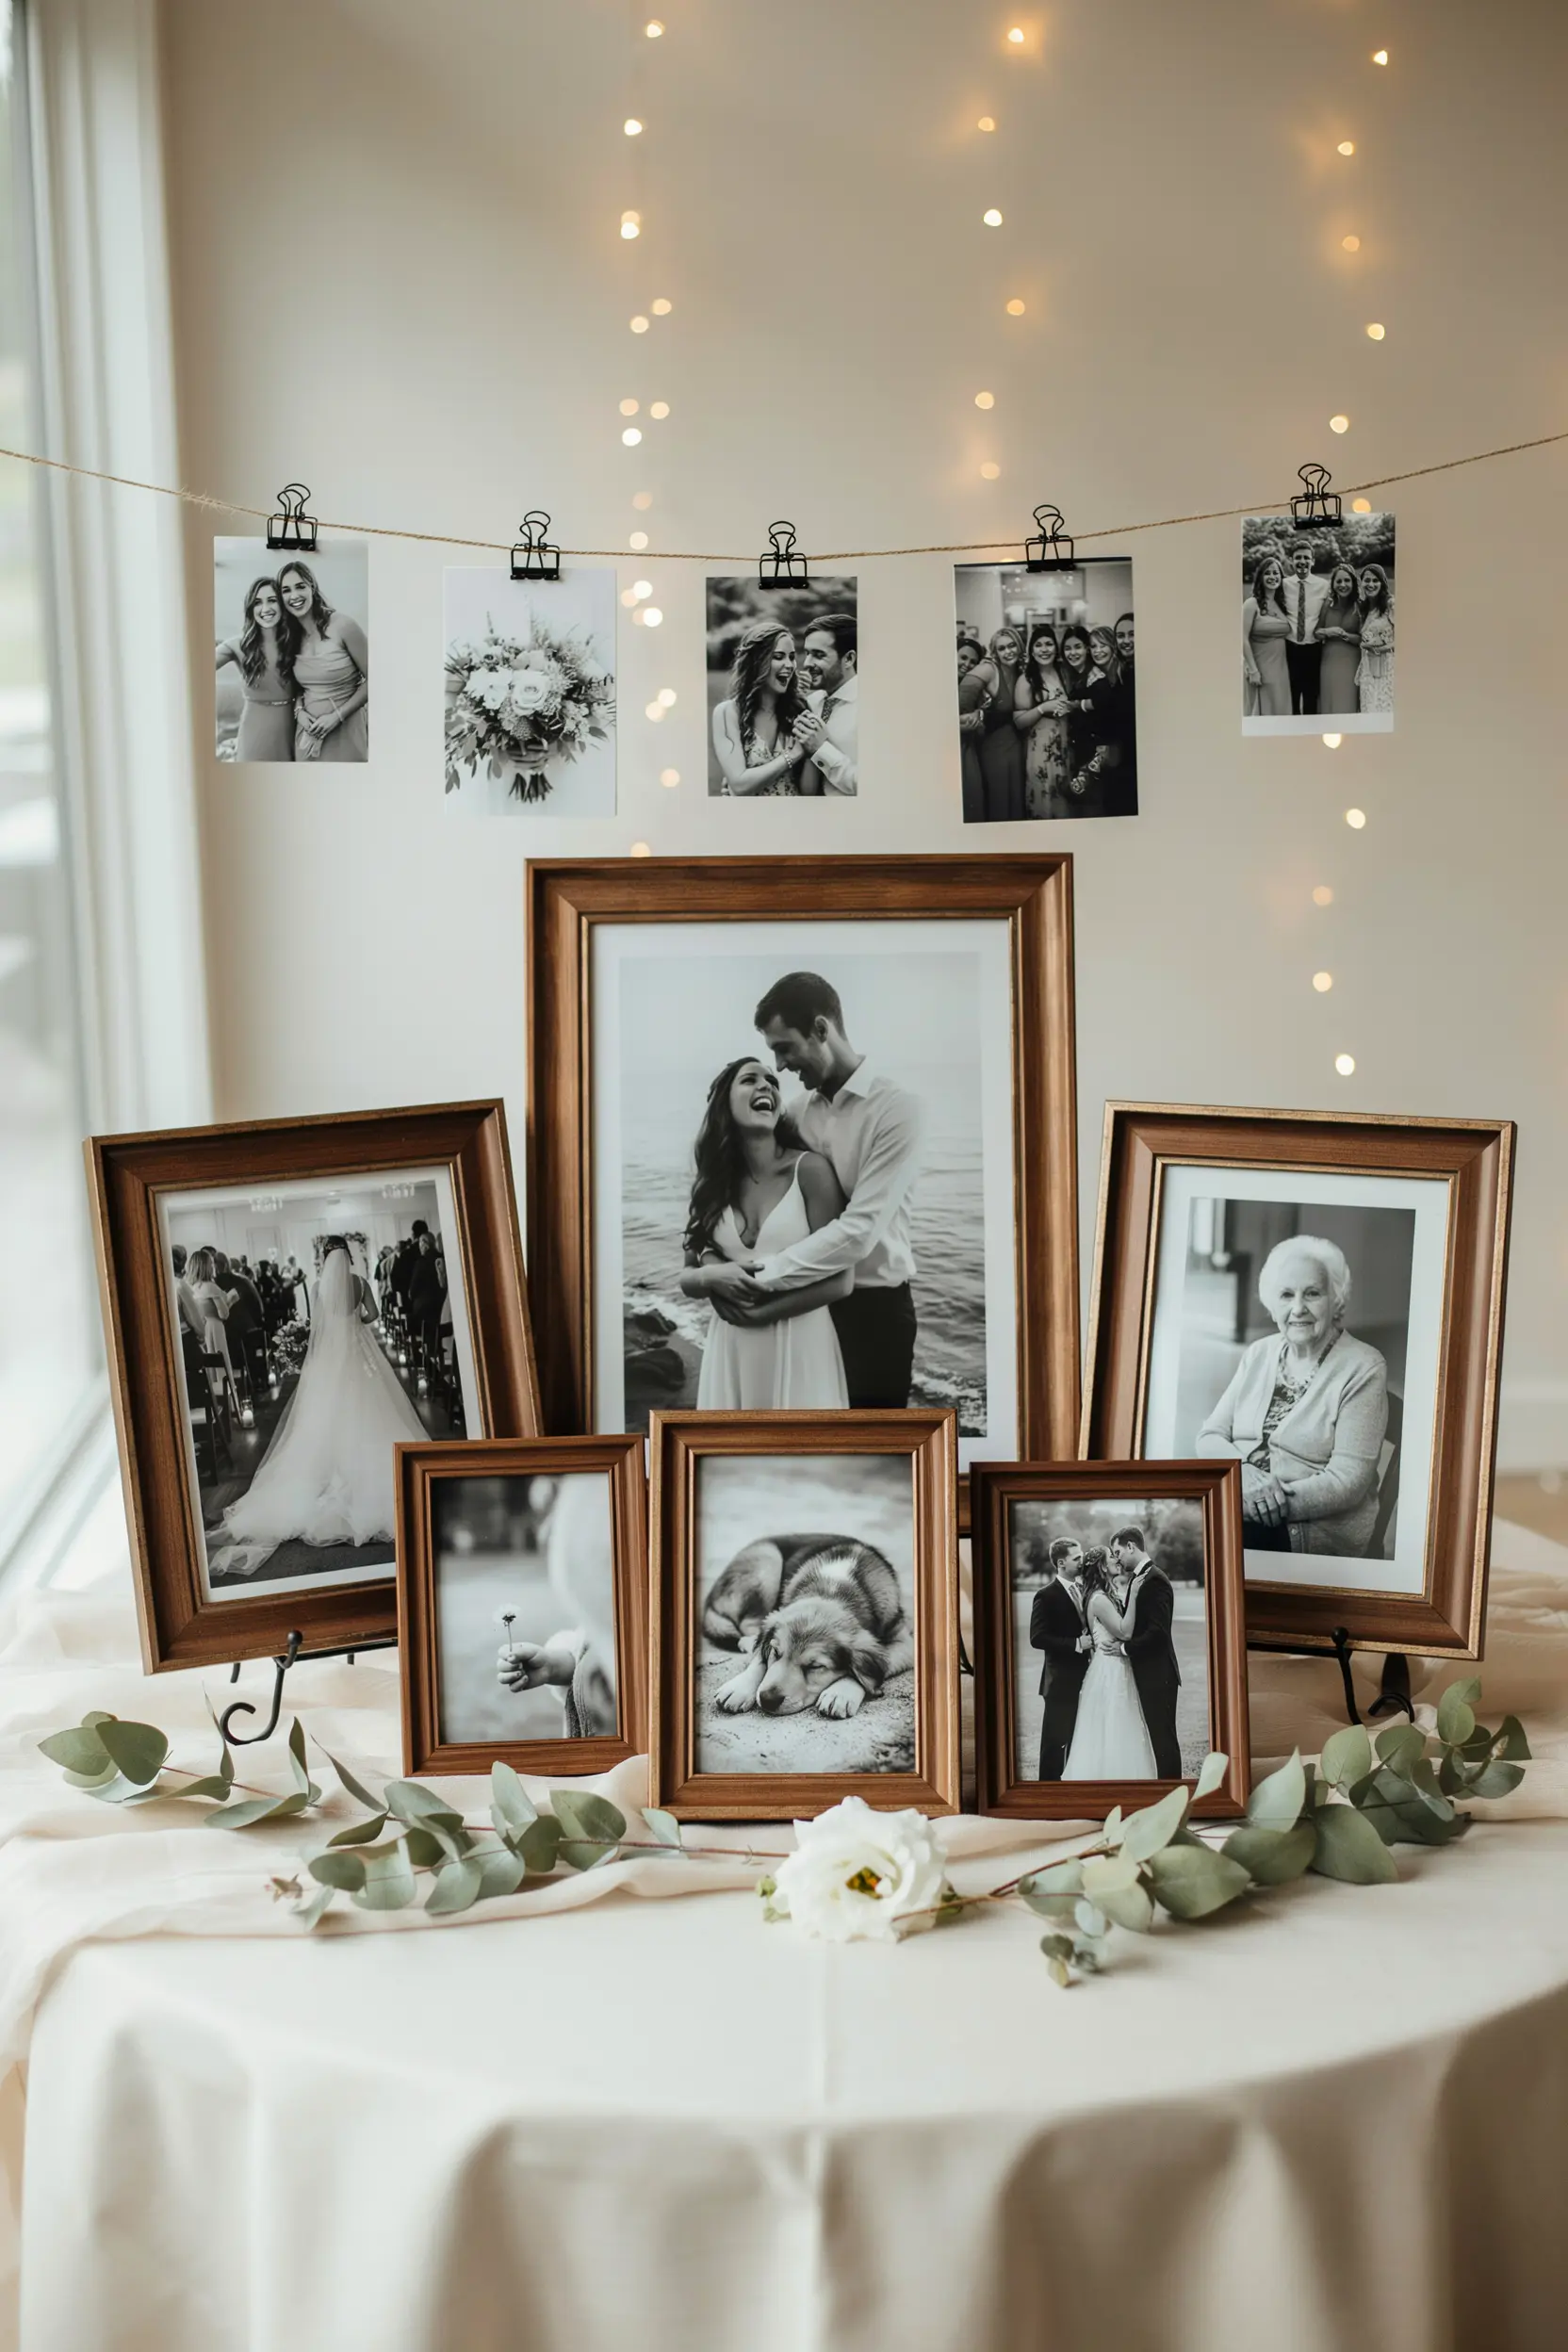
Framed photos are the most common element on a memorial table wedding setup — and for good reason. A single well-chosen photo does more than a collection of six average ones. Black-and-white prints in simple wood frames have a timeless quality that works in almost any wedding style.
If you’re mixing multiple people, keep the frames consistent (same wood, same color) so the display reads as intentional rather than assembled.
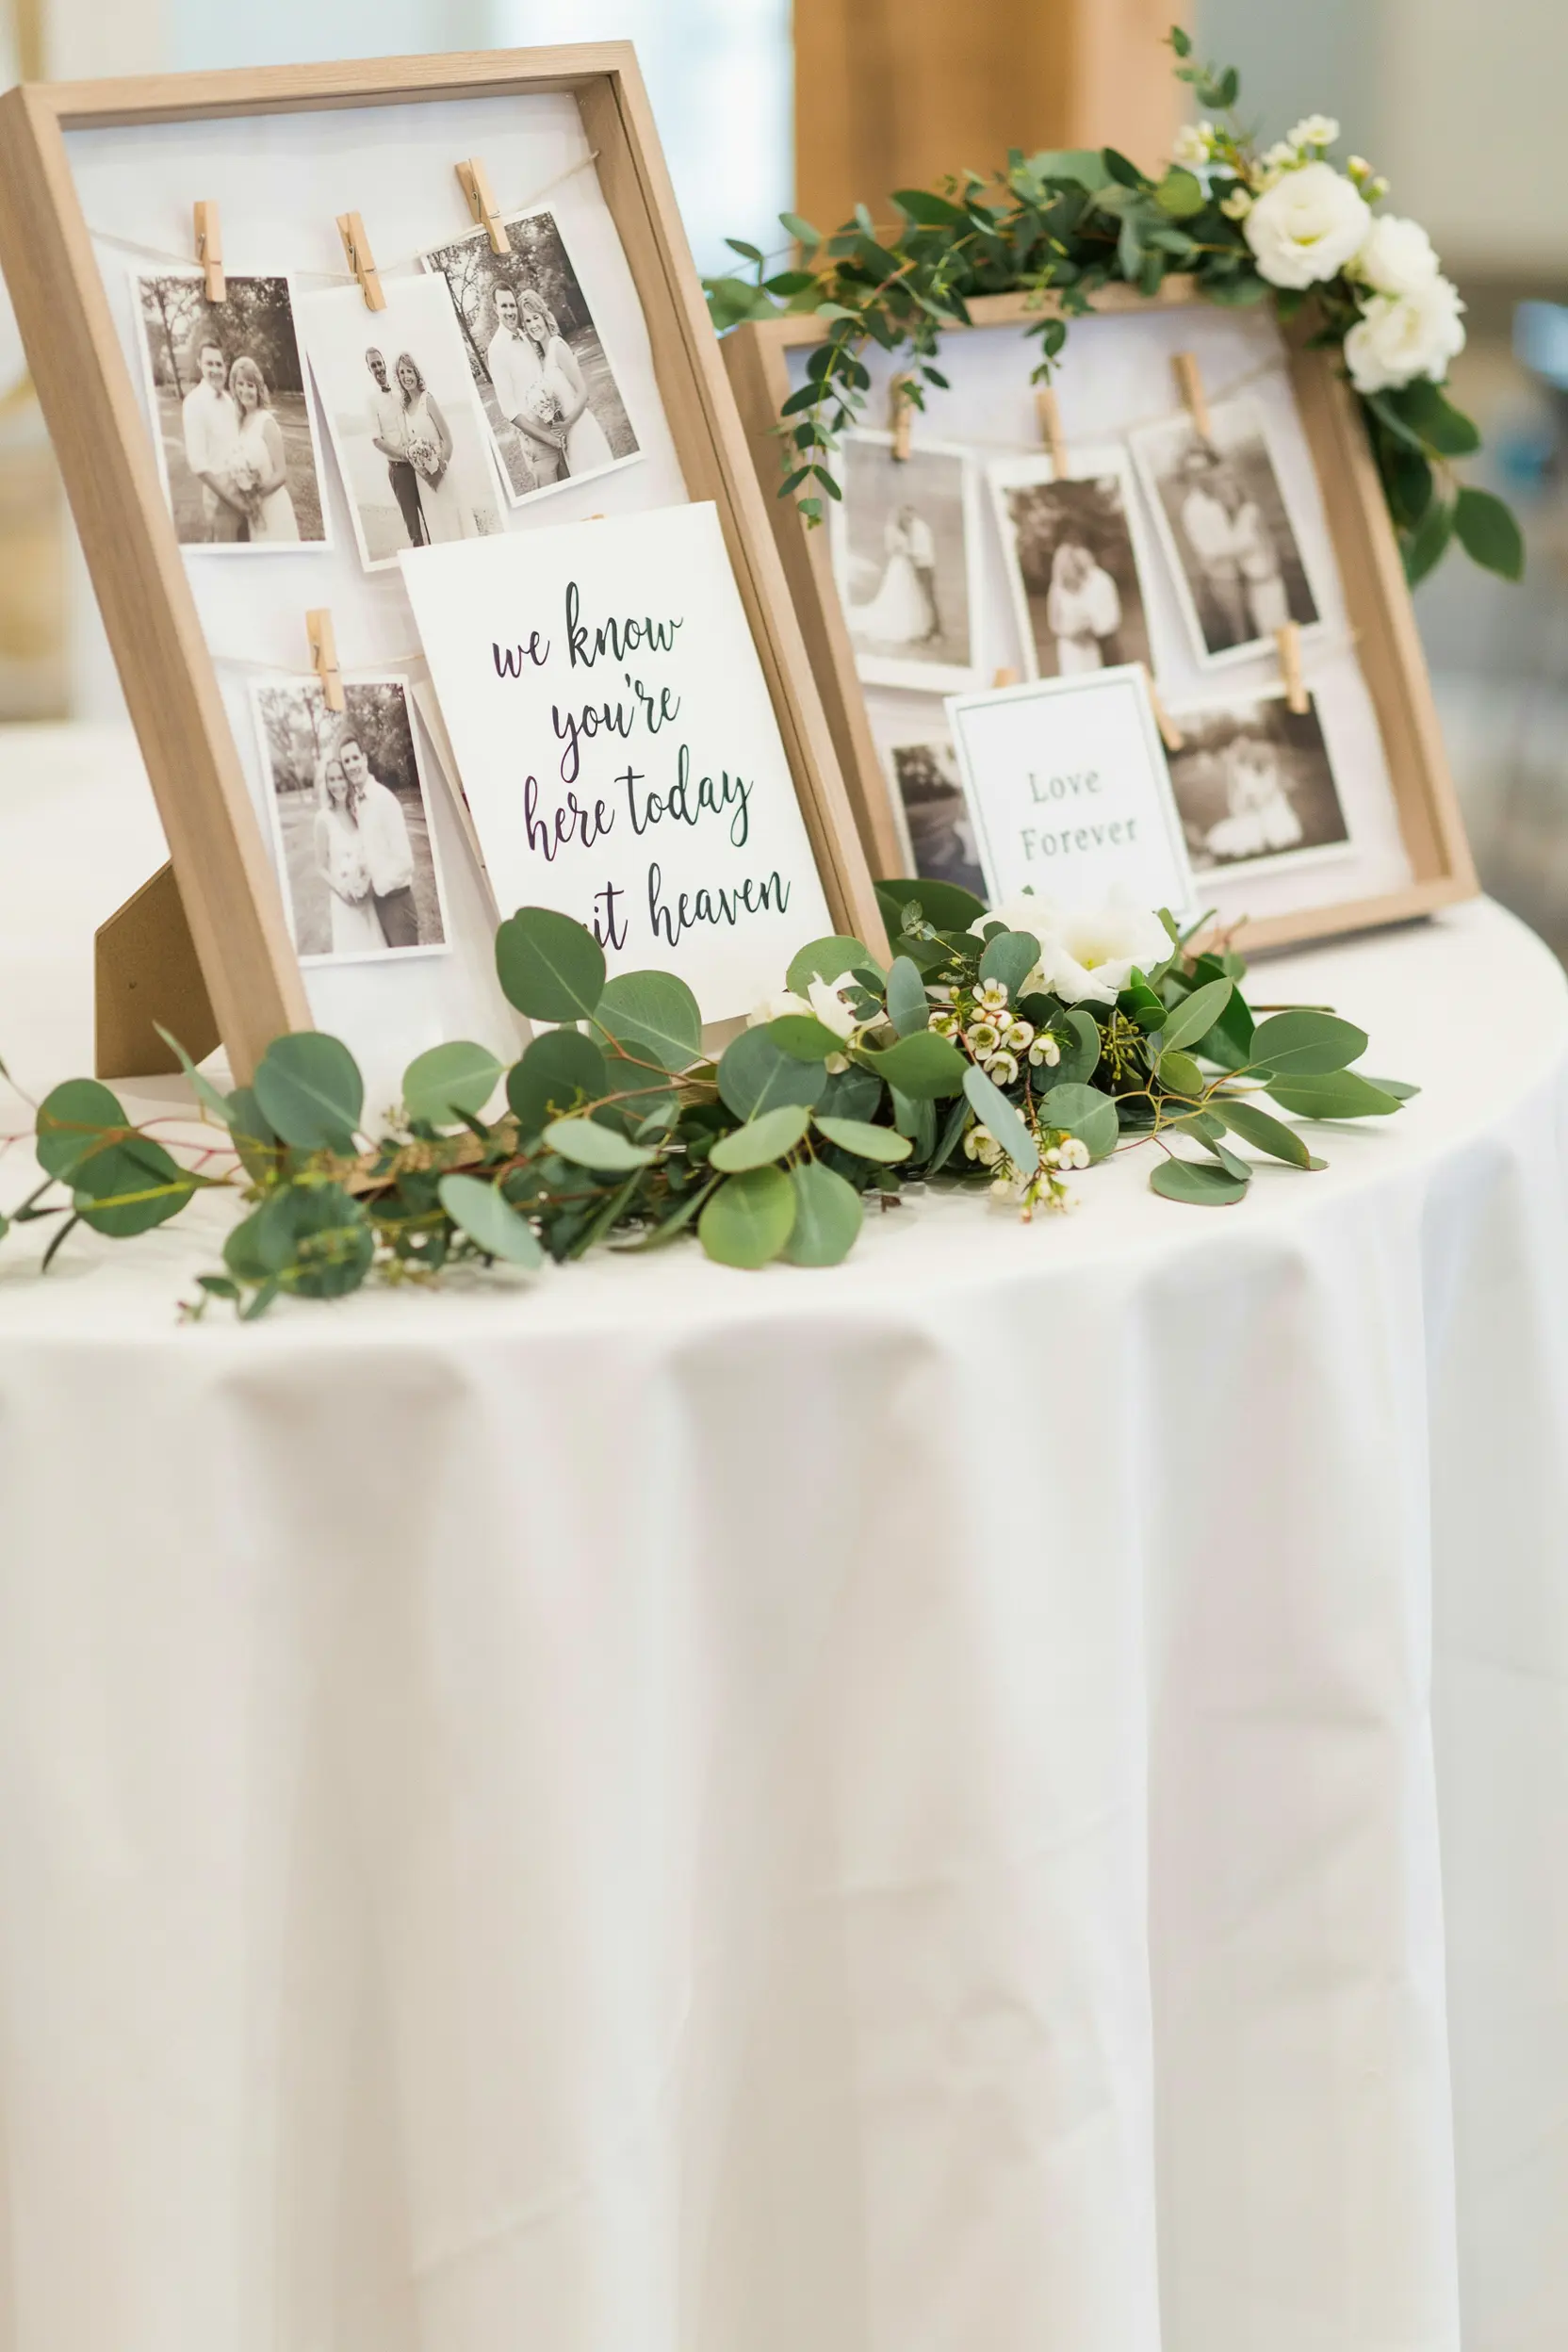
For wedding memory table ideas involving photos, a mix of sizes works well: one larger 8×10 as the anchor, with 4×6 or 5×7 prints around it. Clip photo frames on a wire or string add a lighter, more informal touch that suits outdoor and rustic settings.
Candles
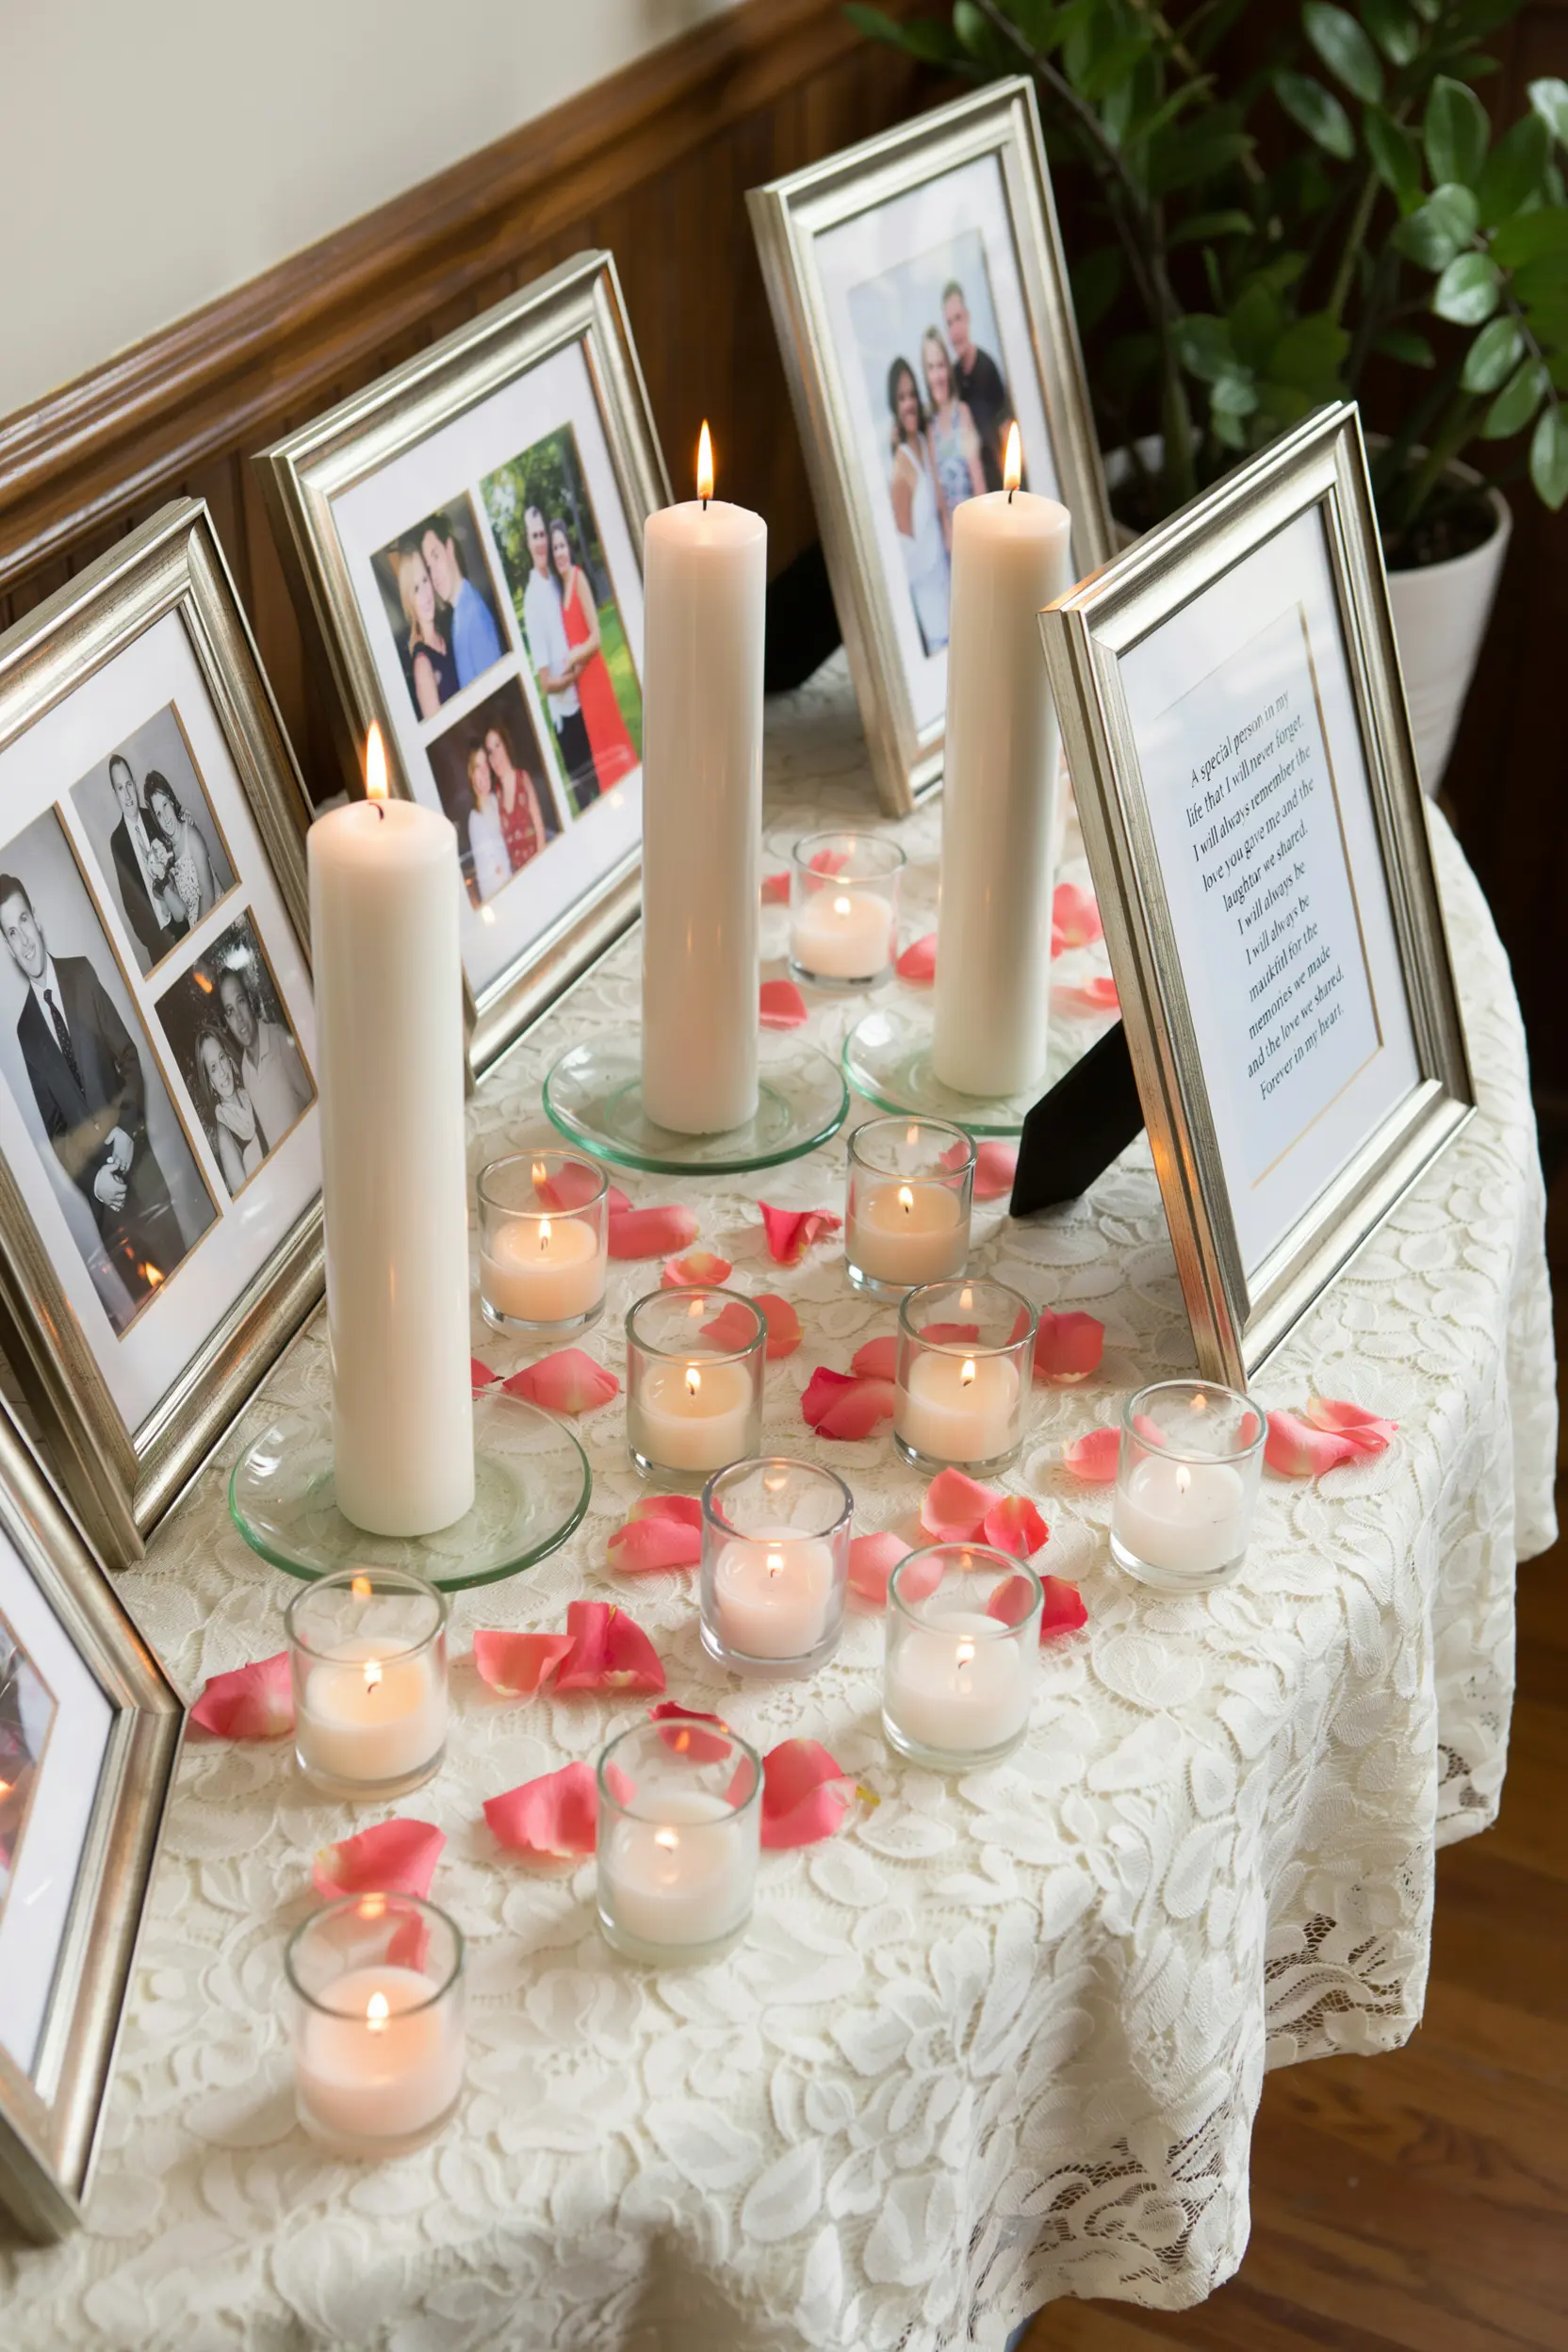
Votive candles are a natural pairing with a wedding memorial table — they add warmth without demanding attention. White or ivory votives in small glass holders are the safest choice. For a wedding memory table ideas setup with more atmosphere, pillar candles at different heights create depth.
If the venue prohibits open flame (which outdoor venues often do), battery-operated flickering candles work surprisingly well and are much less worrying.
Flowers and Greenery
A small arrangement or a few loose stems in a bud vase is usually enough. For wedding memory table ideas with flowers and greenery, eucalyptus sprigs, white garden roses, or whatever flower was meaningful to the person you’re honoring all work beautifully.
If it’s a summer outdoor wedding, small wildflower bundles in simple glass vases feel right. For elegant wedding memory table ideas, white peonies or dusty miller with trailing ivy read more formal without being stiff.
Personal Items
This is where a memory table stops being generic. A pocket watch. A recipe card in their handwriting. A favorite book left open to a loved passage. A small object from their home. These details are what make guests stop and stay for a moment — and what make the table feel like it’s really about that specific person, not “deceased loved ones” as a category.
What works best
One or two personal objects + consistent frames + a single candle type. More than that and it starts to compete with itself. Keeping it simple is what makes it feel intentional.
How to Set Up a Memory Table at a Wedding

The setup is simpler than most people expect.
Choose a Location
Near the entrance is the most common placement — guests see it as they arrive, which sets a thoughtful tone before the ceremony or reception begins. Near the guest book table is another natural spot, since people are already pausing there.
Avoid placing it in a high-traffic path where guests might brush past it, or in a dark corner where it reads as an afterthought.
Pick a Display Style
A few formats that work well depending on the setting:
- Draped table with frames: A linen or velvet-draped table with framed photos arranged at different heights using small risers or books. Classic, works everywhere.
- Vintage memory cart wedding: An old dresser, a bar cart, or a small sideboard — feels personal and less “display case.” Especially good for rustic and cottagecore wedding styles.
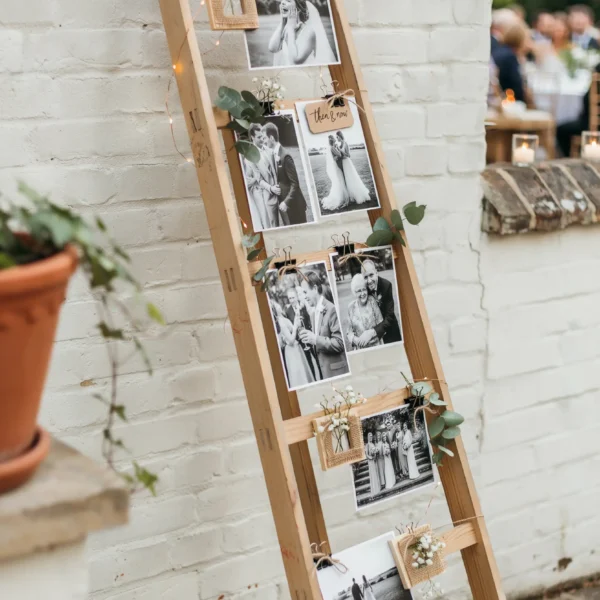
- Memory ladder wedding: A wooden ladder leaned against a wall, with photos clipped to the rungs. Requires no table at all. Works well in barn settings and outdoor spaces.
- Framed gallery on an easel: A single large frame containing a collage of photos, mounted on an easel. Takes up less horizontal space and reads clearly from a distance.
Layer the Elements
Work in layers: table covering first, then the largest items (frames, vase), then fill in with smaller elements (candles, personal objects, small florals). Leave breathing room between items. A crowded table looks rushed; a spare one looks considered.
Wedding Memory Table Ideas by Style
Rustic / Barn Wedding Memory Table
For rustic wedding memory table ideas or a barn setup, lean into natural materials: raw wood frames, mason jars filled with wildflowers, a burlap runner, woven baskets. A memory ladder with wood-clip frames is a natural fit here. Keep the color palette warm — cream, sage, rust — rather than going stark white.
Elegant / Formal Memory Table
For elegant wedding memory table ideas, choose matching frames in gold or silver, white roses or garden flowers in a low vase, and a single larger pillar candle as an anchor. A velvet table runner in navy, dusty rose, or deep green elevates even a simple setup. The sign, if you include one, should be in a clean serif font — engraved or letterpress printed rather than handwritten.
Outdoor Wedding Memory Table Ideas
For outdoor wedding memory table ideas, think about wind: secured frames (use small easel backs or weighted bases), no loose papers, and sturdy low-profile florals that won’t blow over. Potted herbs or succulents instead of cut flowers work well in warm weather. A wooden crate or decorative box as a base adds height without the risk of things tipping.
Vintage Memory Cart or Dresser
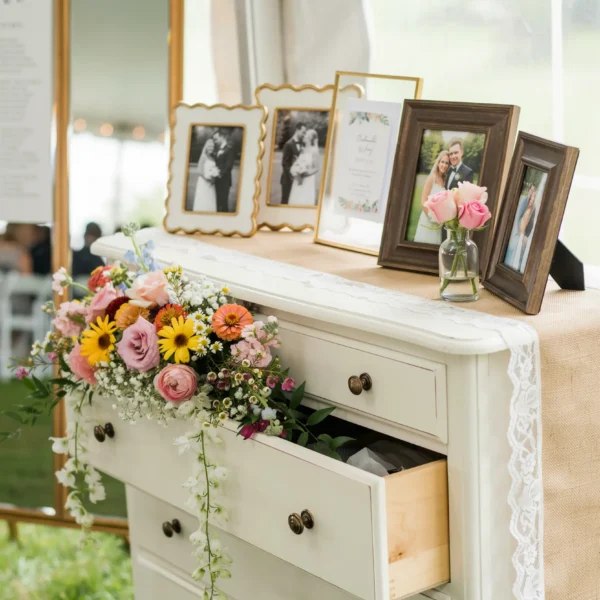
One of the best wedding memory table ideas for intimate or small weddings is the vintage dresser look: an old dresser or console table, styled as if it belongs in the room rather than placed as a display.
Arrange photos in mismatched vintage frames, add a small lamp or lantern, and leave the top drawer slightly open with a meaningful object inside. It looks like it belongs there rather than something that was assembled just for the day.
Simple / Budget Wedding Memory Table Ideas

For budget-friendly wedding memory table ideas, you don’t need much. Three framed photos (IKEA Ribba frames work perfectly and come in sets), a few tea light candles in glass holders, and a single stem or small bunch of flowers from a grocery store bouquet. The sign can be printed at home and placed in a frame you already own. Total: under $30, and it works every time.
Small Wedding Memory Table Ideas
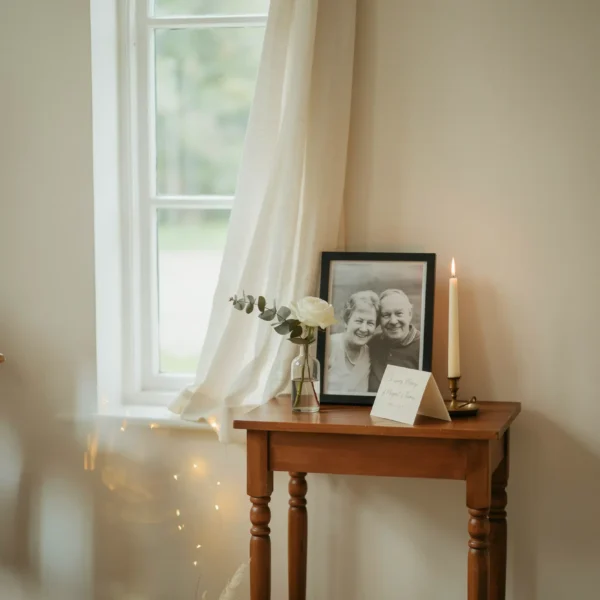
For small wedding memory table ideas — or weddings with limited space — consider a single framed photo with a small vase and one candle on a side table or windowsill. It doesn’t need to be a dedicated table. A memory corner on a bookshelf or a single display on a mantel can be just as intentional without requiring square footage.
Budget Pick
Three IKEA Ribba frames (~$5–$8 each) + a set of votive candles (~$12) + a single grocery store flower bunch split into three bud vases (~$8). Total: under $35. Looks completely intentional.
DIY Wedding Memory Table Ideas
For DIY wedding memory table ideas, the most impactful project is usually the photo display. A few options:
- Memory photo ladder: Sand and stain a wooden ladder from a hardware store ($20–$30). Clip black-and-white prints to each rung with small wood clip frames or binder clips wrapped in twine.
- Wire photo display: String thin galvanized wire between two small wooden posts. Hang photos with clothespins. Can be made in under an hour.
- Shadow box: A deep frame filled with photos, a dried flower from their garden, a piece of their handwriting — personal and self-contained.
- Printed memory cards: Small cards with the person’s name, dates, and a line or two printed on kraft cardstock. Guests can take one as a keepsake.
What to Write on a Wedding Memory Table Sign
Keep it short. A few phrases that work without feeling like a greeting card:
- “Those we love don’t go away.”
- “Forever in our hearts.”
- “In loving memory.”
- “They are here with us today.”
- Or simply: the person’s name and dates, nothing else. That’s enough.
Avoid anything too long or poetic — guests will read it and move on in about five seconds. Simple is always better here.
Pro Tip
If you’re honoring multiple people, consider a small framed list with just their names rather than individual signs. It reads clearly, takes up less space, and feels cohesive rather than like a row of separate tributes.
Pet Memorial at a Wedding

A pet memorial wedding table is more common than you’d think, and there’s nothing wrong with it. A framed photo of the dog or cat, a small paw print keepsake, and a note saying something like “Missed today but always in our hearts” is enough. Keep it subtle — one element on the main memory table rather than a separate section.
FAQ
How do you set up a memory table at a wedding?
Choose a location near the entrance or guest book, select a display style (draped table, vintage dresser, memory ladder), and layer your elements: table covering, frames, florals, candles, personal objects. Keep it uncluttered — five to seven items maximum. Add a small sign if it feels right.
What photos do you put on a wedding memory table?
Photos of loved ones who have passed away — usually family members the couple wanted to acknowledge on their wedding day. Choose photos that show the person as they were, not formal portrait shots only. A candid, a moment from a family gathering, a photo where they’re laughing all work well. Black-and-white printing unifies mixed photo eras.
Where should a memory table be placed at a wedding?
Near the entrance of the ceremony or reception venue, or beside the guest book table. Guests naturally pause in these spots, which gives them a moment to notice and acknowledge the table. Avoid placing it where guests might crowd around it, creating an awkward bottleneck.
Is a memory table appropriate for all wedding styles?
Yes — the format just adapts to the style. Rustic weddings suit wood, burlap, and wildflowers. Formal weddings suit uniform frames, white roses, and gold accents. Outdoor weddings need wind-secured setups. The underlying gesture is appropriate across all styles.
How do you honor someone at a wedding without a memory table?
A candle lighting ceremony, a reserved seat with a single flower on the chair, a mention in the ceremony program, or a toast during the reception are all meaningful alternatives. Some couples choose to include a small framed photo in their bouquet or boutonniere instead of a dedicated table.
Final Thoughts
The best wedding memory table ideas are the ones that feel like they were made for that specific person — not copied from a template. Use their favorite flower. Frame a photo where they’re actually happy. Add the one object that makes people who knew them smile in recognition.
The table doesn’t have to be big. It just has to be real.
Keep Reading on Stylicia
- The Best Wedding Gift Ideas for Every Budget
- DIY Wedding Gifts That Actually Feel Thoughtful
- Unique Wedding Gifts for Bride and Groom
- Wedding Gifts for Guests: Favors They’ll Actually Keep

Disclosure: This post contains affiliate links. If you purchase through our links, we may earn a small commission at no extra cost to you.
Finding a wedding gift is one of those things that sounds simple until you’re actually doing it. You’re staring at the registry, everything’s either already bought or costs more than your rent, and suddenly you’re googling “wedding gift ideas” at 11pm the night before.
I’ve been there more times than I’d like to admit. Here’s what I’ve learned after years of going to weddings: the gifts people actually remember aren’t always the most expensive ones. They’re the ones that feel considered.
This is a roundup of the best wedding gift ideas across every price range — whether you’re a close friend with a bigger budget, a work colleague keeping it practical, or someone who just got the invitation three days ago and needs to figure something out fast.
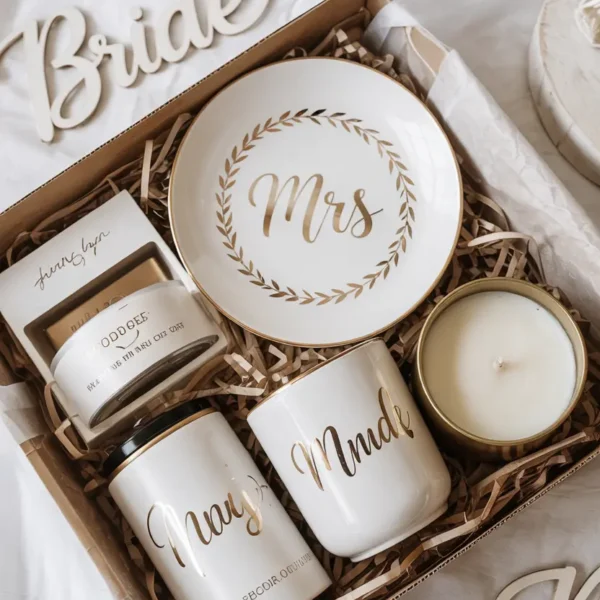
Quick Answer
The best wedding gifts are either useful (kitchen equipment, home items, experiences they wouldn’t buy themselves) or personal (monogrammed, custom-made, specific to the couple). A $75 personalized cutting board can mean more than a $200 appliance they already have. Check the registry first — then go off-script if nothing feels right.
Wedding Gift Ideas Under $50
This range is perfectly reasonable for a coworker, a distant cousin, or when you’re going to three weddings in the same summer and your budget has limits. The key is finding something that doesn’t feel like a filler gift — and there are more options here than you’d think.
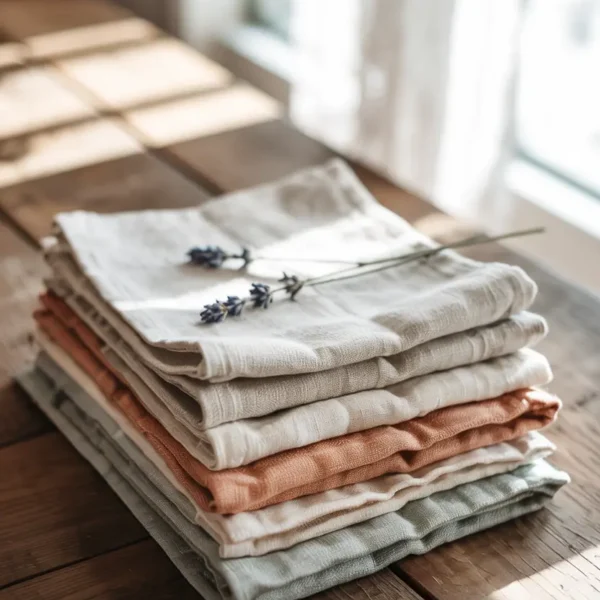
Personalized Linen Cocktail Napkins

A set of monogrammed linen cocktail napkins runs about $35–$45 and looks thoughtful. I gave these at a wedding two years ago and the couple still brings them out whenever we have dinner at their place. They’re the kind of thing you display, not hide.
A Nice Cookbook
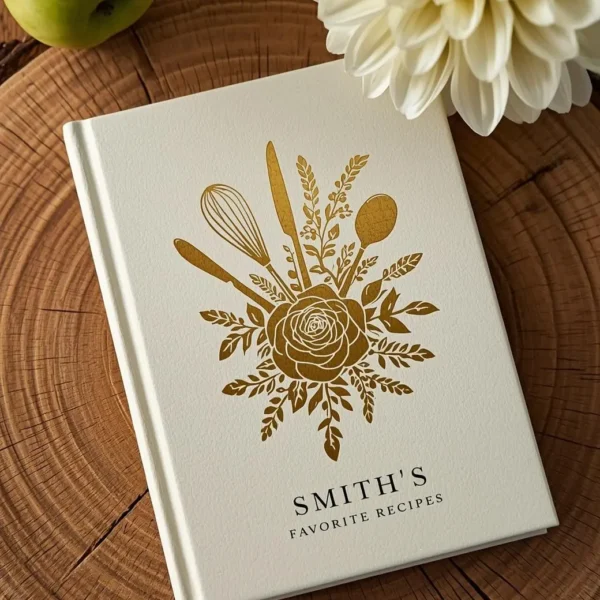
Not a generic one. A specific one — whatever cuisine the couple actually cooks, or a book by a chef they follow. Ottolenghi Simple → View on Amazon, Salt Fat Acid Heat → View on Amazon, or The Wok by Grace Young → View on Amazon are all consistently loved and run about $30–$40. You can write something personal on the inside cover, which most people don’t bother to do.
A Custom Wedding Date Print
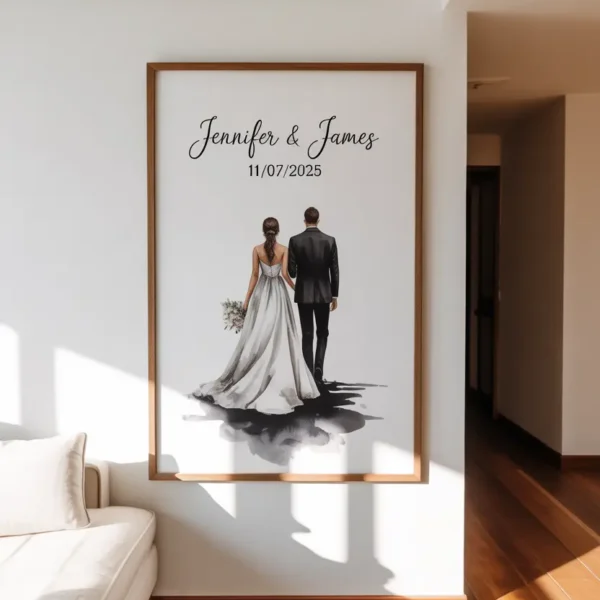
A simple typographic print of the couple’s wedding date → View on Amazon or a map of the place where they met — around $25–$40 on Etsy. It goes on a wall and stays there for years. Understated but specific to them.
A Monogrammed Doormat or Kitchen Towel Set
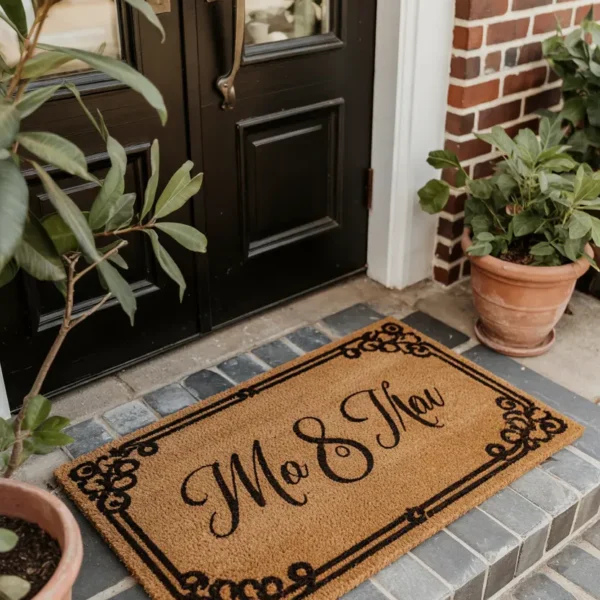
A “first home” doormat → View on Amazon or a set of personalized kitchen towels → View on Amazon with their last name initial is around $30–$45. For couples who just moved in together or are moving after the wedding, it’s both practical and personal.
Budget Pick
Personalized linen cocktail napkins → View on Amazon (~$38) — looks more expensive than it is, stores flat, and gets used for years. The monogramming is what makes it.
Wedding Gift Ideas $50–$150
This is the most flexible range and where a lot of the best options are. You’re spending enough to get something really good, without overthinking it.
A Monogrammed Cutting Board
A personalized maple or acacia cutting board → View on Amazon with the couple’s last name or initials is somewhere between $60–$95 depending on size and where you order it. It sits on the counter, people see it when they visit, and the couple uses it daily. One of my most-given gifts — and I’ve never had it land badly.
A Quality Olive Oil and Vinegar Set
This sounds like a boring gift. It’s not. A well-picked set from a specialty shop or a brand like California Olive Ranch → View on Amazon is around $60–$80 and is exactly the kind of thing a couple uses for years but wouldn’t necessarily buy for themselves. If you can find a local olive oil shop that does gift sets, even better.
A Subscription Box (First 3 Months)
Coffee, wine, specialty cheese, or flowers — depending on what the couple is into. A 3-month subscription → View on Amazon runs about $70–$120 and keeps giving after the wedding is over. It’s one of the few gifts that doesn’t get forgotten in a closet.
Linen Dinner Napkins (Full Set of Eight)
Not the cocktail version — a full set of linen dinner napkins → View on Amazon in a natural color. These run $80–$120 and are the kind of thing people don’t buy themselves but love having. Stone, terracotta, and sage all work. Get eight, not four — four is for brunch, eight is for dinner parties.
A Personalized Recipe Box or Card File
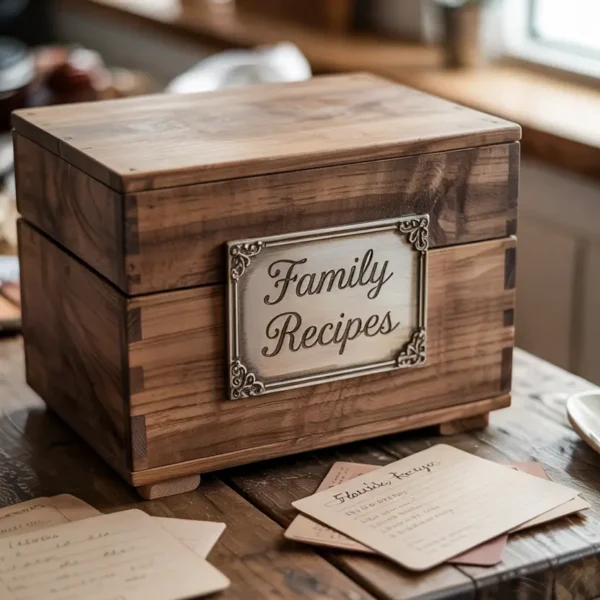
A custom engraved wooden recipe box → View on Amazon with a set of blank recipe cards runs about $50–$70. For couples who cook together, this is a nice sentimental gift — especially if you add a few handwritten recipe cards with meals you know they love.
Our Pick
The personalized maple cutting board (~$75) — it’s displayed, used daily, and has their name on it. That’s a tough combination to top at this price point.
A Quick Note on Registries
I generally check the registry first. It exists so the couple doesn’t end up with four toasters and nothing else they actually want. If something fits your budget, buy it — that’s the whole point of the registry.
Where it gets complicated: the registry is already mostly cleared, or everything left is either $400 or $12. That’s when going off-script makes sense. Going off-script works best when you know the couple well enough to know what they’d actually like. If you’re not sure, giving cash is always fine. More on that below.
Wedding Gift Ideas $150–$300
At this range you can get something actually special. This is where I’d land for a close friend, a sibling, or someone whose wedding I’m a part of.
A Le Creuset Dutch Oven
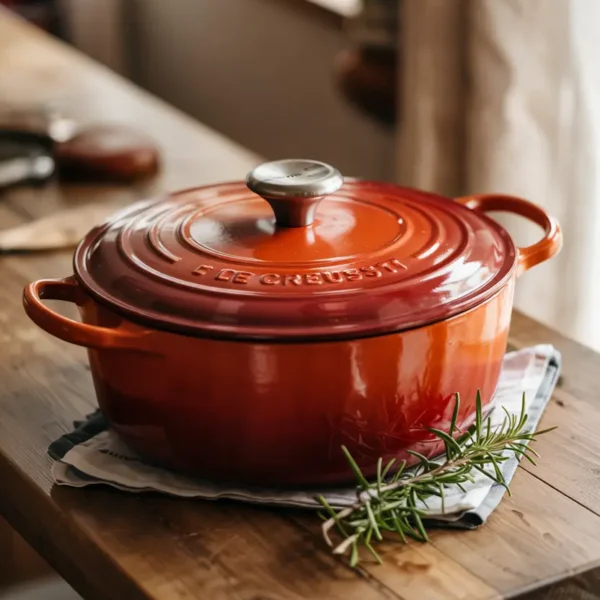
Not the most exciting thing to say, but this is consistently the most-used and most-loved wedding gift I’ve seen in practice. The 5.5-quart round Dutch oven → View on Amazon runs about $200–$250 depending on color and sale timing. Every couple I know who received one actually uses it. It lasts decades. It’s worth checking the registry first to see if they’ve listed it — and if they have, it’s the clearest signal you can get.
A Custom Portrait or Illustration

A few Etsy shops specialize in illustrated portraits from a couple’s photo — a stylized drawing of their wedding venue, their home, or just the two of them. Around $150–$250 depending on the artist and detail. It goes on the wall and stays there for years. (I’ve commissioned a few of these. The key is finding an artist whose style actually matches the couple’s taste — look at their reviews carefully.)
A Hotel or Airbnb Gift Card

For a couple going on a honeymoon or planning their first trip, a hotel or Airbnb gift card in the $200 range is actually useful. Less exciting to unwrap than something physical, but practically helpful in a way most gifts aren’t. Pair it with a handwritten card about where you hope they use it.
A Personalized Keepsake Box
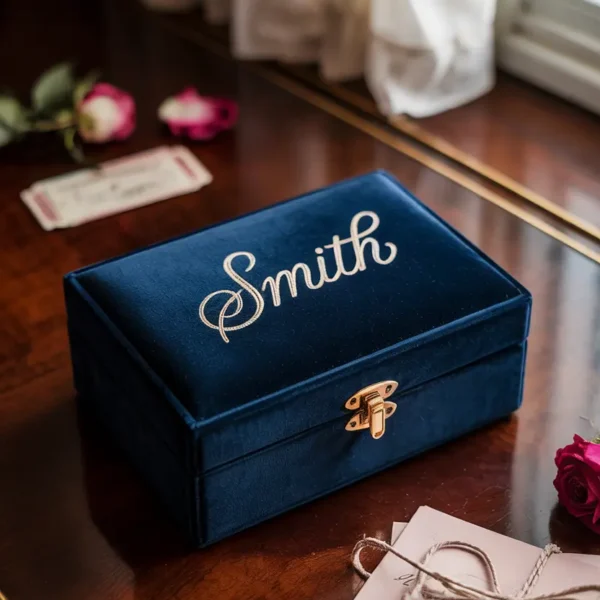
A quality wooden or velvet keepsake box → View on Amazon monogrammed with their last name, around $150–$200. For couples who are sentimental — who save ticket stubs and keep letters — this is the kind of thing that becomes meaningful over time. Neutral wood tones or deep navy velvet both work well.
A Quality Linen Tablecloth
A linen tablecloth → View on Amazon in a natural or muted color runs $120–$180 and is one of those things people love but almost never buy for themselves. It lasts for years, handles washing well, and looks better every time it’s used. Stone, natural, and eucalyptus green are safe colors for most homes.
Pro Tip
If you can’t decide between a few options at this price range, ask a mutual friend what’s still on the registry. Group gifting is also worth considering — a $250 item split three ways is about $83 each, which is much easier for everyone.
Wedding Gift Ideas $300+
At this range you’re either a close family member, a best friend, or you’re doing a group gift with two or three other people. All three are good reasons to spend more.
A KitchenAid Stand Mixer
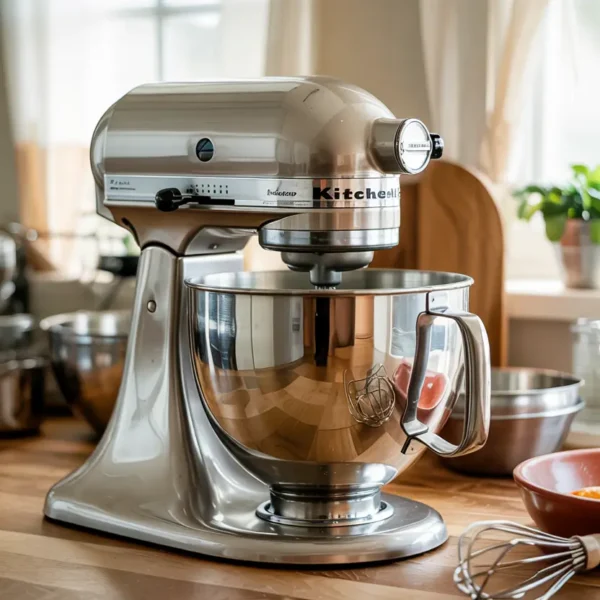
The classic. It runs $350–$450 depending on color and model — shop KitchenAid mixers on Amazon → View on Amazon. Couples either have one already or they want one — there isn’t much middle ground. Check the registry first. If it’s listed, it’s a safe bet. If it’s not, only get this if you know they’d actually use it — a stand mixer takes up real counter space and some couples genuinely don’t bake.
A Cashmere or Merino Throw
A quality throw → View on Amazon from a brand like Quince (good price-to-quality ratio) or Jenni Kayne sits around $150–$350 depending on brand and material. It’s the kind of thing couples keep for years. Neutral colors — oatmeal, ivory, sage, or soft grey — work in almost any home.
A Honeymoon Fund Contribution
A lot of couples now set up honeymoon funds through Zola or Honeyfund. Contributing to a specific experience — a dinner, a snorkeling trip, a hotel upgrade — feels more personal than just sending money. Some funds let you label your contribution so the couple knows exactly who paid for the sunset dinner.
A Set of Quality Cookware
If the Dutch oven feels too small for this budget, a full cookware set — stainless or ceramic, from a brand like Made In or Caraway — runs $300–$500 and is the kind of thing couples use every day. Check the registry to see if they’ve specified a preference, because cookware is one of those things people have opinions about.
Wedding Gifts for Couples Who Already Live Together
This is the actual challenge. They have a blender. They have towels. They’ve been splitting rent for three years and already bought the one thing they really needed from IKEA. The registry exists, but half of it feels like it was assembled by obligation.
For these couples, experiences almost always land better than stuff. A few that consistently work:
- A cooking class for two ($120–$200) — specifically something they wouldn’t book for themselves, like a pasta-making class or a sushi workshop
- A wine or cocktail tasting at a local spot ($80–$150 for two)
- A weekend getaway fund — contribute to a specific trip or a hotel night
- A restaurant gift card to somewhere they’ve been wanting to go but haven’t yet
- A spa day or couples massage ($150–$250)
(I always go with experiences for couples who’ve been living together for a while. They genuinely don’t need more things. And experiences tend to become stories — which is more than most kitchen gadgets ever become.)
Is a Cash Gift Ever Okay?
Yes. Entirely. In many cultures, it’s the expected and preferred thing to give. Younger couples especially often have more use for cash toward a house down payment or a trip than they do for a fourth set of wine glasses.
If you want it to feel more personal: write a card that says where you hope the money goes. “For your first trip to Portugal” or “for whatever the new apartment needs first.” That small detail makes it feel like a gift rather than just an envelope.
Venmo and Zelle work fine. A check in a nice card also works fine. The card is what makes it feel intentional.
When Should You Give the Wedding Gift?
Before the wedding is ideal — it takes one less thing for the couple to deal with on the day itself. Most registries are set up to accept gifts shipped directly, so you don’t even have to wrap anything.
At the wedding is totally fine. A card with a check or cash is easy to manage. For physical gifts, most venues have a gift table — just keep the item manageable in size.
After the wedding is also acceptable, especially if you’re buying something that takes more time to select. Most couples don’t formally expect a gift for several months after the wedding, though sooner is generally better.
Quick Reference: Wedding Gift Ideas by Budget
| Budget | Best Options | Best For |
|---|---|---|
| Under $50 | Monogrammed napkins, quality cookbook, personalized doormat | Coworkers, distant guests |
| $50–$150 | Cutting board, linen dinner napkins, subscription box, olive oil set | Friends, cousins — best value range |
| $150–$300 | Dutch oven, custom portrait, hotel gift card, linen tablecloth | Close friends, siblings |
| $300+ | KitchenAid mixer, cashmere throw, honeymoon fund contribution | Family, best friends, group gifts |
FAQ
How much should I spend on a wedding gift?
A general guide: $50–$75 for a coworker or acquaintance, $100–$150 for a friend, $150–$300 for a close friend or family member. There’s no hard rule — give what you can, and choose something thoughtful over something expensive.
Is it okay to give money as a wedding gift?
totally fine, and more and more common. Most couples — especially younger ones saving for a home or trip — appreciate cash or a honeymoon fund contribution. A handwritten card with a note about where you hope the money goes makes it feel intentional rather than impersonal.
What do you give a couple who already lives together?
Experiences tend to land better than things. A cooking class, a wine tasting, a restaurant they’ve been wanting to try. If you want to give something physical, go personalized — a custom portrait, a monogrammed item, something specific to them rather than generic home goods they may already have.
Should I buy from the wedding registry?
Generally yes — the registry exists precisely so the couple gets things they actually want. If the registry is cleared or nothing fits your budget, going off-script (or giving cash) makes sense. The couple will not be offended. They’ll be glad you came.
What are the best personalized wedding gifts?
Monogrammed cutting boards, custom illustrated portraits, engraved glassware sets, and personalized keepsake boxes are consistently well-received. They’re specific to the couple, harder to return, and usually become things people keep for a long time.
What’s a good group gift idea for a wedding?
Anything in the $200–$500 range that the couple has listed on their registry but might not expect to receive — a KitchenAid mixer, a high-quality cookware set, or a contribution to a honeymoon experience. Split between three to five people, it’s manageable for everyone and meaningful for the couple.
Final Thoughts
The best wedding gift is the one you’d be glad to receive yourself. Useful, personal, or both — that combination is hard to go wrong with.
And if you’re still not sure after all of this: check the registry, pick something in your budget, and write a good card. The card matters more than most people give it credit for.
Whether you’re shopping last minute or planning ahead, these wedding gift ideas cover every budget and relationship. The best gifts are the ones that feel chosen — not grabbed.
Keep Reading on Stylicia
- DIY Wedding Gifts That Actually Feel Thoughtful
- Unique Wedding Gifts for Bride and Groom That Aren’t a Toaster
- Wedding Gifts for the Bride: Ideas She’ll Use After the Wedding
- Handmade Wedding Gifts Worth Making (No Craft Skills Required)
- Wedding Gifts for Guests: Favors They’ll Actually Keep

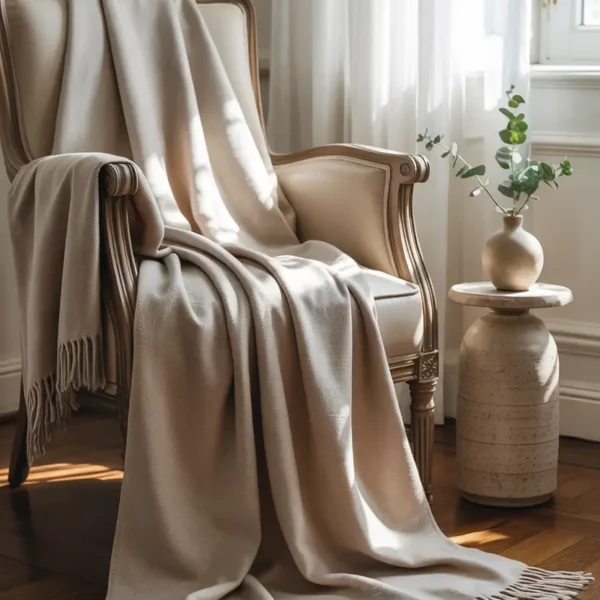
Citrus decor has become one of the most enduring home design themes — and for good reason. It’s flexible, affordable, and instantly cheerful.
But while lemons dominate Pinterest boards and interior mood boards alike, the broader citrus family opens up a far richer palette. Oranges bring warmth, limes offer modern freshness, grapefruits add a romantic blush, and blood oranges deliver sophisticated seasonality.
This complete guide walks you through each citrus type, how to use them by room, which combinations work best, and what to avoid.
Quick Answer: Citrus decor combines lemons, oranges, limes, and/or grapefruits as visual accents in home styling. The most popular citrus is lemon (yellow = white + green palette), followed by orange (warm Mediterranean), lime (modern fresh), and blood orange (sophisticated sunset). Best used as 20-30% accent in bowls, wreaths, garlands, and prints rather than the dominant design theme. Most flexible color blends well with white, sage, terracotta, navy, and brass.
The 5 Citrus Types and Their Decor Personalities
Each citrus type carries a distinct visual mood. Understanding what each one communicates helps you make intentional choices rather than defaulting to whatever’s on hand. Here’s how the main citrus types read in a decor context.
Lemons (Yellow)
The most versatile citrus for decor. Lemons read Italian summer, Mediterranean freshness, and effortless femininity. They work in every season — brightest in spring and summer, but manageable with adjusted supporting colors in fall and winter.
Best in kitchens, dining rooms, bathrooms, and summer events. They pair beautifully with white, sage green, terracotta, navy, and brass.
Oranges
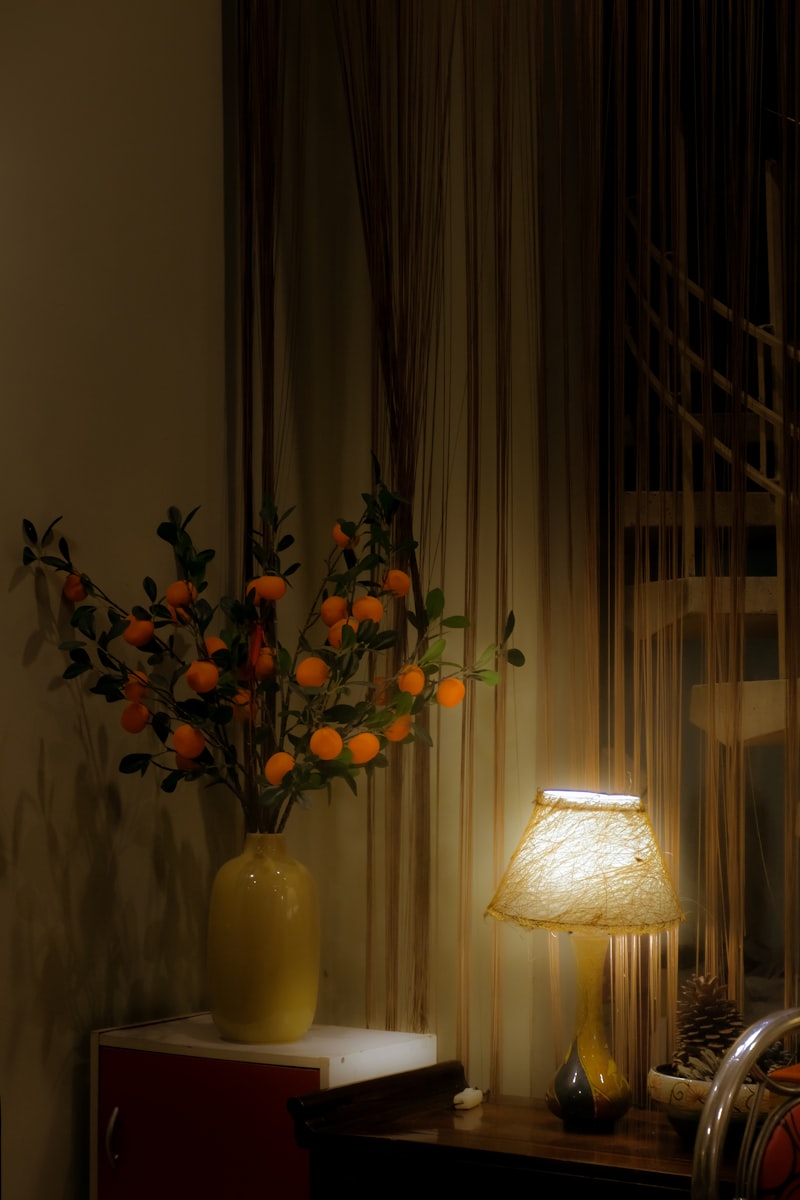
Oranges bring a warmer, deeper energy than lemons — think Spanish countryside, candlelit dinners, late harvest. They’re stronger visually, so you need fewer pieces to make an impact.
Best in living rooms, fall tablescapes, evening dinner parties, and vineyard or rustic interiors. They pair well with rust, burgundy, deep green, cream, and brass.
Limes (Green)

Fresh, modern, and unexpected. Limes read tropical and casual with a slight playfulness that lemons don’t have. They’re underused in home decor, and that rarity is part of their appeal — a bowl of limes in a white kitchen feels genuinely current.
Best in modern kitchens, cocktail areas, summer barbecues, and beach houses. Pair with white, navy, gold, fresh greens, and light wood.
Grapefruits (Pink-Red)
Soft, romantic, and underrepresented in most decor guides. Grapefruits read sunset, sophisticated, and distinctly feminine without being overdone.
Their blush-to-deep-rose tones work in spaces where you want warmth without full orange saturation. Best in feminine spaces, brunch areas, bedrooms, and late summer events. Pair with blush, rust, gold, deep green, and cream.
Blood Oranges and Kumquats
Distinctive and intentional. Blood oranges read sophisticated and seasonal — their deep red interior makes any arrangement look considered. Kumquats read playful and unique; their small scale adds texture without bulk.
Blood oranges are best in winter decor (in season November through March), modern cocktail displays, and design-forward spaces. Pair both with rust, deep green, brass, and cream.
Citrus Decor by Room
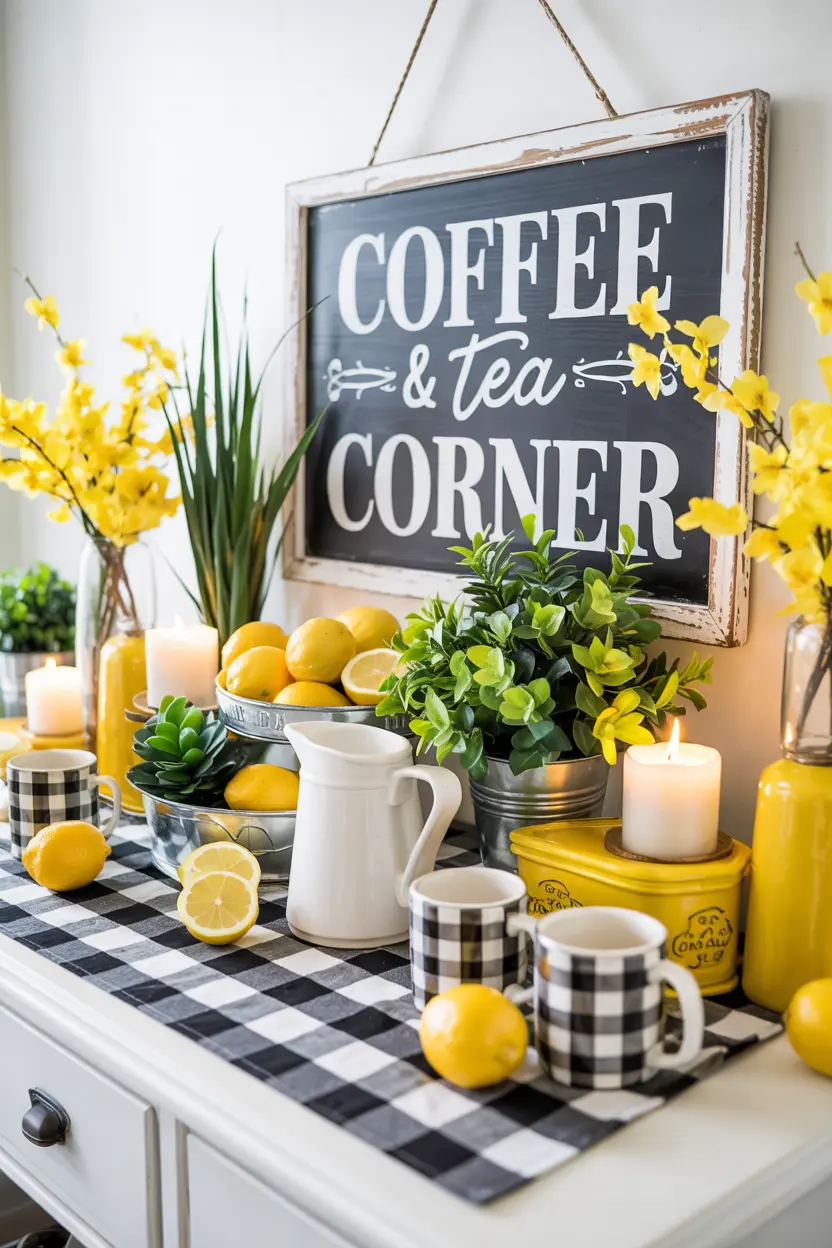
Kitchen
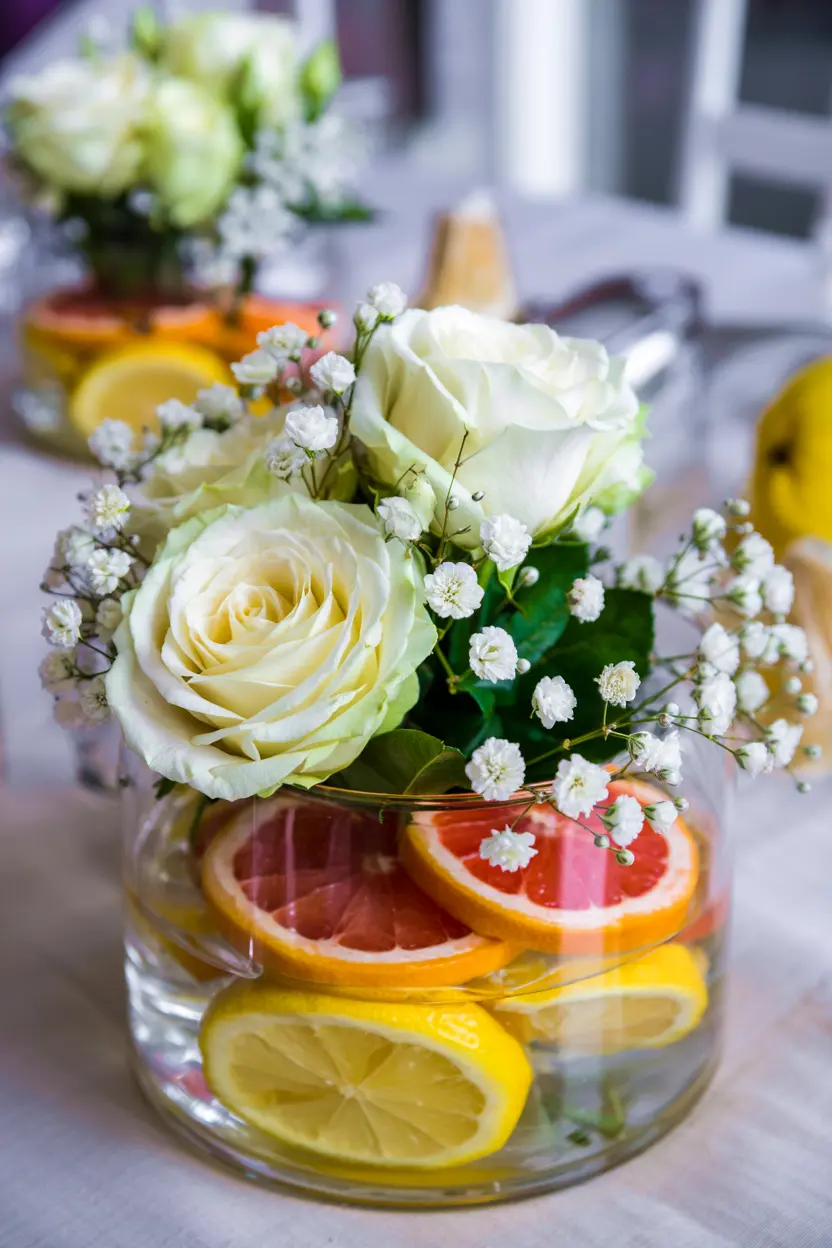
The kitchen is the most natural home for citrus decor. A bowl of fresh lemons or mixed citrus on the counter is the simplest and most effective centerpiece you can make.
Beyond fresh fruit: lemon-print kitchen towels, ceramic majolica bowls, faux lemon garlands above windows, citrus-themed canisters. Lemons dominate here; orange or lime accents add depth without competing for attention.

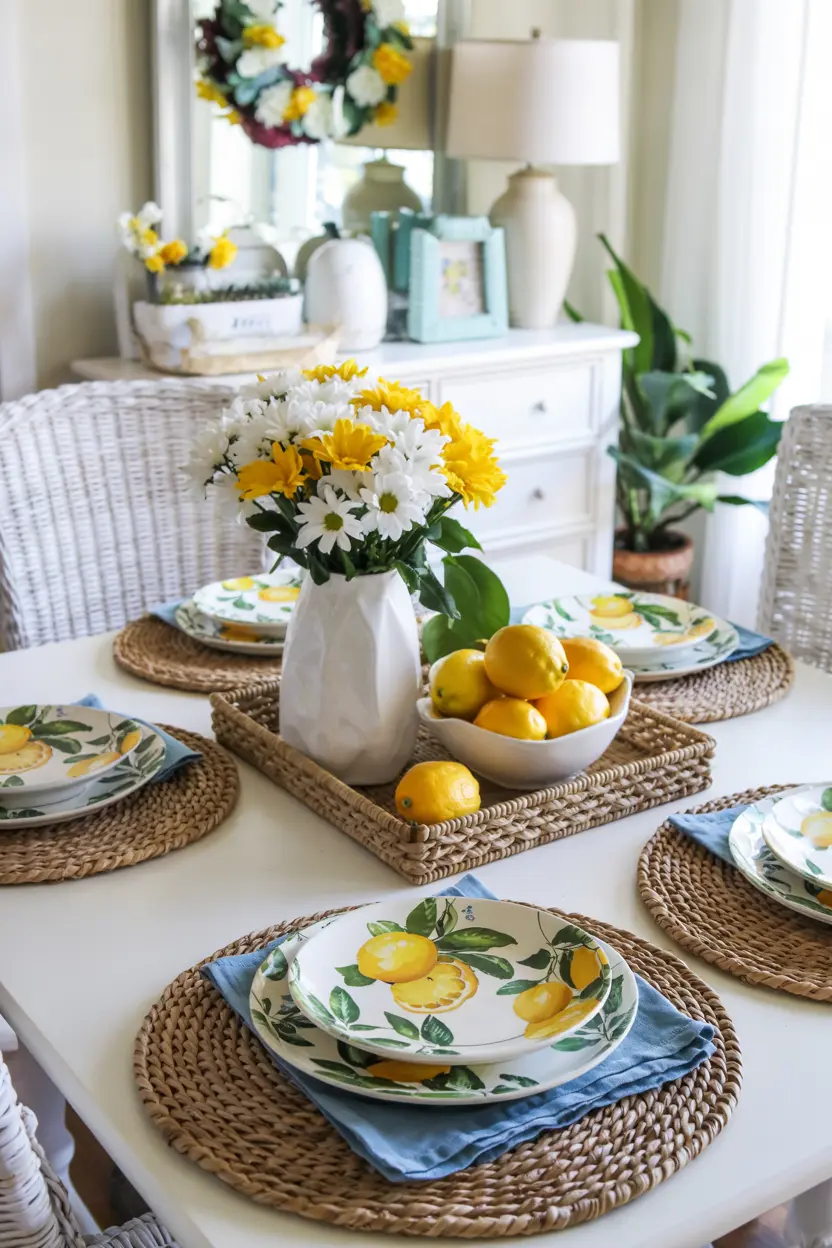
Dining Room
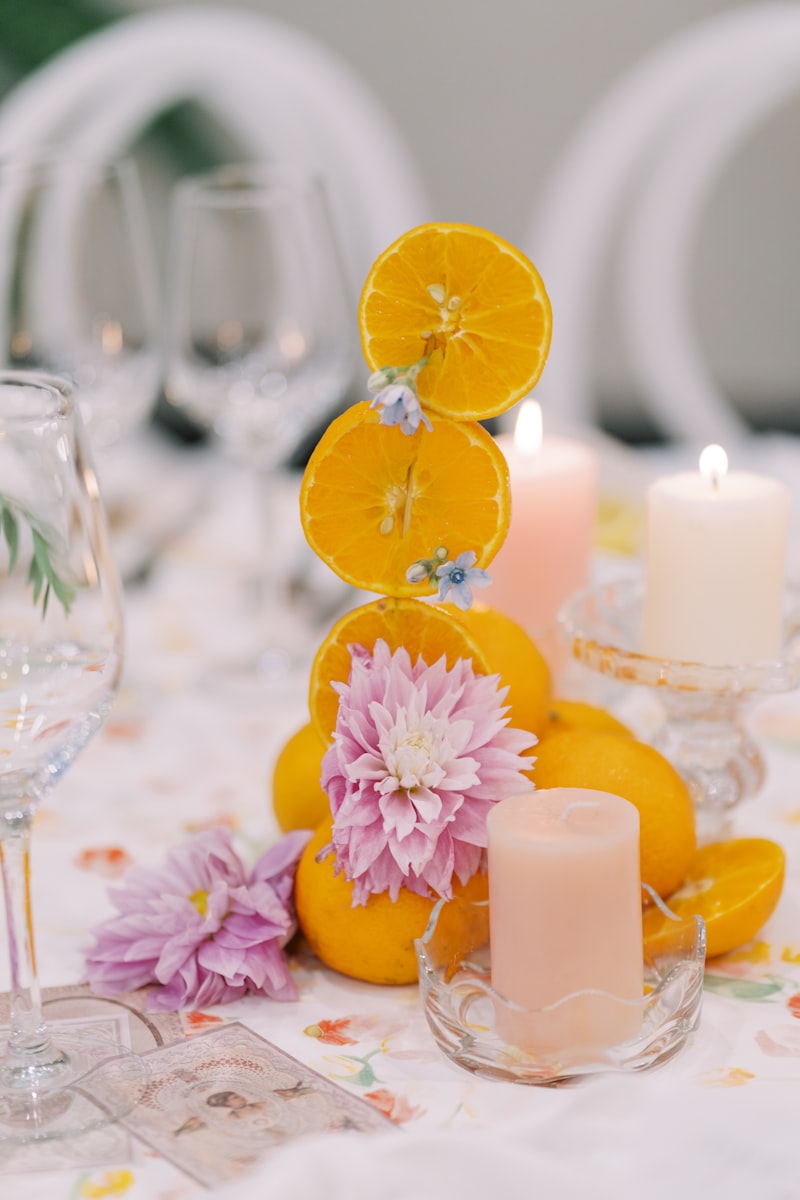
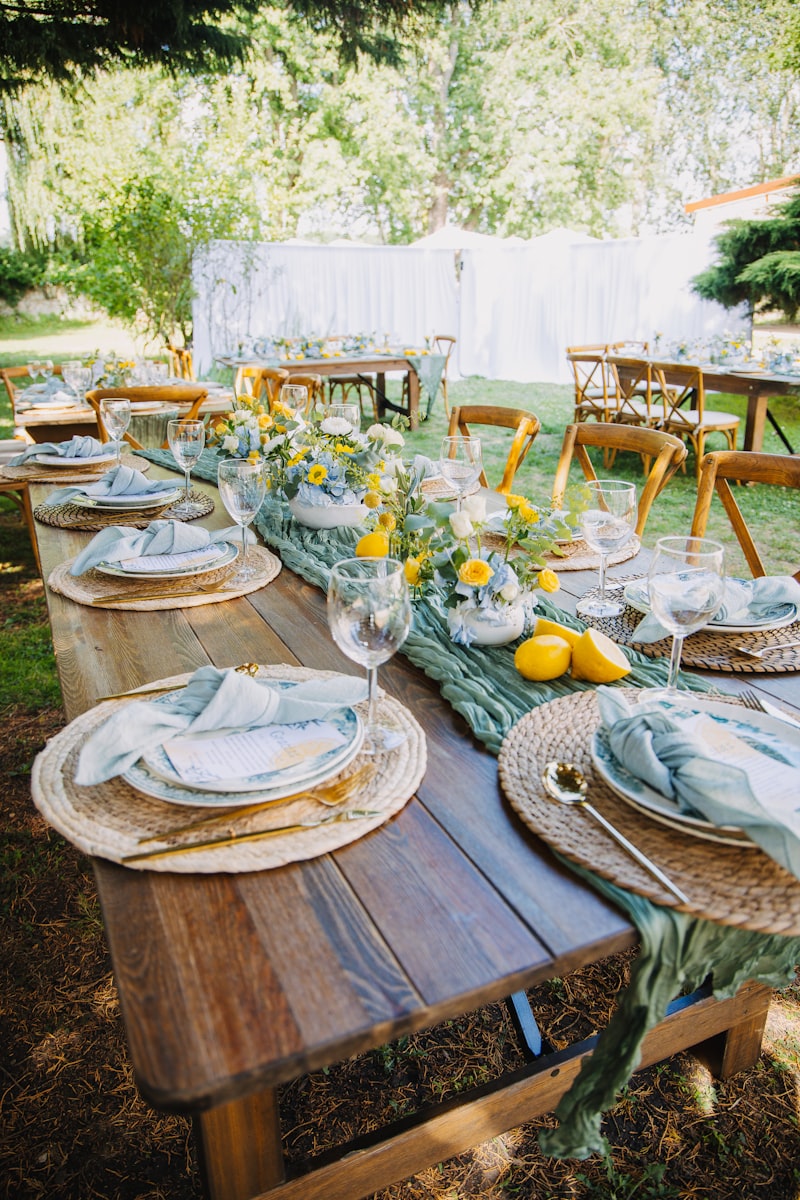
Citrus tablescapes are one of the most searched decor topics for good reason — they’re accessible, scalable, and photograph beautifully.
Lemons are the most popular choice; mixed citrus centerpieces work for more elaborate seasonal looks. Use real fruit for one-day events and faux for permanent centerpieces. A long runner of mixed citrus with greenery and candles creates impact for minimal cost.
Living Room

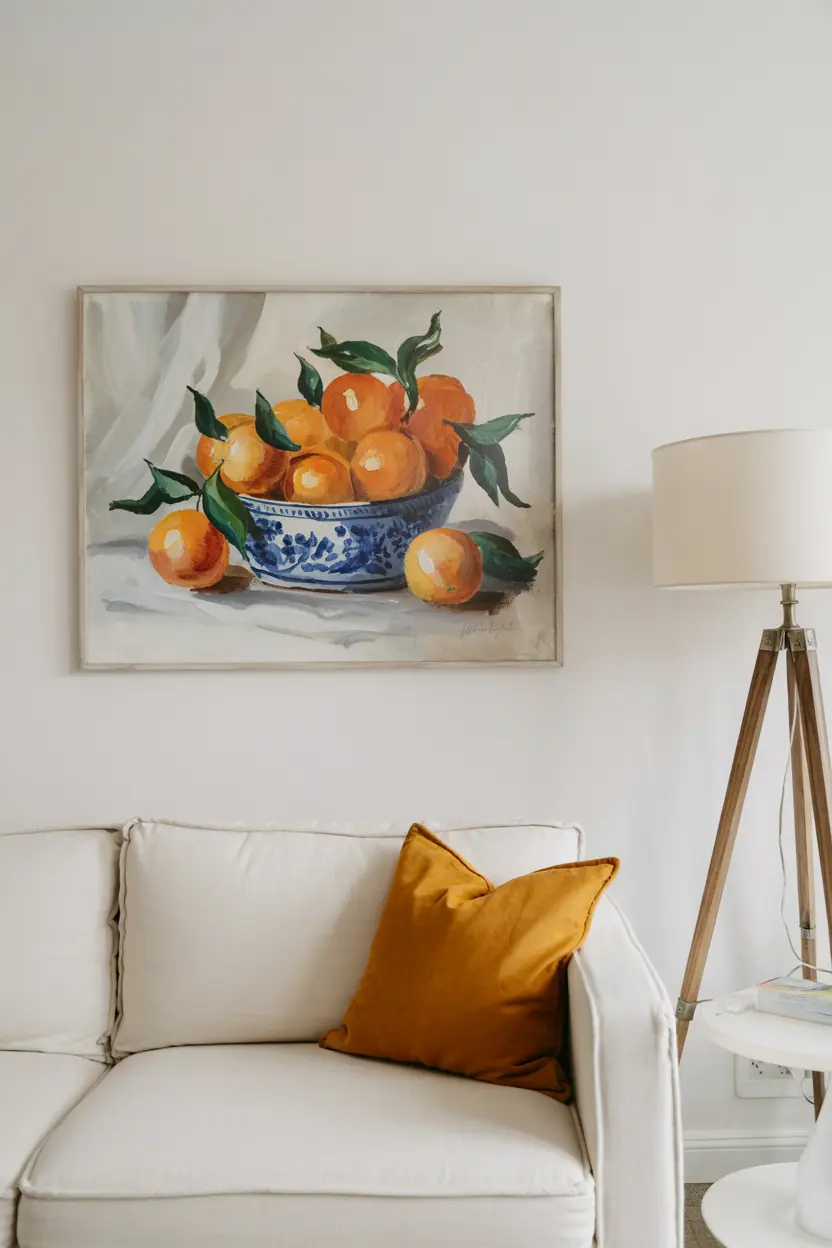
Citrus in the living room requires a lighter touch than in the kitchen or dining area. A few well-placed accents work; a themed approach usually doesn’t.
The most successful approaches: a small bowl of lemons on the coffee table, framed citrus art on a gallery wall, one or two citrus-printed throw pillows on a neutral sofa, a faux citrus arrangement on a console table, or a lemon-scented candle used as a styling element.
Keep it to three or four citrus touches maximum — any more and the room starts reading as themed rather than styled.
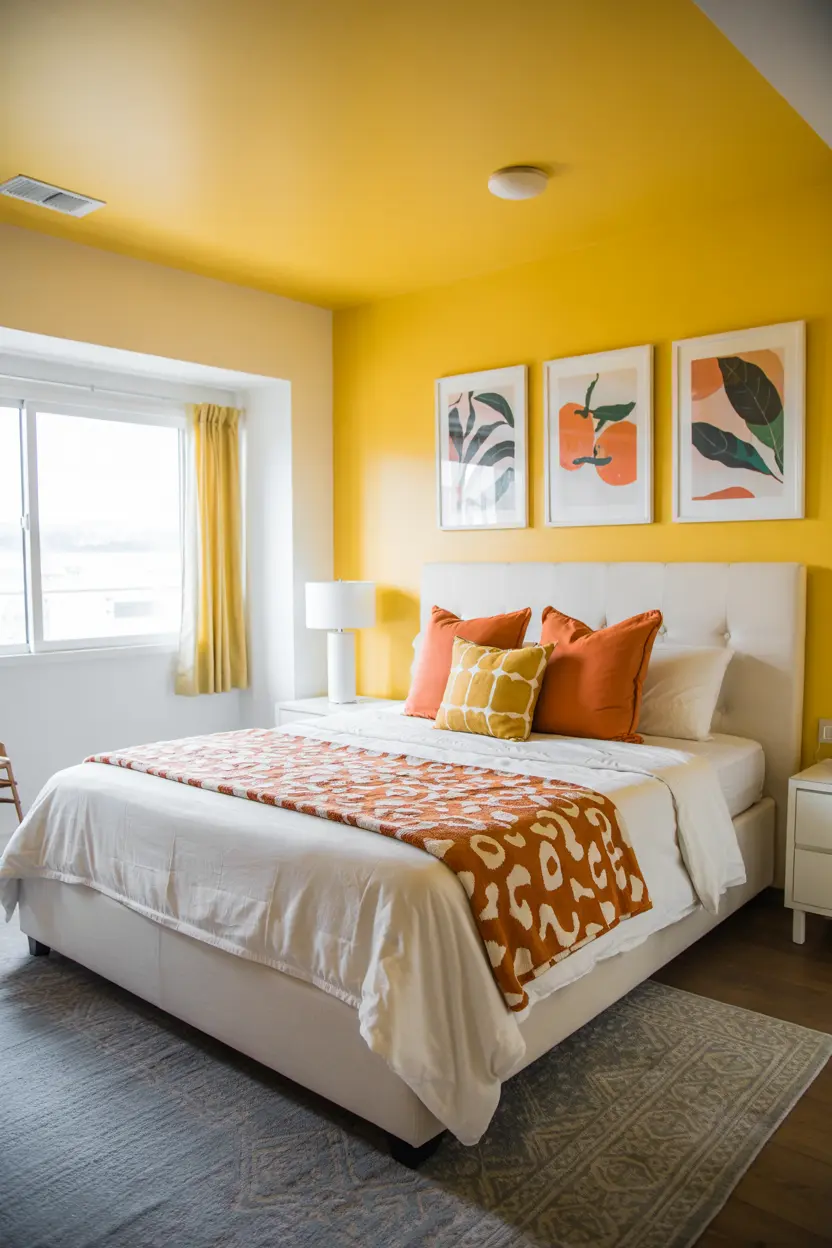
Bathroom
Bathrooms respond particularly well to citrus accents because they’re small, accessory-heavy spaces where individual pieces have outsized visual impact.
A citrus-print shower curtain, lemon-yellow towels, or a majolica soap dispenser can shift the entire feel of the room. Lemons are most popular here; orange or lime accents work well in beach house or modern bathrooms.
Keep scent consistent with visuals — lemon verbena or grapefruit soap reinforces the theme without any extra effort.
Bedroom
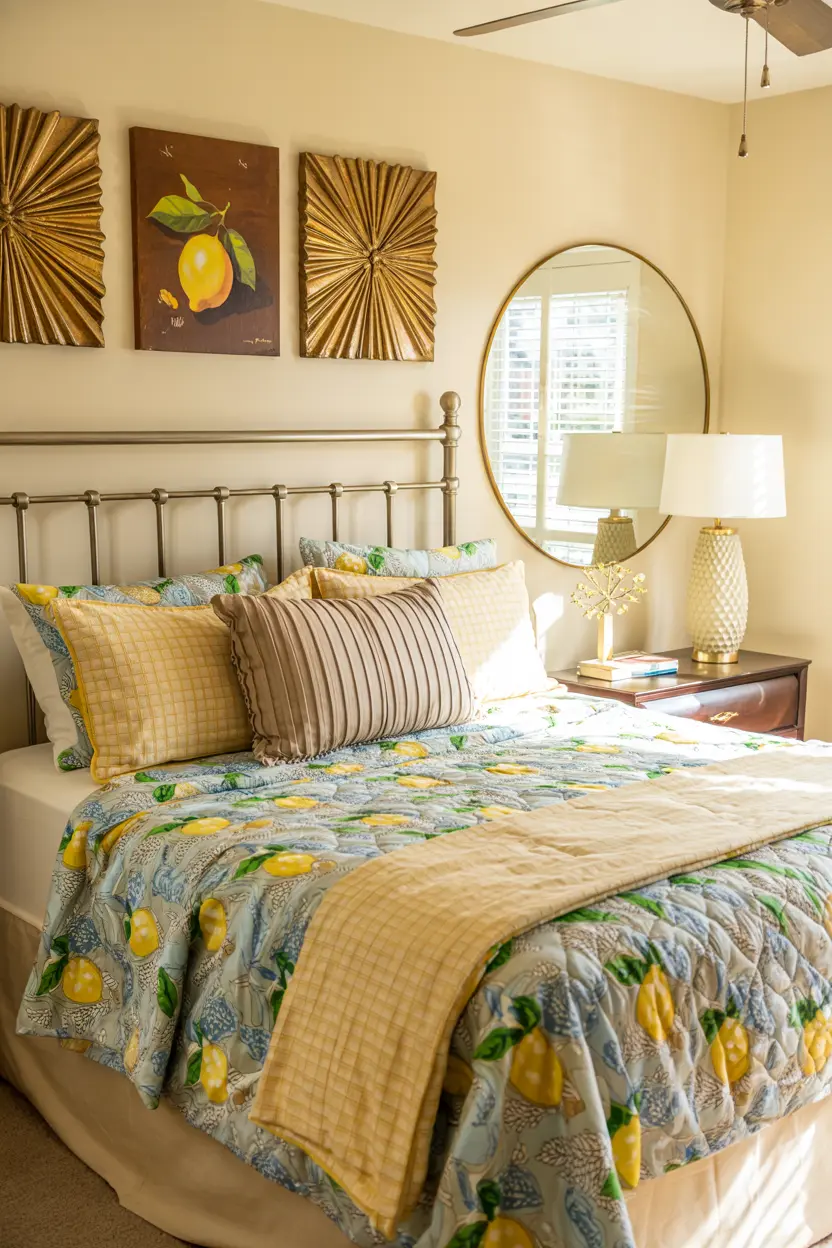
Citrus in the bedroom is less common and harder to execute well. The energy of citrus colors and patterns runs counter to the restfulness most bedrooms aim for.
If you want to try it, lean toward subtle: lemon-printed pillowcases on a neutral bedspread (not both), a single framed citrus print on the wall, a small bowl of lemons on a dresser as a styling element, or a lemon-scented diffuser.
Avoid heavy citrus prints on bedding or curtains — the visual weight is too energetic for a sleep space.
Outdoor and Patio
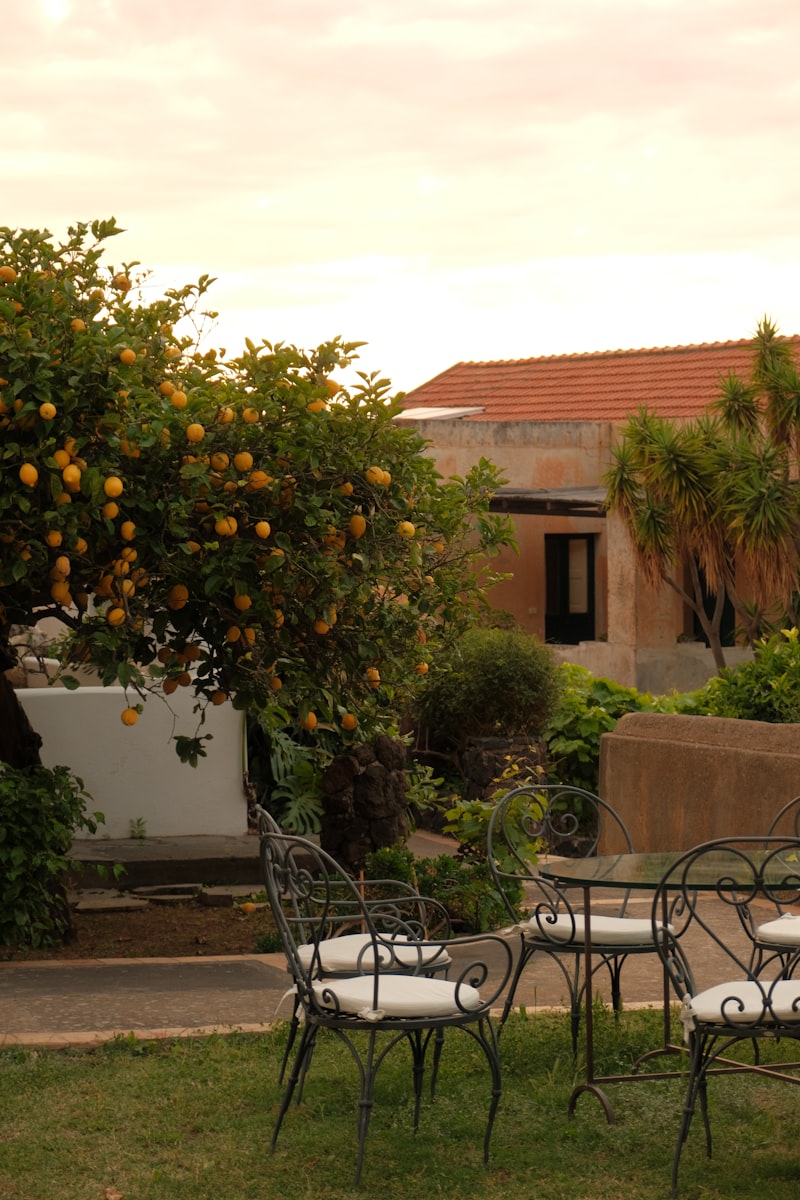
Outdoor spaces are the most permissive for citrus decor — both Mediterranean and tropical citrus styles translate beautifully to patios, terraces, and gardens.
Options include terracotta pots with herb plants or small lemon trees, citrus-print outdoor throw pillows, lemon-themed serving platters and pitchers for entertaining, and citrus garlands draped over pergolas or strung along a fence.
Real citrus trees in pots are a particularly strong move for Mediterranean-style outdoor spaces — they’re functional, beautiful, and deeply fragrant.
Citrus Color Palettes That Always Work
The right supporting palette makes or breaks citrus decor. Here are the combinations that reliably work across room types and aesthetics:
- Yellow + white + sage green — the lemon classic, works in any room, any season
- Orange + cream + rust — warm Mediterranean, strongest in fall and winter
- Lime + white + brass — modern fresh, strongest in spring and summer
- Mixed citrus + white + brass — full citrus mix, needs a strong neutral foundation
- Blood orange + cream + deep green — sophisticated winter palette
- Citrus + navy + white + brass — coastal, works particularly well in bathrooms and outdoor spaces
Avoid pairing citrus with bright pink, bright red, or bright purple — these clash rather than complement, and the result reads garish rather than cheerful.
Mixed Citrus Decor: What Combinations Work
Combining multiple citrus types creates visual richness but requires more care than single-citrus arrangements. The most successful combinations:
- Lemons + Limes — fresh and modern. Yellow and green together photograph beautifully against white kitchen counters and pair naturally with brass hardware.
- Lemons + Oranges — warm Mediterranean. Yellow and orange together feel rich and inviting, particularly in dining rooms and evening settings.
- Oranges + Grapefruits — sunset palette. Orange and pink together feel romantic in late summer and fall settings, especially in dining rooms or on outdoor tables.
- Lemons + Limes + Oranges — full citrus mix. The most colorful and the hardest to execute well. It requires a strong neutral foundation (white or cream surfaces, natural wood, stone) and benefits from greenery to prevent the mix from reading as a fruit salad rather than a decor choice.
Citrus Decor Beyond Fresh Fruit
Real and faux citrus fruit are just the starting point. Citrus decor extends across a wide range of home objects and materials, each adding to the theme without requiring actual fruit in every corner.
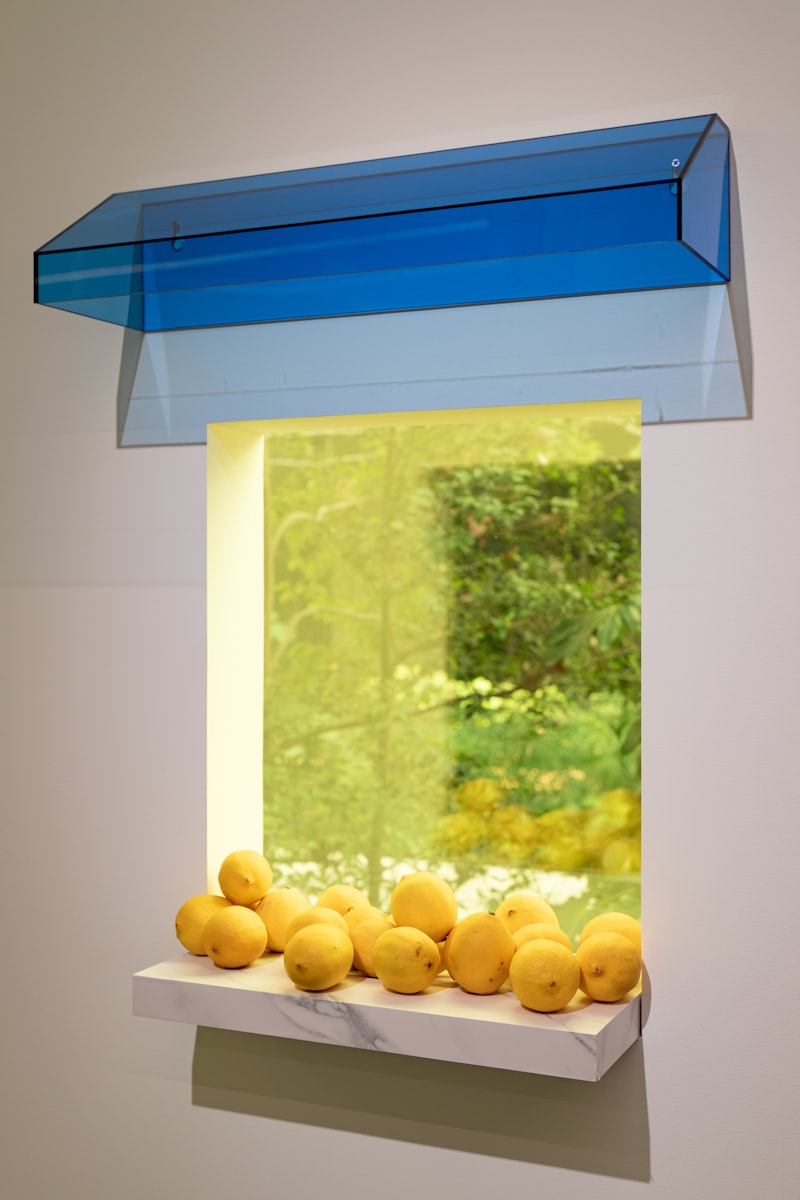
Citrus art makes one of the most lasting investments in the category. Framed prints, watercolor paintings, illustrated posters, and photographic prints are available across price ranges — from $15 digital downloads on Etsy to $500+ original artwork.
Hanging two or three pieces together in a gallery arrangement creates impact. Look for work that has a consistent style rather than mixing vintage botanical with modern graphic prints.
Citrus textiles offer the fastest and most affordable way to refresh a room. Throw pillows, table runners, kitchen towels, bath towels, shower curtains, and aprons all come in citrus patterns.
Cotton and linen read most sophisticated; polyester prints tend to look less premium. One or two pieces in a room is the right amount — more starts competing with itself.
Citrus ceramics and pottery are among the most durable decor investments. Hand-painted Italian majolica with lemon and orange motifs, ceramic bowls, vases, and planters all hold up over years of use and improve with age.
Budget versions start around $15; artisan pieces from Italian or Portuguese makers run $150 to $300+.
Citrus scents reinforce visual decor with fragrance and make a space feel more complete. Candles, essential oil diffusers, and room sprays in lemon, lemon verbena, orange cedarwood, grapefruit, and lime are all widely available.
Premium brands like Diptyque and Jo Malone run $40 to $80; quality budget options exist in the $15 to $30 range.
5 Common Mistakes in Citrus Decor
- Going too monochromatic. Yellow on yellow on yellow reads juvenile. Always include white, green, or natural materials as a foundation — citrus works as an accent layer, not as the entire palette.
- Using cheap faux fruit. Hollow plastic citrus ruins the aesthetic of an otherwise carefully considered space. Spend on quality faux — the difference between $8 plastic lemons and $35 high-resin faux lemons is visible from across the room.
- Mixing visual registers. Realistic faux fruit combined with cartoonish prints combined with watercolor art creates visual chaos. Pick one style direction — realistic still life, modern graphic, or botanical illustration — and stay consistent.
- Overcrowding. More citrus elements doesn’t mean more impact — it means less. Three to four citrus touches per room is the right ceiling for most spaces. One strong focal point plus two to three supporting accents reads as styled; five or more reads as themed.
- Forgetting greenery. Citrus alone looks artificial and slightly flat. Greenery — eucalyptus, olive branches, fresh herbs, or simple grocery-store greenery — gives citrus displays the visual grounding they need to feel natural.
Frequently Asked Questions
Is citrus decor seasonal?
Each citrus type has a peak season, but quality citrus decor can work year-round with adjusted supporting elements. Lemons feel most natural in spring and summer; oranges shine in summer through fall; blood oranges are best in fall and winter when they’re in season.
The trick is shifting the secondary palette rather than removing the citrus — lemons with cedar and cream work in winter, lemons with white and sage green work in summer.
How much citrus is too much?
If you can identify five or more distinct citrus elements at a glance, you’ve crossed from styled into themed.
Aim for three to four elements per room: one clear focal point (a bowl, a large print, a statement textile) and two to three supporting accents. Let there be negative space between citrus elements so each one reads individually.
Can citrus decor work in modern homes?
Yes — particularly with limes and unexpected citrus types. Modern citrus decor uses graphic prints rather than vintage Tuscan styles, brass and matte black accents rather than warm terracotta.
Opt for minimal single-fruit displays rather than abundance arrangements. Choose one or two statement pieces rather than a fully themed approach.
What’s the most versatile citrus for decor?
Lemons, without question. They work in every season, every room, and every aesthetic from rustic farmhouse to modern minimalist. They’re also the easiest to source — a $5 bag of lemons from any grocery store is the lowest-barrier citrus decor move you can make, and it works immediately.
How do I avoid looking dated with citrus decor?
Use citrus as accent (20 to 30% of visual weight), not as a theme (60%+). Mix with neutral foundations — white, cream, natural wood.
Choose modern interpretations of classic motifs: graphic prints over ornate Tuscan styles, clean ceramic shapes over heavily embellished pottery. Add contemporary grounding elements like brass hardware or matte black fixtures to anchor the warmth.
And always pair citrus with greenery — it immediately shifts the arrangement from decorative cliché to something that looks genuinely intentional.
Where to Start
The best entry point depends on your room and your style. For kitchens, start with a bowl of lemons on the counter — it’s the easiest, most natural fit and requires no commitment.
For dining rooms, start with a mixed citrus centerpiece for your next gathering and see how you feel about it before investing in permanent pieces.
For living rooms, start with framed citrus art — a single print is low-cost and reversible. For bathrooms, a citrus-print shower curtain or set of towels can transform the room for under $50.
The consistent principle across all rooms: let one strong element anchor the space, pair it with neutrals and greenery, and resist the impulse to add more.
Related Articles
The Ultimate Guide to Lemon Decor — kitchen, table, wedding, and DIY lemon decor overview.
Lemon Kitchen Decor — complete kitchen styling guide with product recommendations.
Lemon Table Decor — full dining table styling guide for everyday and special occasions.
Lemon Wedding Decor — wedding-specific citrus styling guide.
Citrus Wedding Theme — multi-citrus wedding styling beyond just lemons.

Bathrooms are honestly one of the easiest rooms to give a personality makeover — they’re small, they’re full of swappable accessories, and a pop of yellow goes a surprisingly long way. A lemon-themed bathroom doesn’t require a renovation or even a big shopping trip. You can pull off a solid refresh for under $50 in a weekend, and if you change your mind, nothing is permanent. These ten ideas run the gamut from a single $15 swap to a full room transformation, with rough costs and practical tips for each.
Quick Answer: Lemon bathroom decor is really about layering yellow and white — towels, a shower curtain, a bath mat — with a few lemon-print accessories like a soap dispenser or toothbrush holder. Throw in some framed art and a sprig of eucalyptus and you’re done. White walls and natural textures (wood, jute) make it all look intentional. A basic refresh runs $30-60; a full themed bathroom is more like $100-200.
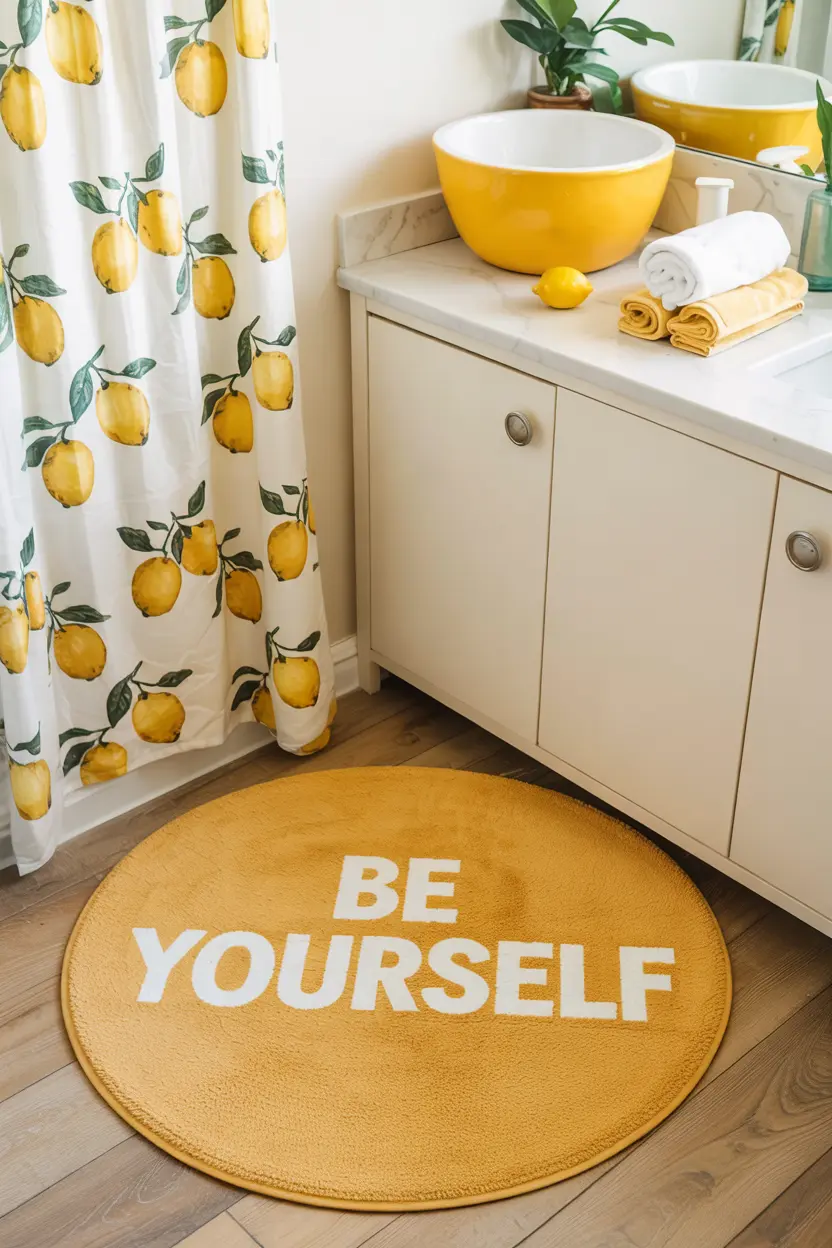
1. The Lemon Shower Curtain
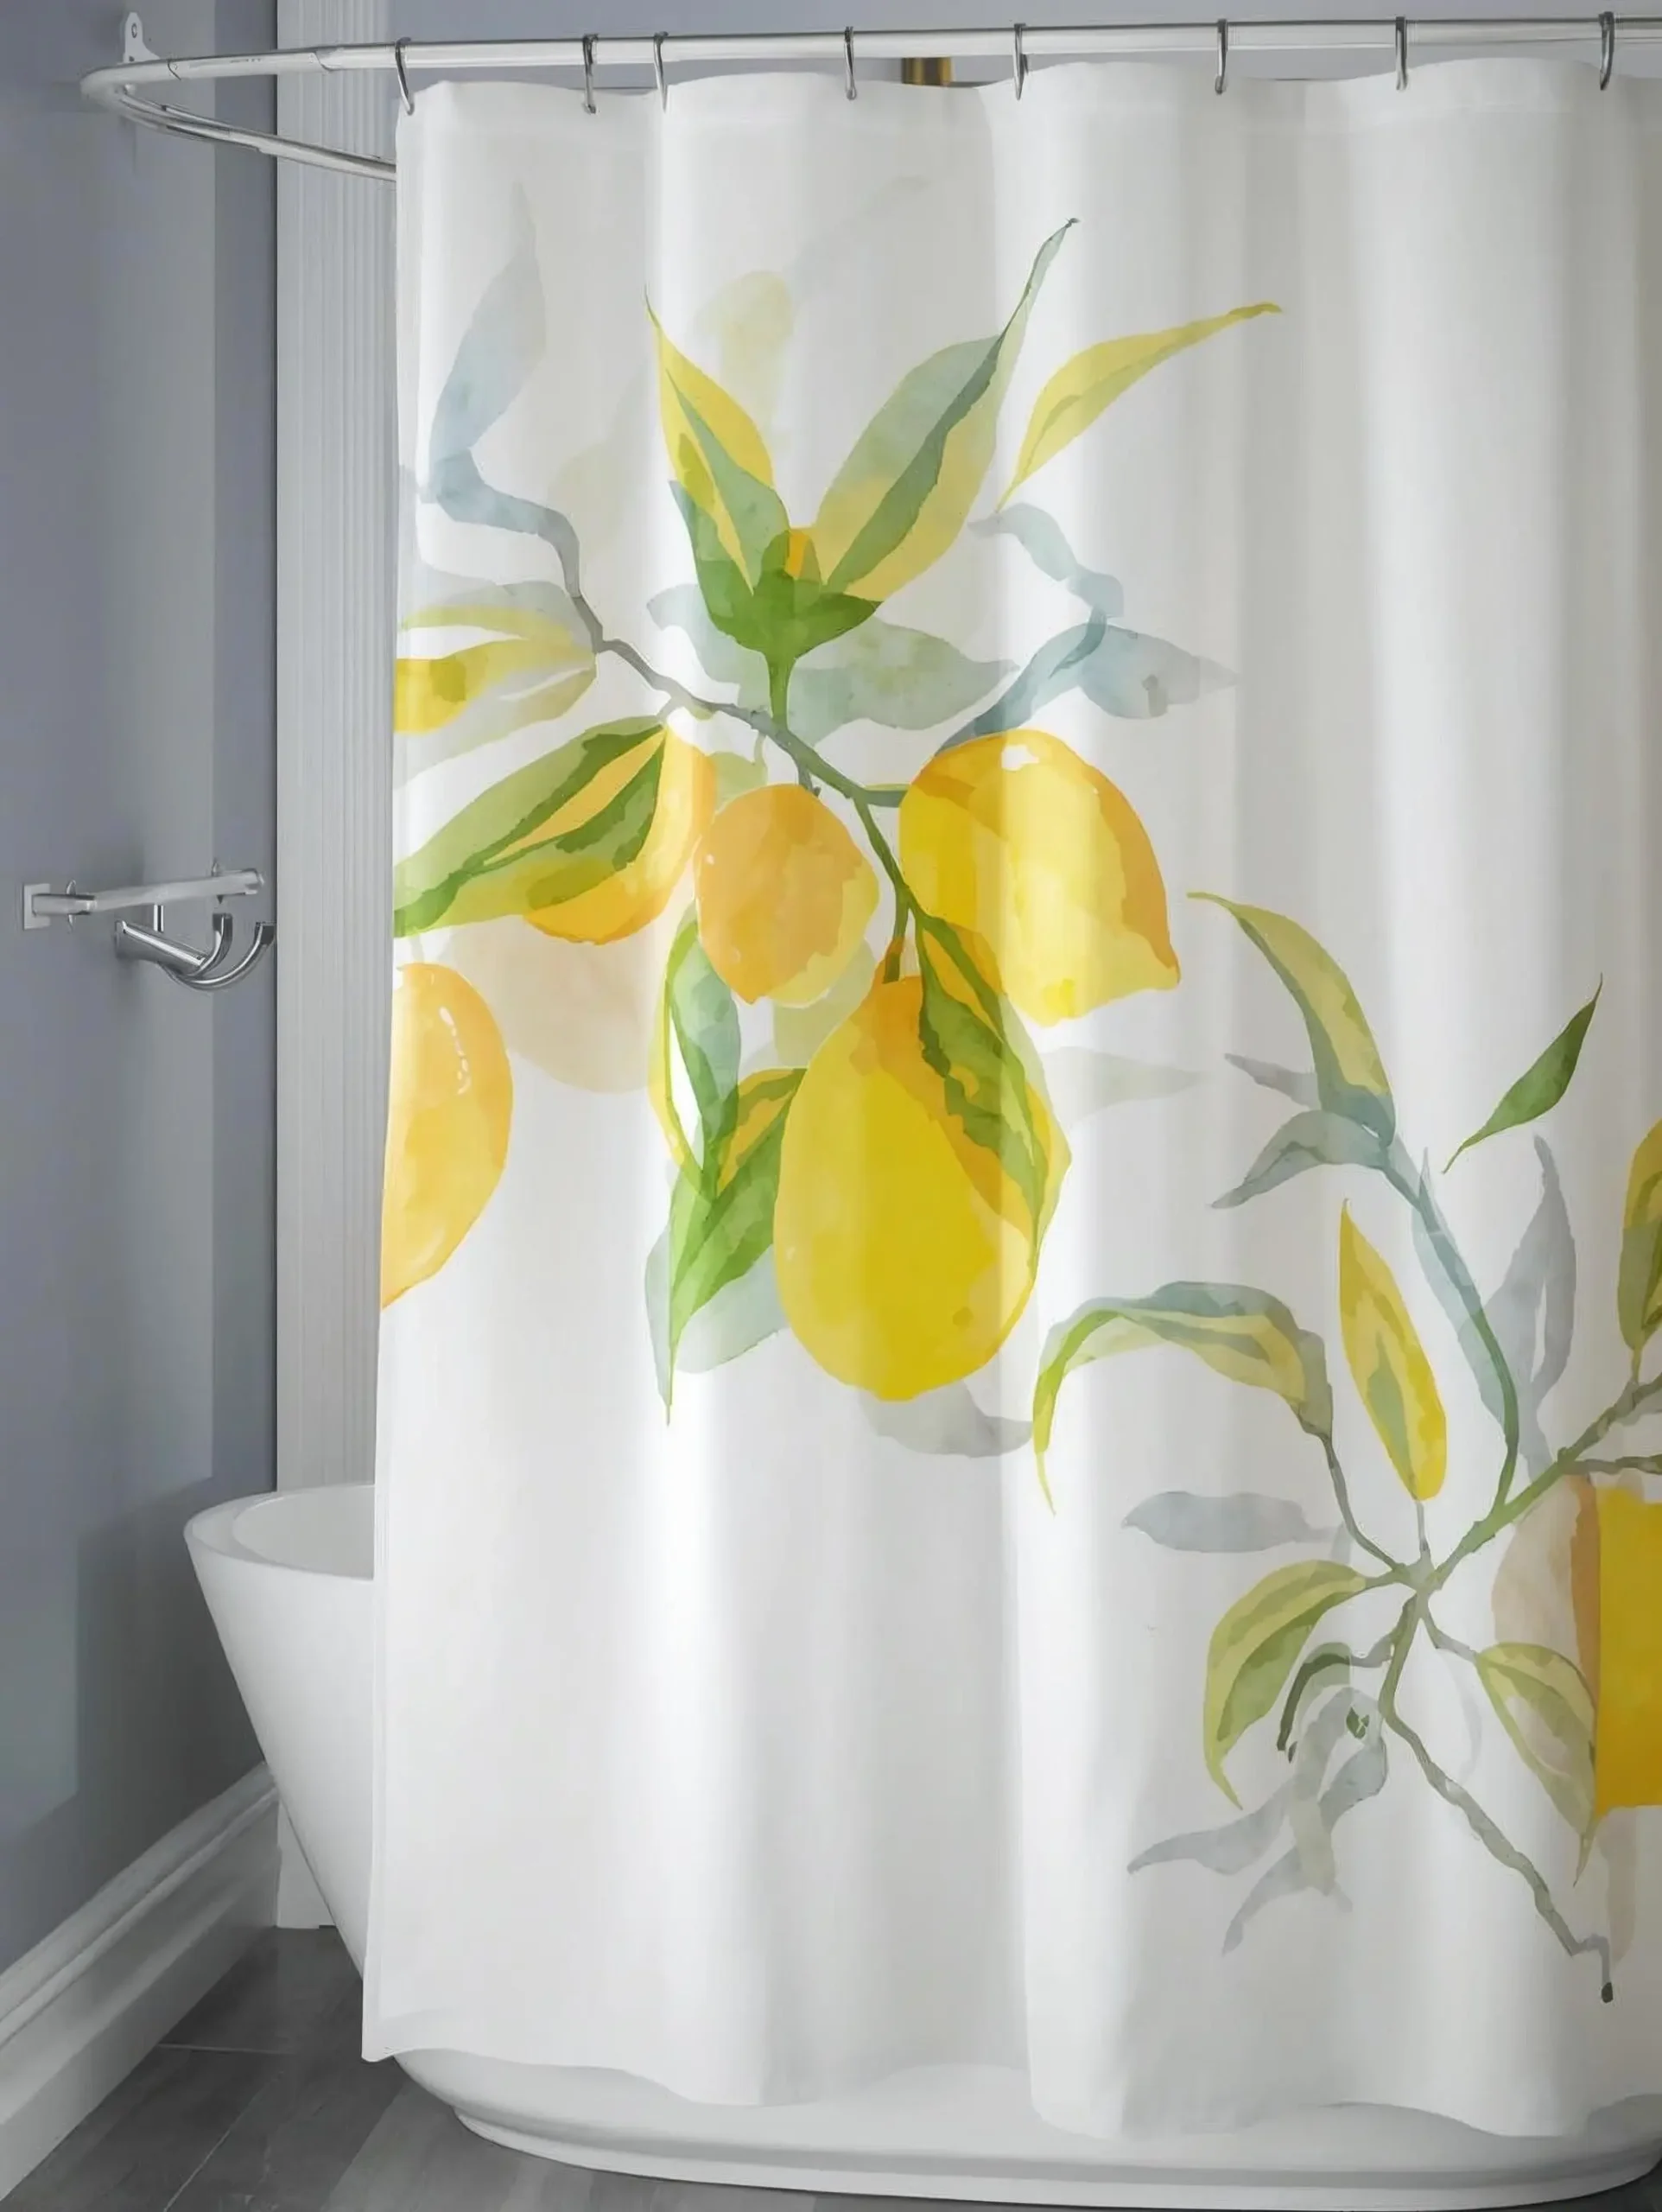
If you only do one thing, do this. Swapping out a plain shower curtain for a lemon print or yellow-and-white stripe makes an immediate difference — it’s the first thing anyone notices when they walk in. You’ll find two main styles: watercolor lemon prints (softer, feels more like art) and graphic prints (bolder and more playful). Either way, expect to spend $20-40 for something that doesn’t look cheap. See options on Amazon
Pro Tip: Look for curtains where the lemon print extends all the way to the hem. Designs that fade out halfway down always look a bit unfinished — and they don’t photograph well either. Check the customer photos in reviews before buying; they’ll show you what it actually looks like hung up.
2. Yellow and White Striped Bath Towels
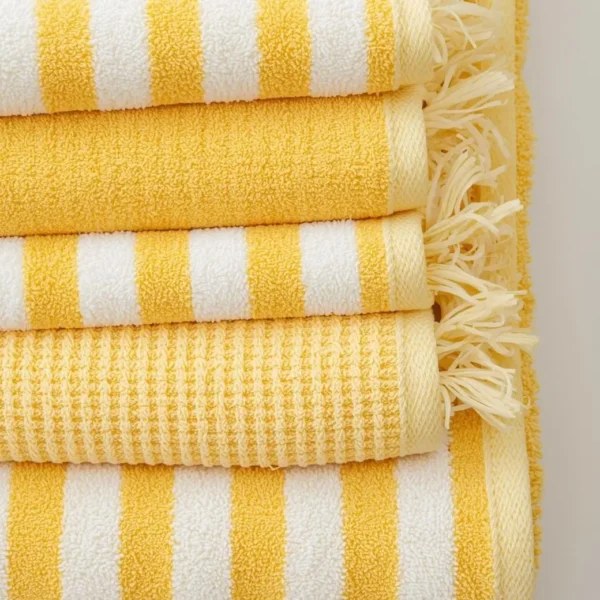
Swap your neutral towels for a set of 4-6 in yellow-and-white stripes or a soft solid yellow. Stick with 100% cotton — it’s more absorbent and holds up better after washing. A full set runs $30-60. Keep two hand towels and two bath towels on display; the rest can live in a cabinet.
3. Lemon-Print Bath Mat
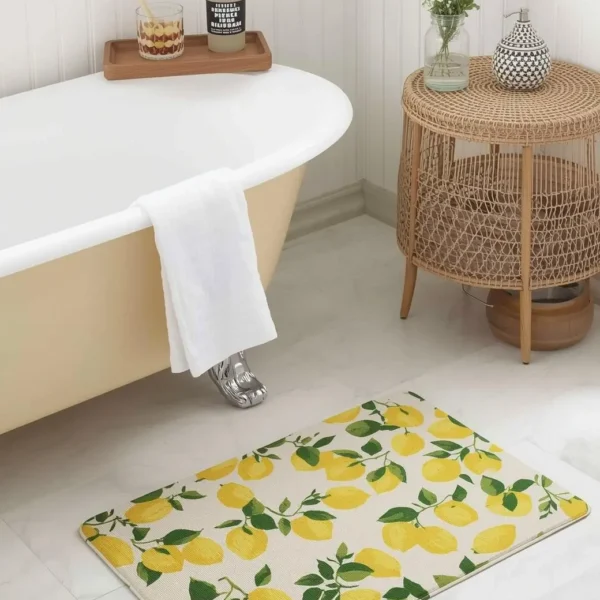
A lemon-print or yellow-and-white bath mat ties the floor into the rest of the room. Go for washable cotton over rubber-backed options — it’s easier to clean and tends to last longer. For a standard 24×36 inch mat, you’re looking at $20-40.
4. Ceramic Soap Dispenser
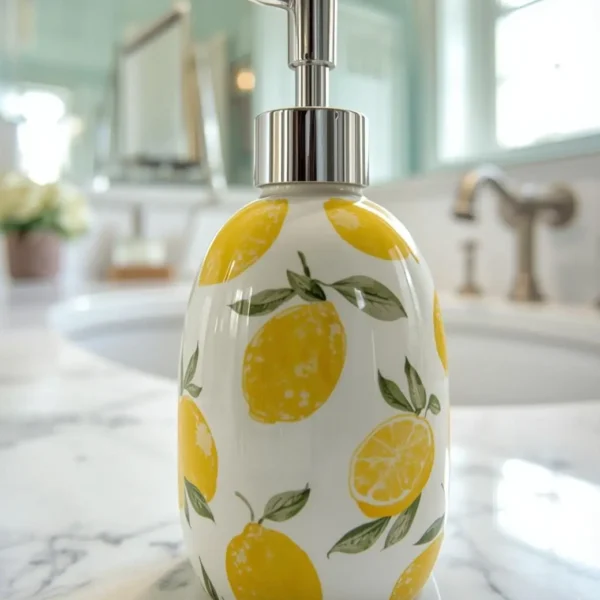
Ditching the plastic pump bottle for a ceramic soap dispenser is one of those small swaps that makes a bathroom feel like it belongs to an adult. Look for lemon motifs, yellow-and-white patterns, or simple white with a painted lemon detail. Refill it with bulk hand soap and you’ll never have to look at a branded bottle again. Quality ceramic dispensers run $15-30.
Worth the Splurge: Handpainted lemon motifs in the Italian majolica style look far more elevated than printed designs, and they age well. Expect to pay $25-45 on Etsy or at specialty home stores — but they genuinely read as a design piece, not just a bathroom accessory.
5. Coordinated Bath Accessories Set
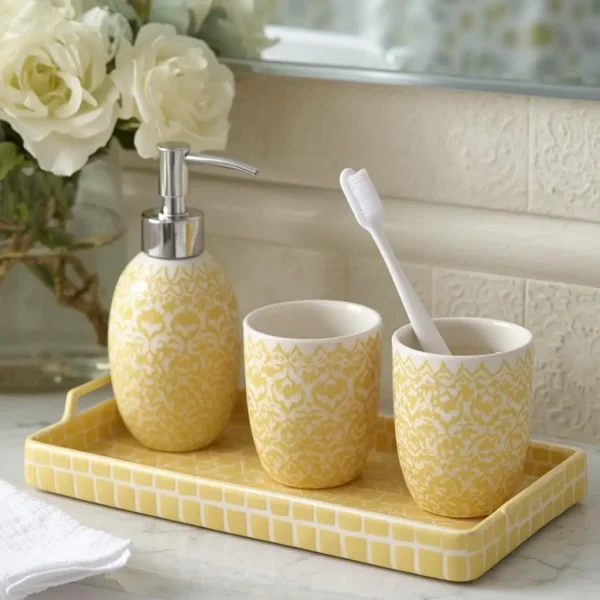
There’s something about a matching set — soap dispenser, toothbrush holder, tumbler, tray — that makes a bathroom counter look pulled together instead of random. Look for sets in coordinating ceramics or yellow-and-white patterns. You can find decent sets on Amazon for $40-80, and the cohesion is worth more than the sum of the parts.
6. Framed Lemon Art
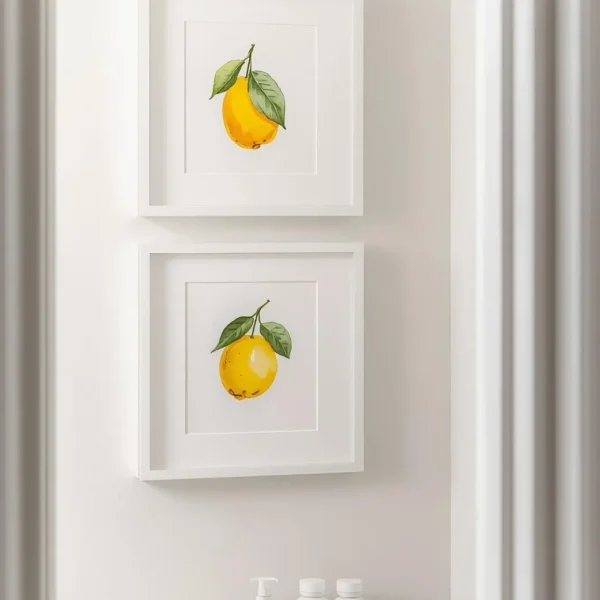
Two or three small framed lemon prints on the wall — above the toilet, along a narrow wall, or grouped near the vanity — add personality without taking up counter space. Watercolor lemon prints in white frames work with almost any bathroom style. Target and HomeGoods usually have options for $15-30 each; Etsy artists typically charge $25-60 for something more original. Skip digital prints — they tend to look flat and a bit clinical in person.
7. Lemon-Scented Candles or Diffusers

This is the one that actually changes how the room feels. A lemon, lemon-verbena, or Italian-summer candle reinforces the whole theme beyond just the visual. Set it on the back of the toilet, the vanity, or a windowsill. Budget $15-35 for something from a decent brand. One note: avoid candles in fluorescent yellow wax — they look cheap. Pale yellow, white, or clear glass jars are the move.
8. Live or Faux Greenery
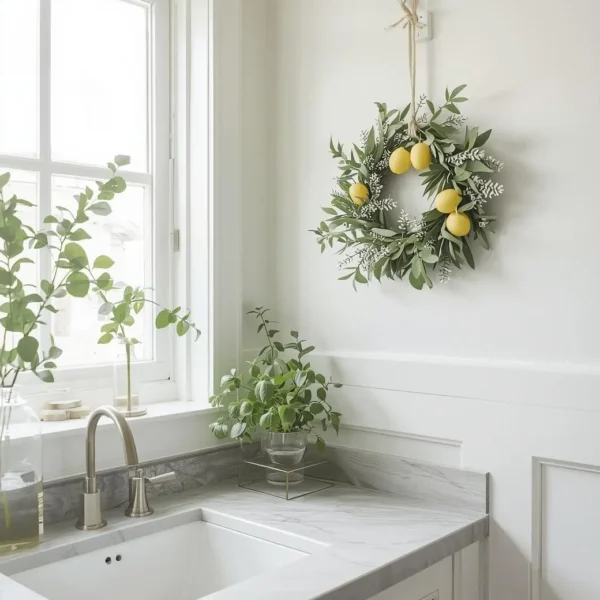
Greenery is what keeps a lemon bathroom from feeling like a prop room. Without it, all those yellow accents start to look artificial. A few options that actually work:
- A small eucalyptus stem in a vase by the sink — replace it weekly and it stays fragrant
- A basil or mint plant on a windowsill, if you have natural light
- Faux eucalyptus in a small pot if you’d rather not deal with maintenance
Bonus: Tie 3-4 fresh eucalyptus stems with twine and hang them from your showerhead. The steam releases the fragrance every time you shower. It lasts one to two weeks and makes your bathroom smell genuinely lovely.
9. Yellow and White Storage Baskets
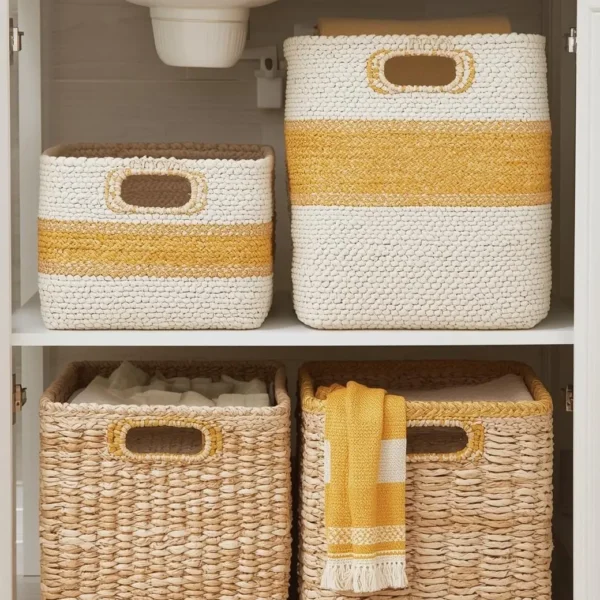
Swap plastic bins under the sink or on shelves for woven baskets in natural materials — look for ones with yellow stripes or yellow-trimmed white. They add warmth and texture that plastic just can’t. Around $15-30 per basket, and they work for towels, toiletries, or just display.
10. The Wallpaper Refresh

For the full commitment: lemon-print or yellow-and-white striped wallpaper on one accent wall. The area behind the vanity is usually the best spot for this. In a small powder room, you can go all four walls without it feeling overwhelming. Removable peel-and-stick wallpaper makes this essentially risk-free — it comes off cleanly and doesn’t damage the wall. Most bathrooms need 1-3 rolls at $30-80 each.
Good News for Renters: Removable wallpaper has gotten genuinely good in the last few years. Quality peel-and-stick now runs $35-60 per roll, looks nearly identical to traditional wallpaper, and peels off without leaving a mess. It’s the easiest way to make a rented bathroom feel like yours.
Lemon Bathroom by Budget
$30 Refresh
- Set of 2 yellow-striped hand towels: $20
- Single ceramic soap dispenser: $15
- Small bunch of fresh eucalyptus: $5
$75 Refresh
- Lemon shower curtain: $30
- Set of yellow-striped towels (4 piece): $40
- Ceramic soap dispenser: $20
- Single framed lemon print: $15
$200+ Full Theme
- Lemon shower curtain: $35
- Coordinated bath accessory set: $50
- Set of 6 yellow-striped towels: $60
- Lemon-print bath mat: $30
- 3 framed lemon prints: $50
- Lemon-scented candles (3): $35
- Faux eucalyptus arrangement: $15
- Removable wallpaper accent wall: $35
Lemon Bathroom Color Palettes
- Yellow + White — the classic. Works against any tile color, in any bathroom style
- Yellow + White + Sage Green — feels Mediterranean, especially nice with white tile and modern fixtures
- Yellow + Navy + White — coastal Italian. Works best in bathrooms with darker or matte fixtures
- Yellow + Brass + White — warm and a little sophisticated. Perfect with brass or gold hardware
Mistakes Worth Avoiding
- Painting the walls yellow. It’s hard to walk back and tips quickly into feeling dated. Keep yellow in the accessories.
- Mixing too many lemon styles. Realistic painted lemons in your art and cartoon lemon prints on your towels cancel each other out. Pick one register and stick with it.
- Skipping the greenery. Lemons alone look artificial. Plants or eucalyptus make everything feel deliberate and natural rather than themed.
- Overdoing it in a small bathroom. Three or four lemon elements is the limit in a small space. More than that and it starts to feel like a gift shop.
Frequently Asked Questions
Will lemon bathroom decor go out of style?
Lemon decor has been showing up in bathrooms for over 30 years — it’s not going anywhere. The current approach is different from the 1990s version, which committed to yellow walls and tile. Today’s lemon bathrooms use yellow as an accent against a neutral base, which means they can be easily refreshed over time without a full redo. That’s what makes them actually sustainable as a design choice.
How do I make it work in a small bathroom?
Pick three elements and stop there: a shower curtain (or bath mat), a set of towels, and one wall or counter accent. In a small space, less is always more — the compact size amplifies everything you add, so restraint reads as styled rather than sparse.
What about a powder room or half-bath?
Powder rooms are actually the best place to commit fully to a theme. They’re small enough that bold wallpaper and full themed accessories feel fun rather than overwhelming. And since powder rooms are usually the ones guests use, a themed design there gets seen far more often than anything you do in a private bathroom.
What’s the easiest place to start?
A set of yellow-striped hand towels and a fresh eucalyptus stem in a small vase — total cost under $25. It’s a dramatic enough change that you’ll know immediately whether you like the direction, and if you don’t, you’ve lost almost nothing.
Start Small, Build Slowly
If you’re just getting started with lemon bathroom decor, try the $30 refresh first — towels, a soap dispenser, some eucalyptus — and live with it for two weeks before adding anything else. Building gradually means you can adjust what isn’t working before you’ve committed too much money. The lemon bathrooms that look the most effortlessly styled are usually the ones that were built up piece by piece over time.
Related Articles
- The Ultimate Guide to Lemon Decor: https://stylicia.com/lemon-decor — kitchen, table, wedding, DIY overview.
- Lemon Kitchen Decor: https://stylicia.com/lemon-kitchen-decor — extending the bathroom theme to the kitchen.
- Citrus Decor: https://stylicia.com/citrus-decor — broader citrus aesthetic across home.

This lemon garland DIY is one of those projects that works almost anywhere — draped across a mantel, running down the center of a dining table, framing a doorway, or wound up a stairway railing, it instantly brings that warm Italian summer feel to any space.
Pre-made versions can run $40–100 on Etsy or Amazon, but making your own takes about 30 minutes and costs roughly half. The key is starting with a good faux greenery base and wiring the lemons at the right spacing. This guide covers three garland styles — table runner, mantel, and doorway — with a specific supply list for each.
Quick Answer: To make a lemon garland, start with a 6-foot faux eucalyptus or olive branch garland as the base, then wire 15-25 faux lemons evenly along its length using floral wire. For mantel and doorway garlands, add hanging hardware (Command hooks or small finishing nails). Total time: 25-30 minutes. Total cost: $35-50 in supplies. Each garland is reusable for years and stores flat in a long bin.
Where to Use This Lemon Garland DIY
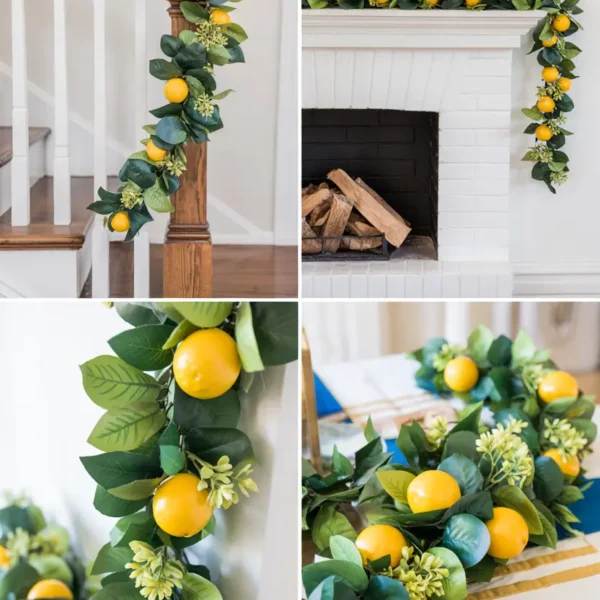
Lemon garlands are more versatile than most people expect. Here are the most popular spots to use them:
- Dining table runner — down the center of a long farmhouse table, with lemons scattered between the greenery
- Fireplace mantel — draped across the mantel with both sides hanging slightly down. Most photographed placement.
- Doorway frame — framing the top and sides of a doorway, especially for summer parties
- Stairway banister — wound around the banister rail for stair-heavy houses or wedding venues
- Above kitchen window — particularly above kitchen sinks or breakfast nook windows
- Wedding ceremony arch — as the primary structure on a copper or wood arch frame
Supplies You’ll Need
Base Greenery Garland

The greenery base is the foundation of the whole garland, so it’s worth spending a little extra here. Cheap wire-and-leaf garlands tend to look obviously artificial — the key is finding something that has real density and color variation. Look for:
- 6-foot length minimum (most spaces need 6 feet; you can always trim shorter)
- Realistic colors — sage or silver-green eucalyptus, deep green olive
- “Real-touch” or “premium” descriptions in product titles
- Reviews mentioning fullness — thin garlands need supplementing with more stems
Budget tip: A quality 6-foot faux eucalyptus garland runs $20-30 on Amazon. Premium versions ($35-50) have noticeably better leaf shapes and color variation. For a single garland, splurge on premium; for multiple garlands, mid-range works fine.
Faux Lemons

For the lemons, quality matters just as much as the greenery. The difference between a good and a bad faux lemon is obvious up close, so look for:
- Real-touch or weighted faux lemons (not hollow plastic)
- 12-15 lemons for a 6-foot garland; 18-25 for a fuller look
- Slightly varied yellow tones for realism
Tools and Hardware
- Floral wire (22-24 gauge, $4-6) — for attaching lemons
- Wire cutters or scissors
- Optional: hot glue gun (for permanent attachment)
- Hanging hardware: Command hooks (3-4) for mantels, finishing nails or hooks for doorways
- Optional: ribbon for accent points
Style 1: The Table Runner Garland
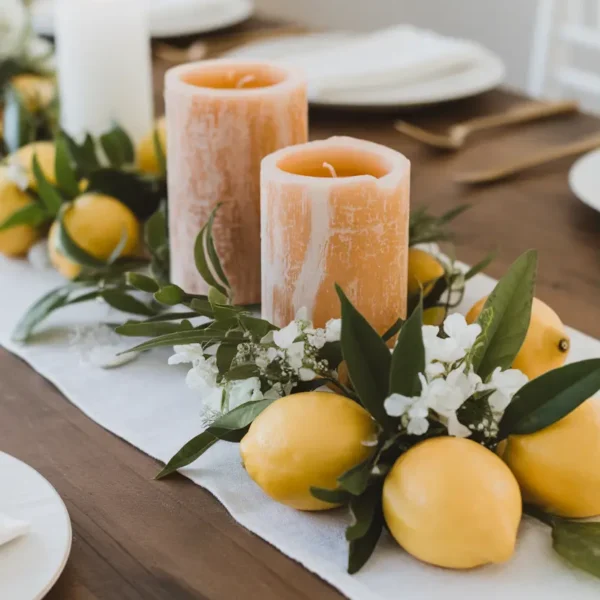
Best for: dining tables, kitchen counters, buffets. Lays flat without hanging requirements.
How to make it
- Lay the eucalyptus garland flat on a clean work surface.
- Position lemons evenly along the garland’s length — about every 4-5 inches. For a 6-foot garland, you’ll use 14-18 lemons.
- Wire each lemon to the garland: cut a 4-inch piece of floral wire, wrap it around the lemon’s stem (or pierce through the soft top), then twist the ends around the garland’s main stem to secure.
- Tuck additional eucalyptus stems between the lemons if the garland looks sparse.
- Position on the table center.
Pro Tip: For table runners, vary the lemon angles slightly so they’re not all facing up. Tilt some toward the diners on each side, some toward the table ends. The variation reads more natural and photographs better than uniform placement.
Style 2: The Mantel Garland
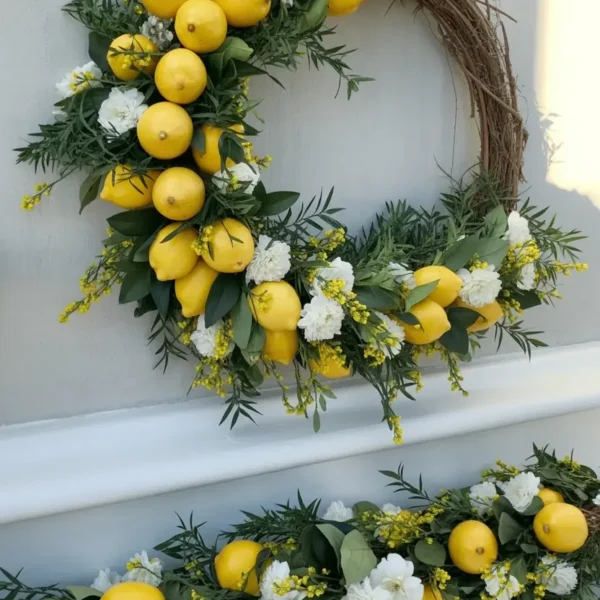
Best for: fireplace mantels, console tables with wall behind, anywhere with a flat horizontal surface that has wall above and visible space below.
How to make it
- Make the garland following Style 1’s steps, but use a longer base (8-9 feet for most mantels — measure your mantel and add 18-24 inches for the side drapes).
- Position 3 Command hooks evenly across the underside of the mantel: one at center, one near each end.
- Drape the garland across the mantel: center the middle, let both ends hang down 12-18 inches on either side.
- Use small twist ties or floral wire to secure the garland to the Command hooks at hidden points.
- Add 2-3 more lemons specifically at the draped corners (where the garland turns from horizontal to vertical) — this is where the visual emphasis lives.
- Add 1-2 white candles or small accents on the mantel surface itself for vertical visual variety.
Style 3: The Doorway Garland

Best for: front doors, archways between rooms, wedding ceremony entrances. Frames the negative space of the doorway.
How to make it
- Measure the doorway’s perimeter (top + both sides). Most standard doorways need 9-10 feet of garland.
- Make the full garland following Style 1’s steps.
- Position 4-5 small hooks or finishing nails along the doorway frame: one at each top corner, one in the middle of the top, one at the middle of each side.
- Drape the garland: start at one bottom side, run up to the top corner, across the top, down the other side. Secure to each hook with floral wire.
- Adjust drape so the garland hangs slightly loose between hooks — strict tension reads less natural than gentle waves.
- Add a 2-3 lemon cluster at the top center as a focal point.
Our Pick: For doorway garlands, removable Command hooks designed for outdoor use (around $5 for a pack) work better than nails. They support the weight, leave no holes, and remove cleanly when you take the garland down. The outdoor versions hold up to weather and humidity changes.
Common Variations
Lemon + Olive Branch Garland
Swap the eucalyptus base for an olive branch garland to get a more rustic, Italian countryside look. The construction process is identical — it just gives a slightly different feel with the softer, gray-green leaves.
Lemon + Mixed Greenery Garland
For a fuller, more layered look, combine eucalyptus, olive branch, and small fern garland as a base. Wire all three together at multiple points before adding the lemons. It costs more ($60–80 in supplies total) but the result looks noticeably richer and more professional.
Lemon + Flower Garland
Tuck small faux white roses or hydrangeas between the lemons — roughly every third or fourth lemon, swap in a flower instead. It gives the garland a softer, more romantic look and works really well for bridal showers and weddings.
Mini Lemon Garland
For smaller spots — a single shelf, a bathroom mirror frame, a kitchen windowsill — scale the whole thing down. Use a 3-foot eucalyptus garland with 6–8 small faux lemons. The technique is exactly the same, just smaller. Total cost comes to around $20–25.
Care, Storage, and Reuse
Storing Between Uses
When you’re done with the garland, roll it loosely — don’t coil it tightly, as that can permanently bend the wire stems. Place it in a long flat plastic bin or a large zip bag and store it flat: under a bed, on a top closet shelf, or in a dry basement all work well. The main thing to avoid is direct sunlight, which fades both the greenery and the lemon color over time.
Reusing for Different Occasions
One of the best things about a faux lemon garland is that you can pull it out for event after event — a summer dinner party, a backyard barbecue, a bridal shower. To refresh the look between uses, tuck in small seasonal accents: a few small flags for a patriotic celebration, ribbon in wedding colors for a shower, or simple white candles for an evening dinner.
Maintenance
After each use, give the garland a gentle shake to knock off any dust, then wipe down the lemons with a damp cloth if needed. Check whether any lemons have come loose and reattach them with fresh floral wire or a small dot of hot glue. If a lemon has a chipped or scuffed spot, a little yellow craft paint on a fine brush fixes it quickly. Most garlands don’t need much upkeep — a quick once-over before putting it away is usually enough.
Common Mistakes
- Skimping on the base garland. A thin or flat-looking base undermines everything else. The greenery is the foundation of the whole project, so it’s worth spending a little more here than on the lemons.
- Spacing lemons too uniformly. Even spacing looks fake. Vary the gaps slightly — 4 inches in some places, 6 in others — and the garland will feel much more natural.
- Positioning all lemons at the same angle. Real lemons on a branch face every which way. Rotate yours at different angles as you wire them on — it makes a noticeable difference.
- Insufficient hanging hardware. Garlands sag in the middle if hooks are spaced too far apart. Use 3 hooks minimum for a mantel, 4-5 for a doorway.
Frequently Asked Questions
Can I use real lemons in a garland?
Not recommended for anything that needs to hang or last more than a day. Real lemons are heavy enough to drag a garland down, and they start to wilt and bruise within one to two weeks. For a single-day event — a dinner or a shower — real lemons can work in a flat tabletop runner if you handle them carefully. For anything else, faux is the better choice.
How long does a DIY lemon garland last?
Indoors, expect 3–4 years before you notice significant fading. Outdoors, direct sun will fade it in 1–2 years, while a shaded porch or covered area can stretch that to 3 or more. How you store it between uses makes a big difference — a garland that’s put away properly lasts two to three times longer than one that’s left up year-round or stored carelessly.
How do I make a longer garland for a longer table?
For a table longer than 6 feet, just connect two 6-foot garlands end to end. Overlap the ends by about 6–8 inches and twist them together with floral wire, then hide the join under a few extra greenery sprigs or a cluster of lemons. You can also find 9-foot or 12-foot garland bases on Amazon if you’d rather buy a single longer base from the start — it costs a bit more upfront but saves the joining step.
Can I make a garland with both lemons and oranges?
Absolutely — a mixed citrus garland looks more colorful and feels at home anywhere from fall through early summer. Try a ratio of about 60% lemons to 40% oranges, distributed evenly along the garland. If you can find small clementines or kumquats, adding a few gives you some nice size variation. It’s a great option when you want something that isn’t quite so tied to a single season.
Try the Mantel Version First
If this is your first garland, start with the mantel version. It’s the most forgiving — any uneven drape gets hidden by the wall behind it. It also photographs beautifully and can be reused for everything from a summer party to a holiday gathering with just a few seasonal swaps. Once you’ve made one, the table and doorway versions feel much easier.
The whole lemon garland DIY project is quicker than most people expect, and the result looks like a lot more work went into it than actually did. For inspiration on different lemon decor styles, Better Homes & Gardens has a great overview of summer decorating ideas worth browsing.
Related Articles
- Lemon Wreath DIY: https://stylicia.com/lemon-wreath-diy — companion DIY for doors and walls.
- Lemon Table Decor: https://stylicia.com/lemon-table-decor — full guide to lemon tablescapes.
- The Ultimate Guide to Lemon Decor: https://stylicia.com/lemon-decor — kitchen, table, wedding, DIY overview.
- Citrus Decor: https://stylicia.com/citrus-decor — broader citrus aesthetic across home.

The lemon bridal shower has become one of the most-pinned bridal shower themes for a reason: it’s bright, photogenic, scales easily from a small backyard gathering to a venue rental, and lets the bride preview the lemon aesthetic before committing to it for the wedding.
The ‘main squeeze’ theme has helped push it into mainstream popularity, with phrases like ‘She Found Her Main Squeeze’ showing up on banners, cookies, and napkins. This complete guide walks through every part of planning a lemon bridal shower — from decor and food to games, favors, and budget — with shopping lists for each section.
Quick Answer: A lemon bridal shower combines yellow-and-white striped linens, a tiered cake stand centerpiece stacked with lemons, a ‘main squeeze’ or ‘citrus and soulmates’ banner, lemon-themed dessert table (lemon bars, lemon cookies, lemonade), and lemon-themed favors (limoncello mini bottles or lemon soaps). Total cost: $200-400 for 15-20 guests, $500-900 for 30-50 guests. Most popular venue: backyard or family member’s home.
Picking Your Lemon Shower Style

Before buying decor, decide on one of three style directions. Each takes the same base elements (lemons, white, yellow) in different directions:
- “Main Squeeze” — playful and modern. Heavy use of the citrus pun, bright colors, casual atmosphere. Best for younger brides and casual showers.
- Italian Garden — sophisticated and Mediterranean. Olive branches and lemons together, terracotta accents, more grown-up feel. Best for older brides or formal showers.
- Vintage Lemon Grove — soft and romantic. Watercolor lemons, cream linens, dried florals, hand-lettered signage. Best for showers leaning into spring and feminine touches.
Decor Essentials
The Welcome Sign
First piece of decor guests see. A hand-lettered or printed welcome sign on an easel with the bride’s name, propped near the entrance. Add a small lemon-and-eucalyptus arrangement at the base to extend the theme.
The Banner
The visual anchor of the shower. Phrases that work well:
- ‘She Found Her Main Squeeze’ (most popular)
- ‘Citrus & Soulmates’
- ‘Bridal Shower’ with bride’s name and lemon graphics
- ‘Love is Sweet — and a Little Tart’
- ‘Squeeze the Day’
Pro Tip: Avoid hanging banners directly against a busy wall — the message gets lost. Hang against a clear backdrop (white wall, smooth fabric backdrop, or a flat solid-color surface) for the most photogenic result.
Centerpieces

For most showers, a single statement centerpiece on the main dining or buffet table works better than multiple small ones. Three options:
- Tiered cake stand — stacked with lemons on each tier, eucalyptus tucked between. Most popular shower centerpiece.
- Wooden bowl with lemons and roses — low and rustic. Best for Italian Garden style.
- Glass cylinder vase — filled with lemons and topped with white roses. Most versatile.
Tablescape

Yellow-and-white striped runner over white linen tablecloth, white plates, yellow linen napkins (or lemon-print paper napkins for casual showers), small lemon and a sprig of rosemary at each setting. Add taper candles in brass holders for evening showers.
Photo Backdrop
A dedicated photo area dramatically increases social media engagement. Three approaches:
- Hanging garland ‘curtain’ of eucalyptus and lemons against a flat wall
- Wooden lattice with greenery and lemons
- Banner backdrop with name + small props table for hats, sunglasses, and signs
The Dessert Table

Arguably the most important visual element of a lemon shower — and the most photographed. Build it on a separate table from the main food, with vertical height variation (cake stands at different heights, books or risers under platters) to create visual interest.
Must-Have Dessert Items
- Lemon bars (cut into small squares, displayed on a white platter)
- Lemon sugar cookies (decorated with white royal icing in lemon shapes or initials)
- Lemon bundt cake or pound cake
- Lemon meringue tartlets
- Mini lemon cupcakes with cream cheese frosting
- Lemon macarons (if budget allows — most premium item)
- A central cake (lemon-flavored, decorated with edible flowers and lemon slices)
Drink Station

Position near the dessert table or as its own focal point:
- Pitcher of fresh lemonade with sliced lemons floating
- Limoncello cocktail or limoncello spritz station
- Lemon water with mint and cucumber for non-drinkers
- Coffee/tea station with lemon shortbread on the side
Our Pick: For the lemonade pitcher, a clear glass dispenser with a spigot (1-2 gallon capacity) is far more functional than a regular pitcher for showers — guests can refill themselves without help, and it photographs beautifully on the dessert table. Around $30-50 on Amazon.
Food Beyond Desserts
If the shower is around mealtime, you’ll need real food. Lemon-themed options that work for showers:
- Brunch shower — lemon ricotta pancakes, frittata with lemon zest, lemon poppyseed muffins, mimosas with lemon
- Lunch shower — lemon orzo salad, lemon chicken pasta salad, antipasti platter, fresh bread with olive oil
- Afternoon tea shower — tea sandwiches, scones with lemon curd, lemon tarts, mini quiches
- Cocktail shower — antipasti spreads, mini caprese skewers, marinated olives, charcuterie with lemon-themed labels
Games and Activities
Lemon shower games stay light and inclusive:
- ‘Famous Couples’ trivia — guess famous couple names from clues. Adapt to favorite couples of the bride.
- ‘How well do you know the bride?’ — questions about the bride’s favorites, with the bride answering separately. Compare to see who knows her best.
- Lemonade tasting — set up 4-5 different lemonade or limoncello variations and have guests vote on favorites.
- Recipe card station — guests write their favorite easy recipes on cards for the bride to take home as a starter cookbook.
- Advice cards — guests write marriage advice on small cards (lemon-themed cards available on Etsy) that the bride opens later.
Favor Ideas

Favors guests will actually use, ranked by popularity at lemon showers:
- Mini limoncello bottles — the most popular. With custom ‘thanks for celebrating’ or ‘main squeeze’ labels. $4-8 per bottle in bulk.
- Lemon soap or lemon body scrub — small jars or bars wrapped with twine and a lemon graphic tag. $5-10 each.
- Mini jars of lemon curd or lemon honey — homemade or sourced from local producers. $4-7 each.
- Lemon tea sachets — small bag of premium loose lemon tea with a wood scoop. $3-6 each.
- Lemon-shaped sugar cookies — individually wrapped with the bride’s name or wedding date. $3-5 each from local bakers.
Budget Breakdown
Three shower scenarios with realistic budgets, including decor, food, and favors but excluding venue rental:
- Intimate (10-15 guests) — $300-500 total. Hosted at home, simple decor, brunch food, mini limoncello favors.
- Mid-size (20-30 guests) — $700-1,200 total. Hosted at home or small venue, full decor including dessert table, lunch service, multiple favor options.
- Large (40-50 guests) — $1,500-2,500 total. Venue rental, professional dessert table, full catering, photographer, professional decor.
Budget Pick: The single biggest variable in shower budget is whether you DIY the dessert table or order from a professional bakery. Professional dessert tables for 30 guests run $400-800; DIY costs $150-250 in ingredients but requires significant time. Choose based on the host’s available time and baking skill.
Shopping List for a 25-Guest Shower
Everything needed for a mid-size lemon bridal shower, with approximate Amazon costs:
- White tablecloth (60×102″): $25-35
- Yellow-and-white striped runner: $20
- Set of 25 yellow linen napkins: $50-70
- ‘Main Squeeze’ banner (Etsy): $25-40
- Welcome sign on easel (Etsy): $50-80
- 3-tier cake stand: $30-45
- Glass dispenser with spigot for lemonade: $35
- Faux lemons (24 pack): $35-50
- Real lemons (15-20 for fresh display): $10-15
- Eucalyptus stems (real or faux): $20-30
- White roses for centerpiece: $25-35
- 25 mini limoncello favor bottles: $100-150
- Custom favor tags and twine: $15-20
Decor and favor subtotal: $440-625. Food cost separate.
Day-of Timeline
How a typical lemon bridal shower flows:
- 60 minutes before guests: final decor adjustments, drinks ready
- Guest arrival window (30 mins): drinks and appetizers, mingling
- Welcome and seating (15 mins): brief welcome, optional opening toast
- Meal service (45-60 mins): brunch/lunch/tea served
- Games (30-45 mins): 2-3 activities, prizes optional
- Dessert and gift opening (45-60 mins): bride opens gifts as guests enjoy desserts
- Photo opportunities and farewell (30 mins): group photos, individual photos with bride, favor distribution
Total runtime: 3.5-4.5 hours. Plan accordingly when sending invitations.
Frequently Asked Questions
How far in advance should I plan a lemon bridal shower?
Start planning 8-12 weeks before the shower date. Send invitations 4-6 weeks ahead. Order custom items (banner, signage, favors) 4 weeks ahead to allow shipping time. Buy or arrange perishables (real lemons, fresh flowers, food) 1-3 days before.
Who hosts a lemon bridal shower?
Traditionally, the maid of honor hosts with help from the bridal party. The bride’s mother, future mother-in-law, or close friends sometimes co-host. The bride herself doesn’t host her own shower, though she’s typically involved in choosing the theme and date.
Can a lemon bridal shower work for a fall or winter wedding?
Yes — many brides with fall or winter weddings still choose a lemon shower because the bright theme contrasts beautifully with grayer weather. Hold the shower indoors with abundant candlelight, lean into the warmer tones (mustard, cream, brass) rather than bright lemon yellow, and add seasonal touches like cedar sprigs alongside the eucalyptus.
How many lemons do I need for the shower?
For a 25-guest shower, plan on 20-30 lemons total: 12-15 for the main centerpiece, 6-8 for the dessert table styling, and a few extras for drinks and as small accents around the space. Use real lemons for the dessert and drink areas, faux lemons for permanent decor that needs to last all day.
The Most Important Element
If you have to prioritize, focus your planning energy on the dessert table. It’s the most photographed element of the shower, the visual moment guests will remember, and the centerpiece of the social media coverage. A perfect dessert table with average decor elsewhere reads more successful than perfect decor with a basic dessert table. Invest in vertical height variation, multiple lemon-themed desserts, and a beautiful drink dispenser, and the rest of the shower can be relatively simple.
Related Articles
- Lemon Wedding Decor Pillar: https://stylicia.com/lemon-wedding-decor — the lemon-specific wedding planning guide.
- Italian Themed Wedding: https://stylicia.com/italian-themed-wedding — Amalfi, Tuscan, and Capri styles decoded.
- Citrus Wedding Theme: https://stylicia.com/citrus-wedding-theme — beyond just lemons, the broader citrus aesthetic.
- Lemon Centerpiece Ideas: https://stylicia.com/lemon-centerpiece-ideas — 15 centerpiece styles.

Disclosure: This post contains affiliate links. If you purchase through these links, we may earn a small commission at no extra cost to you. We only recommend products we genuinely love.
Italian-themed weddings have become one of the most-searched wedding aesthetics on Pinterest, but the term covers at least three distinct styles — Amalfi Coast, Tuscan, and Capri — each with different color palettes, decor elements, and overall feel. Choosing between them shapes every other wedding decision, from your invitations to your menu. This guide breaks down each style, shows you how to pick the right one, and provides the complete decor checklist for an Italian-themed wedding at any budget.
Quick Answer: The three main Italian wedding styles are Amalfi Coast (lemons, blue-and-white stripes, terracotta, white linen), Tuscan (olive branches, cream, rust, sunflowers, weathered wood), and Capri (white-and-blue tiles, lemons, brass, navy stripes). Choose based on venue and color preferences. All three share white linen, Mediterranean greenery, and Italian food traditions, but differ significantly in color palette and formality.
The 3 Italian Wedding Styles, Decoded
Amalfi Coast Style
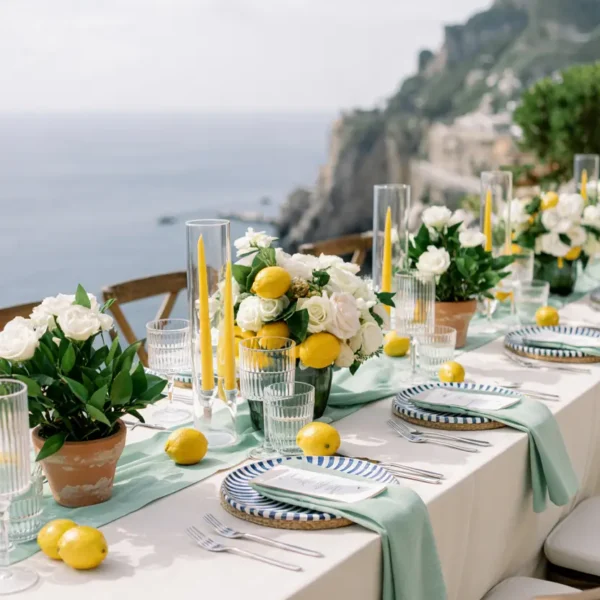
The most popular and recognizable Italian wedding aesthetic. Color palette: lemon yellow, white, sage green, terracotta accents. Signature elements: lemons everywhere (centerpieces, arches, escort cards), blue-and-white striped patterns inspired by Capri tile, terracotta pots with greenery, white linen tablecloths. Best for: outdoor summer weddings, beachside venues, weddings with Mediterranean architecture, brides who want bright color and visual punch.
Tuscan Style
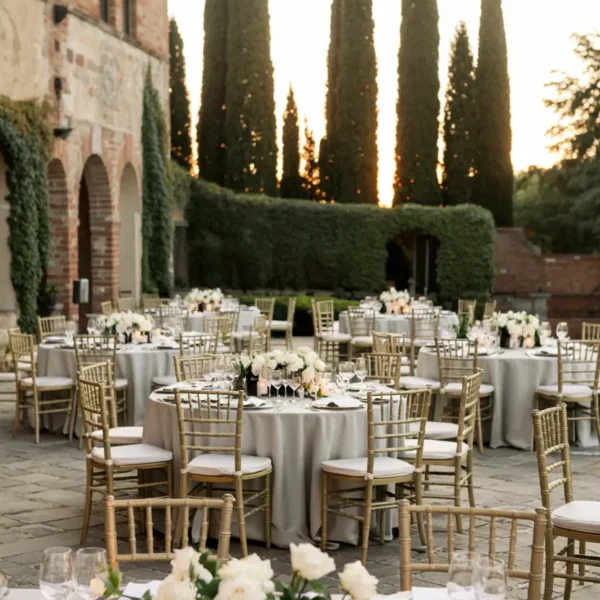
More rustic and earth-toned than Amalfi. Color palette: cream, rust, deep olive green, mustard, weathered terracotta. Signature elements: olive branches as primary greenery, sunflowers, weathered wood, dried wheat, vintage-look ceramics, candlelight. Best for: vineyard or farm weddings, fall and late summer ceremonies, brides who want richer warmth without bright color, rustic-leaning aesthetics.
Capri Style
More upscale and graphic than the other two. Color palette: white, navy, lemon yellow, brass, occasional pink bougainvillea. Signature elements: white-and-navy striped patterns (clothing, linens, signage), brass and gold accents, lemons used sparingly as accents, pink bougainvillea or hydrangeas, white architecture. Best for: more formal weddings, evening receptions, brides drawn to graphic patterns and clean lines.
How to Choose Your Style

Three factors determine which Italian style fits your wedding:
- Your venue — outdoor garden or beachside = Amalfi or Capri; vineyard or farm = Tuscan; modern indoor = Capri
- Time of year — spring/summer = Amalfi or Capri; late summer/fall = Tuscan
- Your color preferences — drawn to bright cheer = Amalfi; warm earthy = Tuscan; graphic and crisp = Capri
Pro Tip: If you’re torn between Amalfi and Tuscan, look at your engagement photos and the colors you naturally wear. If you gravitate toward bright whites, fresh greens, and yellow accents, choose Amalfi. If you favor cream, rust, mustard, and olive, Tuscan is your fit.
Italian Wedding Invitations and Save-the-Dates

Style-appropriate invitation suites set the tone before guests arrive:
- Amalfi: cream paper, watercolor lemons and eucalyptus, navy or charcoal calligraphy
- Tuscan: aged cream paper, watercolor olive branches and sunflowers, dark brown or black serif typography
- Capri: white paper, navy striped borders, gold or brass accent details, italic calligraphy
Custom Italian-themed wedding invitations run $200-600 from Etsy designers, $80-200 for templates you customize and print yourself, $800-1,500 for fully designed letterpress.
Welcome Bag Essentials

For destination Italian weddings or those with out-of-town guests, welcome bags carry the theme into guests’ hotel rooms:
- Mini bottle of limoncello
- Italian biscotti or amaretti cookies
- Small jar of olive oil or balsamic vinegar
- Lemon soap or olive oil soap
- Welcome card with weekend itinerary
- Bottled water with custom Italian-themed label
Budget Pick: Welcome bags cost $20-40 per guest depending on contents. For 100 guests, budget $2,000-4,000. Skip elaborate bags for cost savings — a simple kraft bag with 4-5 quality items reads more thoughtful than a stuffed bag with cheap fillers.
Ceremony Decor

Aisle
Amalfi: lemon-and-eucalyptus garlands hung from chairs or shepherd hooks. Tuscan: olive branches and dried wheat in clusters. Capri: white florals (hydrangea, white roses) with subtle lemon accents.
Arch or Backdrop
Amalfi: olive branches, white roses, lemons, eucalyptus in asymmetric arrangement. Tuscan: olive branches, sunflowers, dried elements, wheat. Capri: clean white florals, brass accents, minimal greenery.
Seating
Crossback wooden chairs work for all three styles. For Amalfi/Tuscan, leave chairs as-is or tie a simple cream linen ribbon to each. For Capri, consider white chiavari chairs with navy ribbon accents for a more formal feel.
Reception Centerpieces

- Amalfi — low cylinder vases with lemons and white roses, plus eucalyptus garland runners on long tables (shop lemon centerpiece decor)
- Tuscan — wooden dough bowls or terracotta bowls with olive branches, sunflowers, dried wheat, candles
- Capri — tall white vases with mass white hydrangeas, brass candlesticks, occasional lemon accents
Italian Wedding Food and Drink

The food carries the theme as much as the decor. Italian wedding food essentials:
- Antipasti station: prosciutto, salami, marinated olives, fresh mozzarella, bruschetta
- Pasta course: handmade pasta with regional sauces (carbonara, cacio e pepe, lemon ricotta)
- Main: roasted chicken with lemon and herbs, or whole roasted fish for coastal themes
- Italian wedding cake: tiered with lemon curd, tiramisu, or traditional Millefoglie
- Cocktails: Aperol spritz, Campari sour, limoncello spritz, classic Negroni
- Late-night station: fresh-made pizza, gelato cart, or espresso bar
Our Pick: A gelato cart at the reception is one of the most-photographed and most-talked-about elements of an Italian wedding. Many cities have rental services starting around $400-800 for a 2-hour service window with 4-6 flavors.
Live Music and Atmosphere

Music sets the Italian feel as effectively as decor. Options:
- String quartet for ceremony and cocktail hour
- Italian-style accordion player or small Italian folk band for cocktail hour
- Modern Italian/European DJ playlist mixing classic Italian (Andrea Bocelli, Italian pop) with current dance music for the reception
- Solo guitarist for ceremony in Tuscan-style outdoor venues
Photography Style and Locations

Italian-themed weddings benefit from photographers who specialize in editorial or fine-art styles. Backdrops to plan around:
- Stone walls or weathered architecture for couple portraits
- Olive groves or vineyard rows
- Outdoor tablescape shots with golden hour lighting
- Detail shots of menu cards, place settings, and centerpieces
- Group shots with bistro lights overhead at evening receptions
Italian Wedding Favor Ideas
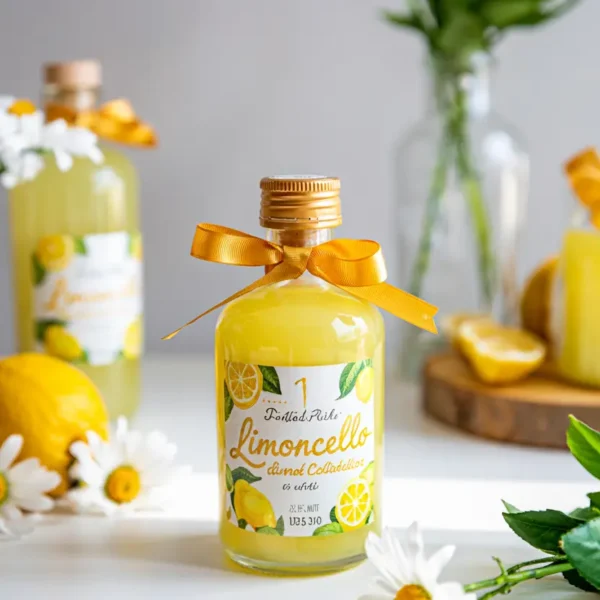
Favors that match the theme without feeling generic:
- Mini bottles of limoncello with custom labels ($4-8 each)
- Small jars of homemade lemon curd or olive tapenade ($5-8 each)
- Olive oil or balsamic vinegar in mini bottles ($6-10 each)
- Italian-style biscotti tied with twine ($3-5 each)
- Custom matchbook with a Bocelli quote or wedding date ($1-2 each)
- Small potted herb plant (basil or rosemary) with name tag ($4-7 each)
Bridal Party Attire

Italian-themed weddings work best with bridesmaid dresses in flowing fabrics and earthy or coastal palettes:
- Amalfi: pale yellow, sage green, or cream flowing dresses
- Tuscan: rust, mustard, deep green, or cream
- Capri: navy, white, or pale pink dresses with structured silhouettes
Groomsmen typically wear linen or lightweight wool suits in tan, cream, or navy. Skip tuxedos for outdoor Amalfi or Tuscan weddings — they read formal-American rather than Italian.
Common Mistakes in Italian-Themed Weddings

- Mixing styles inadvertently. Lemon centerpieces (Amalfi) on a Tuscan-style rustic table reads inconsistent. Pick one style and stick to it.
- Going too costume-themed. Avoid pasta-shaped favors, mini Vespa decorations, and stereotype Italian elements. Italian weddings should feel sophisticated, not like ‘Lady and the Tramp.’
- Forgetting the food matters. Italian decor with American wedding food (chicken-or-fish plate) feels disconnected. Match the menu to the theme.
- Skipping cohesion details. Tie everything together with consistent typography on signage, consistent ribbon color across decor, and consistent greenery type.
Frequently Asked Questions
Can I do an Italian-themed wedding outside of Italy?
Absolutely — most Italian-themed weddings happen in the US, UK, or Australia rather than Italy itself. The aesthetic translates beautifully to outdoor venues anywhere with garden, vineyard, or coastal settings. The trick is committing fully to the visual elements (lemons, olive branches, terracotta, linen) and the food traditions (antipasti, pasta course, gelato), not the location.
How much does an Italian-themed wedding cost?
Italian-themed wedding decor adds 0-15% to a typical wedding budget. The lemons, olive branches, and terracotta elements are inexpensive, and the linen aesthetic is similar to what most weddings already use. The food can cost more if you commit to authentic Italian (handmade pasta, antipasti spread), but it’s not dramatically pricier than typical wedding catering.
What’s the difference between Tuscan and Amalfi style?
Color and feel. Amalfi is bright, citrusy, and crisp — yellow lemons, white linens, fresh greens. Tuscan is warm, earthy, and rustic — cream, rust, mustard, weathered wood, sunflowers, olive branches. Amalfi feels like coastal Italian summer; Tuscan feels like inland Italian harvest. Both share white linen and Italian food traditions but lean opposite directions on color.
Is an Italian wedding the same as a Mediterranean wedding?
Italian weddings are a subset of Mediterranean weddings. Mediterranean is broader — includes Greek (white-and-blue), Spanish (warm earth tones with red accents), and French Provence (lavender, pale yellow) styles. Italian weddings are specifically focused on lemon-olive-terracotta palettes and Italian food traditions, with the three main sub-styles (Amalfi, Tuscan, Capri) being regionally specific.
Can I have an Italian-themed wedding in winter?
Tuscan style works best for winter — the warm earth tones, olive branches, and dried wheat read seasonally appropriate. Amalfi style is harder in winter because the bright citrus colors clash with gray winter weather. For winter Italian weddings, lean Tuscan, choose indoor venues with rustic architecture, and emphasize candlelight and warm metals over fresh greenery.
Pick Your Style and Commit
The most successful Italian-themed weddings commit fully to one of the three sub-styles rather than mixing them. Pick the one that fits your venue, season, and personal aesthetic — then make every decor decision through that lens. Cohesion is what makes Italian weddings feel sophisticated rather than themed. Once you’ve chosen, the rest of the planning becomes much easier because each decision has a clear answer: ‘Does this fit Amalfi/Tuscan/Capri?’
Related Articles
- Lemon Wedding Decor Pillar: https://stylicia.com/lemon-wedding-decor — the lemon-specific wedding planning guide.
- The Ultimate Guide to Lemon Decor: https://stylicia.com/lemon-decor — the full overview across kitchen, table, wedding, DIY.
- Lemon Bridal Shower Ideas: https://stylicia.com/lemon-bridal-shower — bridal shower planning in Italian style.

Lemon wedding decor has become one of the most popular wedding themes for spring and summer ceremonies, and for good reason — it photographs beautifully, scales from intimate backyard receptions to large venues, and works equally well for destination Italian weddings as for backyard bridal showers. The aesthetic is romantic without being fussy, sophisticated without being formal, and remarkably budget-friendly compared to floral-heavy alternatives.
This complete guide covers every part of a lemon-themed wedding: from save-the-dates through reception centerpieces, with detailed budgets and shopping lists for both DIY and full-service approaches.
Quick Answer: Lemon wedding decor combines yellow lemons, white florals (roses, peonies, hydrangeas), and Mediterranean greenery (eucalyptus, olive branches) for an Italian summer aesthetic. Most popular elements: lemon-and-eucalyptus garlands as ceremony aisles, lemon centerpieces in cylinder vases or wooden bowls, Italian-style bridal showers with tiered cake stands, and lemon-themed favors like limoncello bottles or lemon curd jars. Total decor budget: $300-1,500 for small weddings, $2,000-6,000 for full venues.
Why Lemon Wedding Decor Works
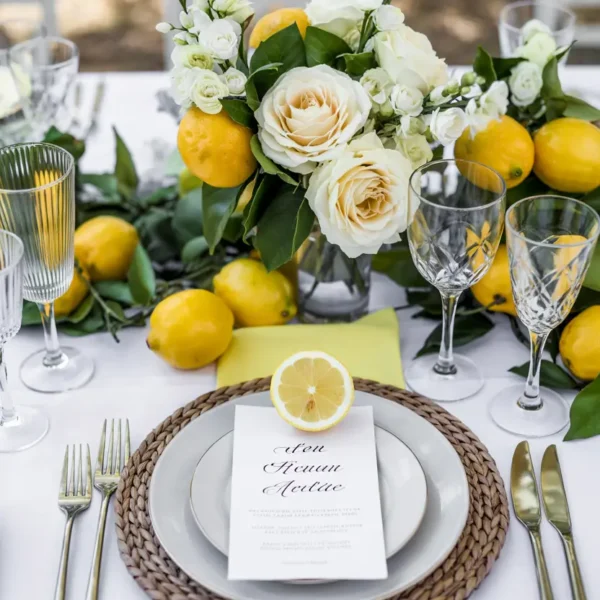
Lemon weddings sit in a sweet spot that few other themes hit: distinctive enough to feel personal, but classic enough to look elegant decades later in photos. Compared to floral-heavy weddings, lemon decor costs significantly less because lemons themselves are inexpensive and don’t require florist arrangements. Compared to fully neutral white-on-white weddings, lemon themes deliver visual punch and color without committing to anything trendy.
The other major reason: lemon themes work for the supporting events too. Bridal showers, rehearsal dinners, day-after brunches, and welcome dinners all naturally extend the lemon aesthetic without feeling repetitive — making the entire wedding weekend feel cohesive.
The Italian Summer Wedding Aesthetic
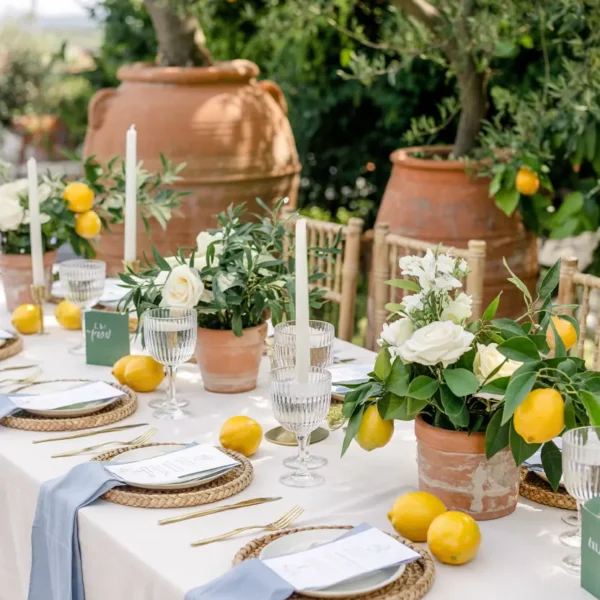
The most popular lemon wedding style is what’s now called the ‘Italian summer wedding‘ — a specific Pinterest aesthetic that’s exploded in popularity since 2022. The signature elements: blue-and-white striped patterns (think Capri tile), terracotta pots, olive branches alongside lemons, lots of white linen, and lemons used everywhere as functional decor (escort card holders, place card markers, centerpiece elements). According to wedding design experts, this aesthetic has grown by over 200% in popularity.
This aesthetic works particularly well for outdoor venues, destination weddings (especially in Italy, Greece, or the Amalfi Coast), backyard weddings with Mediterranean architecture, and any spring or summer ceremony where the bride wants distinctive style without overcomplicated florals.
1. Save-the-Dates and Invitations
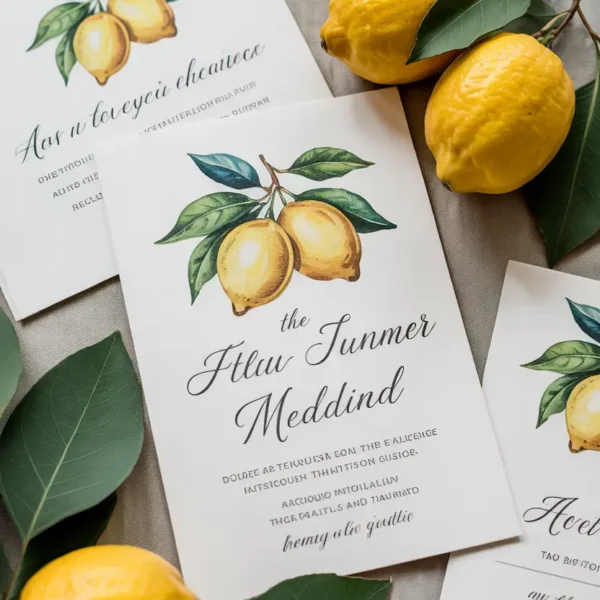
Set the lemon theme from the very first communication. Watercolor lemon and eucalyptus illustrations on cream paper read elegant rather than themed. Calligraphy in dark navy or charcoal pairs better than gold (which can read too coastal-themed). Many Etsy designers offer custom Italian summer wedding invitation suites for $80-200 for templates, $300-800 for fully designed sets.
2. Welcome Signage
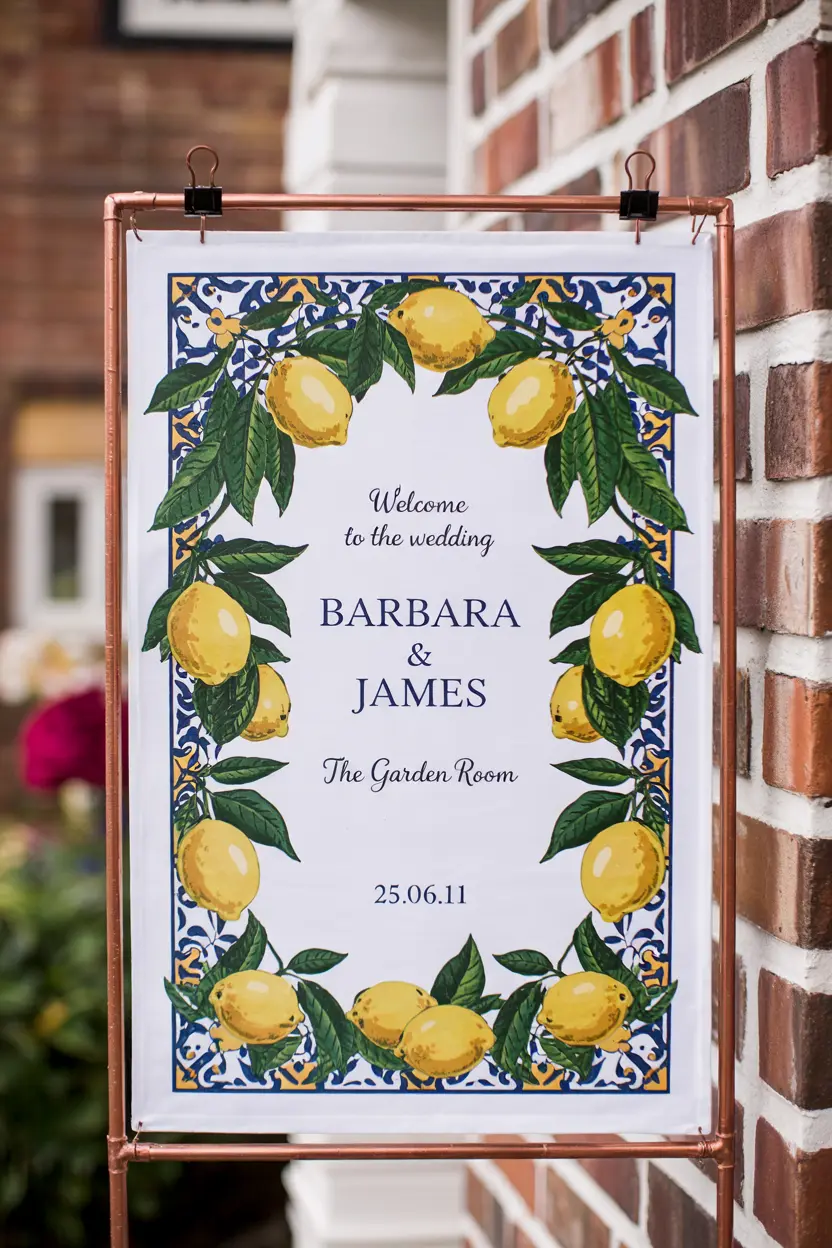
The first piece of decor guests see when they arrive at the venue. A hand-lettered or printed welcome sign with a lemon-and-greenery border, propped on an easel near the entrance, instantly establishes the theme. Looks particularly good when paired with a small lemon-and-eucalyptus arrangement at the base.
Our Pick: For wedding signage, a hand-painted wooden sign on an easel feels more elevated than printed paper. Etsy offers custom hand-painted signs in the $80-200 range, and they double as keepsakes after the wedding.
3. Ceremony Aisle Decor

The most photographed wedding decor element. Three approaches work best for lemon-themed ceremonies:
- Lemon-and-eucalyptus garlands — drape along the aisle on either side, anchored to chairs or hung from shepherd hooks every 6-8 feet.
- Potted lemon trees — small dwarf lemon trees in terracotta pots line the aisle. Higher commitment ($40-80 per tree) but unforgettable visual.
- Scattered lemons with greenery — scatter lemons along the aisle ground with eucalyptus stems woven between. Most budget-friendly approach.
4. Ceremony Arch or Backdrop
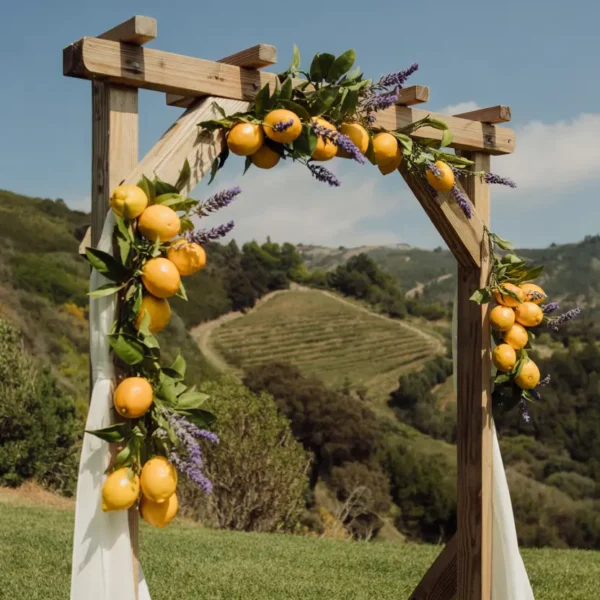
The visual focal point of the entire ceremony. For lemon weddings, the most photographed arches incorporate olive branches, eucalyptus, white roses, and clusters of lemons (real or faux) in asymmetric arrangements. Avoid heavily floral arches that hide the lemons; let the citrus be a clear visual element.
Budget Pick: DIY ceremony arches save significant money. A simple wooden arch or copper hoop ($150-300 to buy or rent) plus $200-400 in greenery, lemons, and white roses creates a $1,500-quality look. Have a friend or family member arrange the day before.
5. Reception Centerpieces
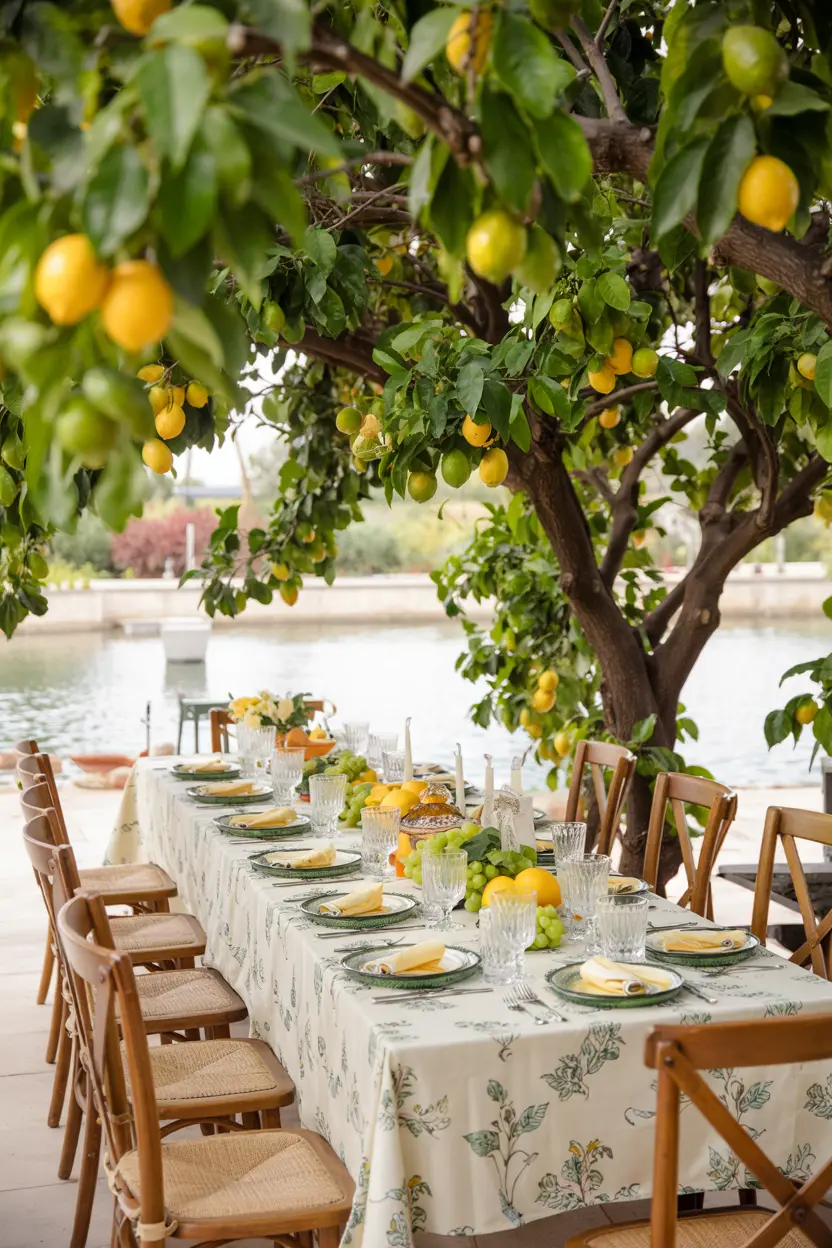
The single largest decor expense at most weddings. For lemon themes, three centerpiece styles dominate:
Long Table Garlands
On long farmhouse tables (10-12 guests per table), eucalyptus garland runners with scattered lemons every 12-18 inches, plus low cylinder vases of white roses and lemons every 3-4 feet. Add taper candles in brass or gold holders at 18-inch intervals.
Round Table Cylinder Vases
On round tables, a single 12-inch glass cylinder vase filled with lemons and topped with white roses or hydrangeas. Add 3-4 taper candles around the centerpiece for evening ceremonies.
Wooden Dough Bowl Arrangements
On both round and long tables, shallow wooden dough bowls filled with lemons, olive branches, and trailing eucalyptus create a more rustic, organic feel than vase arrangements.
6. Place Cards and Favors
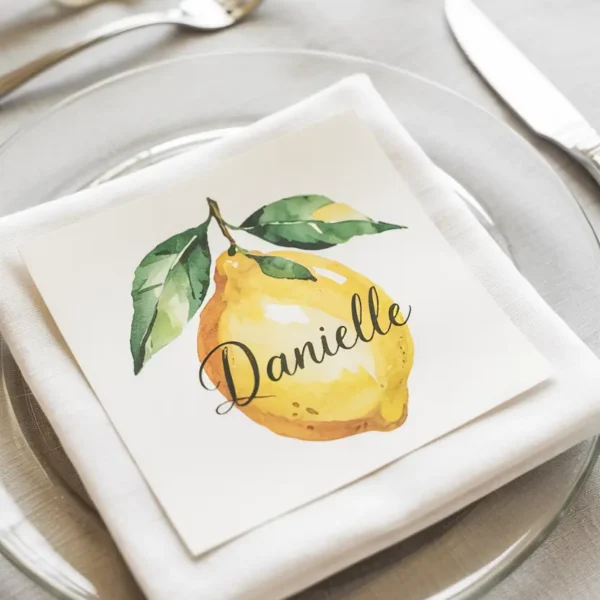
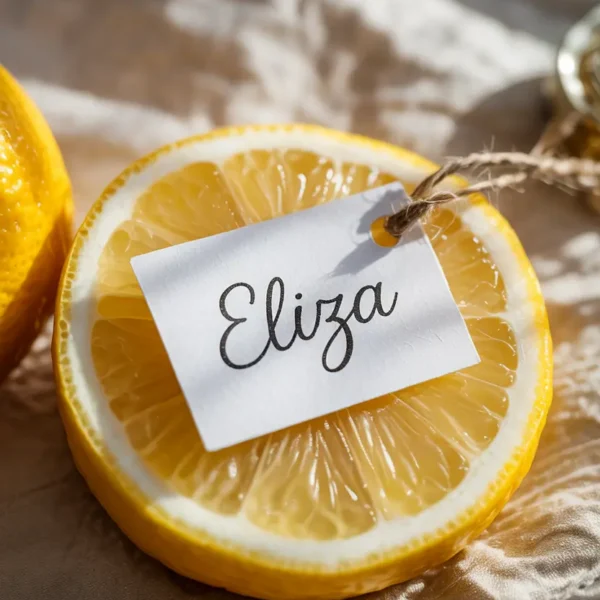
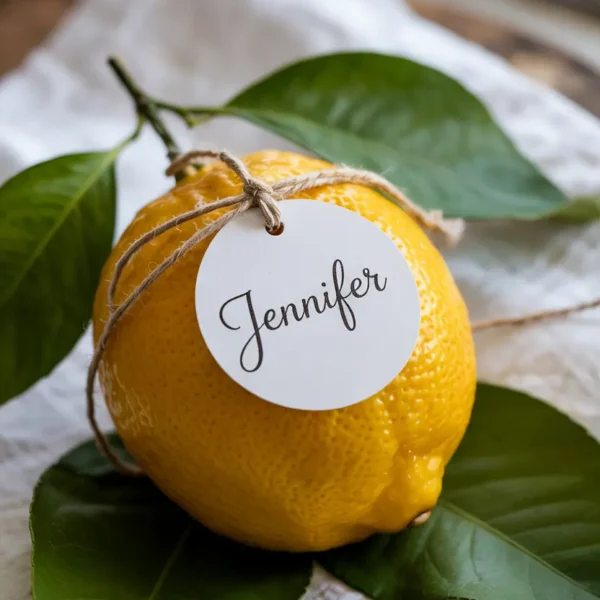
Lemon themes provide several elegant double-duty options where the place card and favor are the same item:
- Real lemons with name tags — tie a small handwritten name tag to each lemon’s stem with twine. Functions as place card, decor, and (technically) a favor.
- Mini bottles of limoncello — with hand-lettered name tags. Premium but unforgettable. $4-8 per mini bottle in bulk.
- Small jars of lemon curd or lemon cookies — homemade or sourced from local bakers. Extremely well-received.
- Potted herb plants with name tags — small terracotta pots with basil, rosemary, or thyme, name tag on a stake. Practical favor guests will actually use.
7. Bridal Shower Decor
Lemon-themed bridal showers are arguably more popular than the wedding themes themselves, because showers are smaller (easier to execute) and lend themselves naturally to the citrus aesthetic. Key elements:
- Large hand-lettered banner with phrases like ‘She Found Her Main Squeeze,’ ‘Citrus & Soulmates,’ or just the bride’s name with lemon graphics
- Tiered cake stand centerpieces stacked with lemons and eucalyptus
- Coordinated dessert table with lemon bars, lemon cookies, lemonade, and limoncello cocktails
- Yellow-and-white striped linens, lemon-print plates or napkins
- Small favor bags with lemon soaps, lemon teas, or lemon body scrubs
Pro Tip: For bridal showers, the dessert table is the visual anchor and the most-photographed element. Invest more in the dessert table styling than the dining table — it’s what guests will remember and post on social media.
8. Reception Lighting
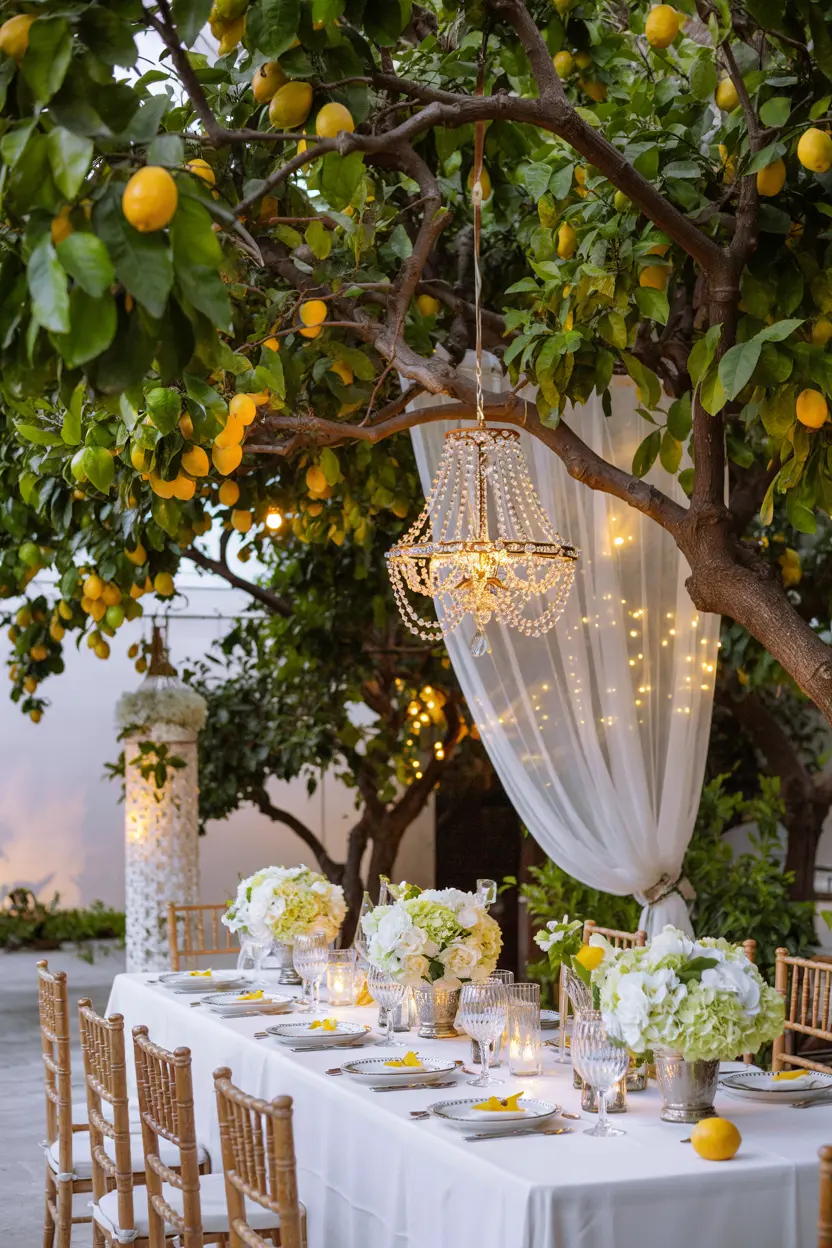
Lighting transforms a lemon wedding from daytime-pretty to evening-magical. Three options:
- Bistro string lights — warm white Edison bulbs strung overhead. The signature look of Italian outdoor receptions.
- Taper candles on tables — in brass or gold holders, in groups of 3-5 per table at varying heights.
- Pillar candles on the floor or aisles — in glass hurricane lanterns to protect from wind. Adds dramatic low light.
9. Bar and Cocktail Stations
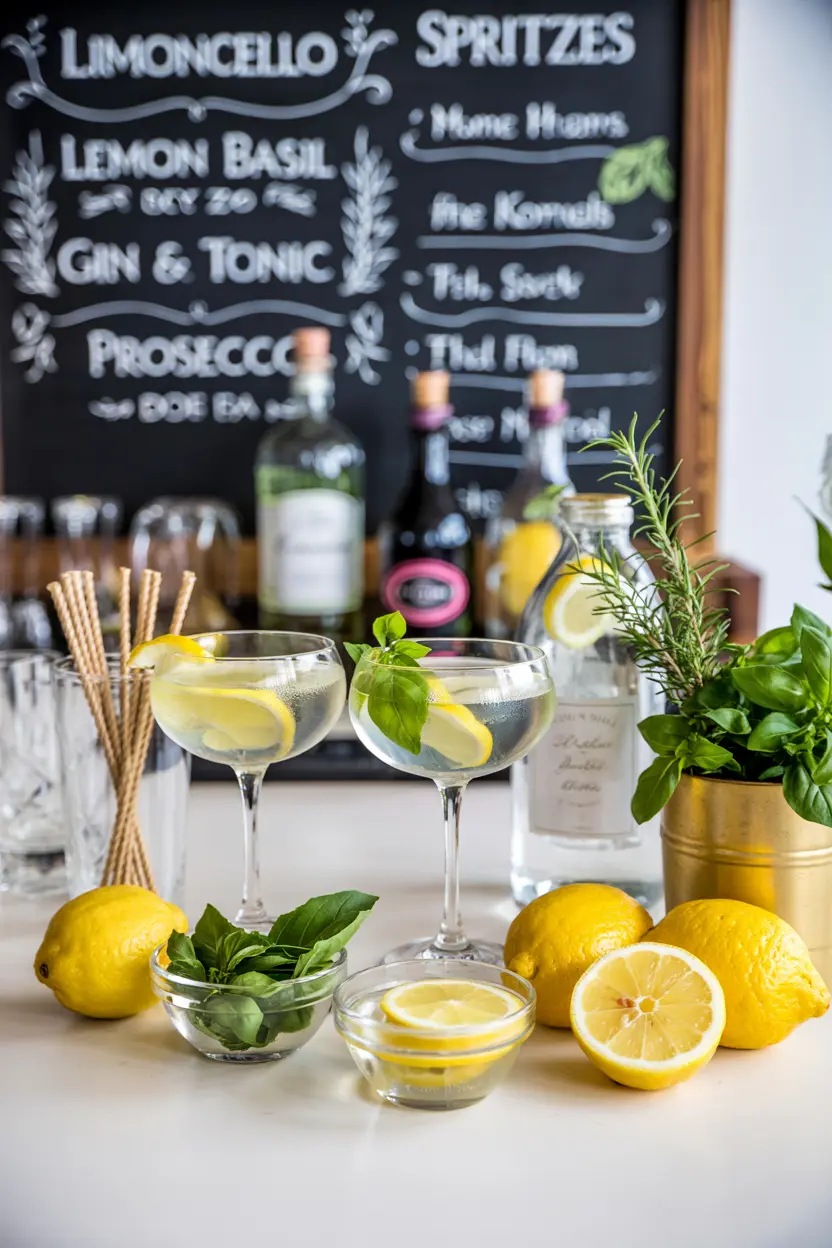
Build a coordinated bar that fits the theme: a small lemon-themed cocktail menu (limoncello spritzes, lemon basil gin & tonic, prosecco with lemon peel), garnishes displayed in small clear bowls (sliced lemons, fresh basil, rosemary sprigs), and bar back styling with bottles of limoncello and a chalkboard cocktail menu with hand-lettered drink names.
10. Photography Backdrop / Photo Booth
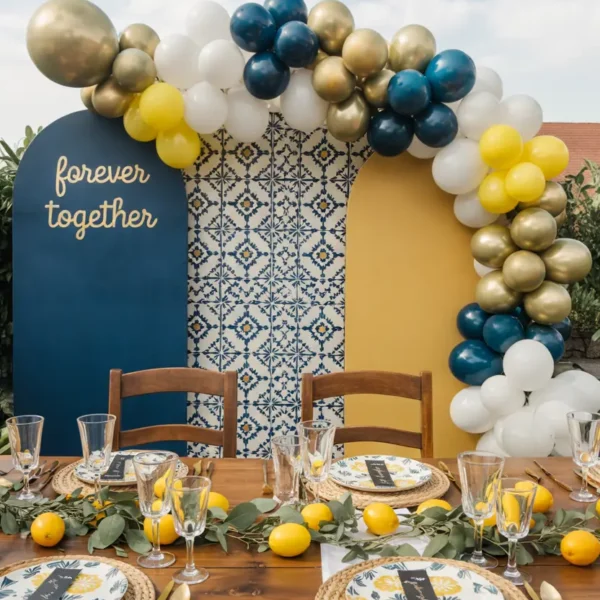
If your venue has space, a photo booth backdrop styled with the wedding theme delivers incredible engagement on social media. For lemon weddings, the best backdrops are: a wooden lattice wall with eucalyptus and lemons, a hanging garland ‘lemon curtain’ wall, or a styled vintage Italian-style wall with framed lemon prints. Add a small props table with lemon-themed accessories (sunglasses, fans, hats with citrus prints).
Budget Breakdowns
Three complete lemon wedding scenarios with realistic budgets.
| Element | Backyard / 50 guests | Mid-size / 100 guests | Large / 150+ guests |
|---|---|---|---|
| Save-the-dates / invites | $80-150 | $200-400 | $400-800 |
| Welcome signage | $80-150 | $150-300 | $300-500 |
| Ceremony arch / aisle | $200-400 DIY | $400-800 | $800-1,500 |
| Centerpieces | $150-300 | $500-1,000 | $1,200-2,500 |
| Place cards / favors | $50-150 | $200-400 | $400-800 |
| Lighting / candles | $100-200 | $300-600 | $600-1,200 |
| TOTAL DECOR BUDGET | $700-1,400 | $1,800-3,500 | $3,800-7,300 |
These are decor-only budgets and don’t include florist labor (add 30-50% if hiring a florist), rentals (linens, chairs, tables), or food/beverage. DIY weddings save 40-60% on decor compared to full-service florist arrangements.
Real vs. Faux Lemons for Weddings

For wedding-scale lemon decor, this decision matters financially. Real lemons cost $0.50-0.80 each in bulk, while quality faux lemons cost $1.50-2.50 each. For a 100-guest wedding using 200 lemons across centerpieces and arches, real lemons cost $100-160 and faux cost $300-500.
Use real lemons for one-day weddings where the decor will only be set up for a single day. Real lemons photograph slightly better in close-ups and add subtle fragrance. Use faux lemons for multi-day events, destination weddings where you can’t easily get fresh lemons, or any reception where the decor needs to last beyond the ceremony day.
Common Mistakes in Lemon Weddings
- Going monochromatic yellow. Too much yellow without white, green, and natural materials reads juvenile. Aim for 60% neutrals, 30% yellow, 10% green.
- Mixing too many themed elements. If your invitations have realistic watercolor lemons, your centerpieces shouldn’t have cartoon lemon prints. Pick one visual register.
- Forgetting greenery in centerpieces. Lemons alone look artificial. Always pair with eucalyptus, olive branches, or trailing ivy.
- Skipping the cohesion details. Tie the theme together with consistent typography on signage, consistent ribbon color, and consistent greenery type. Inconsistency reads as accidental.
- Overdoing it. Lemons should accent, not dominate. If guests’ first comment is ‘wow, so many lemons’ rather than ‘this is gorgeous,’ you’ve gone too far.
Frequently Asked Questions
Are lemon weddings only for spring and summer?
Yes, primarily — lemon weddings work best from April through September. Winter lemon weddings can work for destination Italian weddings or Mediterranean climates, but a lemon-themed January wedding in a snowy climate creates visual dissonance between the indoor decor and the outdoor weather. For winter weddings, consider citrus-and-cedar themes that bridge into the season.
Can I have a lemon wedding without going Italian?
Absolutely — lemon weddings adapt well to several regional aesthetics. Coastal/Cape Cod (lemons + navy + white), Provence French (lemons + lavender + cream), Southern (lemons + magnolia + white linen), or modern minimalist (lemons + clean lines + sculptural arrangements) all work without leaning Italian. The lemons stay; the supporting style changes.
How many lemons do I need for a wedding?
Rough planning: 8-12 lemons per centerpiece, 30-40 lemons for a ceremony arch, 20-30 lemons for aisle decor, plus 1 lemon per guest if using as place cards. A 100-guest wedding typically uses 200-300 lemons total. Order 15-20% more than you calculate to account for damaged or unusable lemons.
Should I serve lemon-themed food at a lemon wedding?
Selectively, yes. Lemon-themed cocktails (limoncello spritz), lemon desserts (lemon tarts, lemon cake), and lemon-touched main courses (lemon roast chicken, lemon risotto) reinforce the theme without overwhelming. Avoid making everything lemon-flavored — guests need variety.
Can lemon weddings work for destination weddings?
They’re particularly well-suited. The Italian/Mediterranean aesthetic feels right at home in Italy, Greece, the Amalfi Coast, Spain, or California wine country. Destination weddings can also use real lemons sourced locally (often higher quality than what you’d ship), and the theme reinforces the location’s natural style.
Start with the Bridal Shower
If you’re planning a lemon wedding but feeling overwhelmed by scale, start by executing the bridal shower first. It’s smaller, less expensive, and lets you test all the elements (signage, centerpieces, place cards, favors) at lower stakes. What works at the shower carries directly to the wedding; what doesn’t can be adjusted before the main event. The shower also gives the family and bridal party a preview of the aesthetic, so they’re invested in helping execute the larger wedding.
Related Articles
- The Ultimate Guide to Lemon Decor: https://stylicia.com/lemon-decor — kitchen, table, wedding, DIY overview.
- Italian Themed Wedding Guide: https://stylicia.com/italian-themed-wedding — the full Italian summer wedding aesthetic.
- Lemon Bridal Shower Ideas: https://stylicia.com/lemon-bridal-shower — complete shower planning guide.
- Lemon Centerpiece Ideas: https://stylicia.com/lemon-centerpiece-ideas — 15 centerpiece styles for ceremony and reception.

Summer kitchen decor is about more than just lemons — though lemons are absolutely part of it. The goal is to make a kitchen feel lighter, brighter, and more vacation-like for the warmer months, then easily transition back when fall arrives.
The best summer refreshes use a mix of fresh fruit, bright textiles, coastal or Mediterranean accents, and seasonal florals — none of which require major commitment or significant budget. These ten ideas cover the full range, from $10 changes you can make today to $200 refreshes that fully reset the space.
Quick Answer: The most popular summer kitchen decor combines lemons or fresh citrus on the counter, lightweight cotton or linen textiles in yellow or blue stripes, fresh herbs in pots, and seasonal florals like sunflowers or hydrangeas. The whole refresh costs $30-80 and takes under an hour. Best summer kitchen palettes: yellow + white, blue + white coastal, or yellow + sage green Mediterranean.
1. Swap Heavy Textiles for Lightweight Cotton or Linen

The single biggest summer kitchen update: replace heavy fall/winter towels with lightweight cotton or linen ones in summer colors. Yellow stripes, white-and-blue check, or sage green florals all read summer. A set of 4 cotton towels runs $20-30 on Amazon. Store winter towels in a labeled bin to swap back in October.
2. Display a Bowl of Fresh Citrus

Lemons, oranges, or limes in a wooden or ceramic bowl on the counter. Functional and seasonal — you’ll cook with them. Choose a 10-12 inch bowl that holds 12-15 fruits comfortably. Replace fruit every 2-3 weeks. Total cost: $10-20 plus $6-10 for fruit refreshes.
Pro Tip: Mix citrus types in the same bowl for visual interest. A combination of lemons, limes, and oranges (or grapefruits) reads as more intentional than a uniform bowl, and gives you variety for cooking.
3. Add Fresh Herbs in Small Pots

A row of small terracotta or ceramic pots with fresh basil, rosemary, mint, and thyme on the windowsill or counter. Functional (you’ll use them) and beautifully summery. Even just one pot of basil dramatically shifts a kitchen toward summer Italian. Around $15-25 for the pots, $4-6 per herb.
4. Display a Pitcher of Lemonade or Iced Tea

A glass pitcher of lemonade with sliced lemons floating on top, or iced tea with mint sprigs, on the counter or kitchen table. Reads instantly summer. Refresh daily. Use a clear or yellow-tinted pitcher for maximum visual impact.
Our Pick: A simple clear glass pitcher with a wide mouth (8-10 cup capacity) is one of the most useful summer kitchen pieces. Use for lemonade, sangria, infused water with cucumbers and herbs, or as a flower vase. Around $20-35 on Amazon.
5. Bring in Sunflowers or Seasonal Florals

A small bouquet of sunflowers, hydrangeas, or yellow roses in a clear glass vase on the counter or kitchen table. Grocery store flowers ($8-12) refresh weekly add a continuous summer feeling. Place near natural light for the most photogenic display.
6. Swap Out Heavy Curtains for Light Linen Sheers

Heavy patterned curtains feel wrong in summer. Replace with white or pale yellow linen sheers that filter light without blocking it. Around $30-60 per panel. Store winter curtains in a vacuum bag for fall. The lighter window treatments visually expand the space and let summer light flood in.
7. Add a Nautical or Coastal Accent

If you want summer kitchen decor that’s not lemon-themed: blue-and-white striped textiles, woven baskets, jute placemats, or a small wooden boat oar leaned against the wall. Pairs beautifully with white cabinets and natural wood floors. Read coastal Italian or New England summer rather than tropical.
8. Display Seasonal Cookbooks

Stack 3-4 summer-focused cookbooks on the counter or open shelving — Italian summer cookbooks, grilling guides, salad books, ice cream books. Functional decor — you’ll actually reach for them. Skip cookbooks with heavy stew or roast imagery (winter feel) until fall.
9. Light Cotton Aprons in Summer Colors

Hang a yellow, blue-striped, or floral apron on a kitchen hook even when not cooking. Adds color at eye level and signals seasonal style. $20-40 for quality cotton or linen aprons. Skip leather or heavy canvas aprons for summer (too winter-coded).
10. Refresh Counter Accessories

Smaller items add up: a yellow ceramic spoon rest by the stove ($12), a striped jar for utensils ($15), a wooden lemon-shaped cutting board on the counter ($25), brass salt and pepper grinders ($30). Replace darker, heavier winter versions with lighter summer pieces. Total cost for a full refresh: $80-100.
Summer Kitchen Color Palettes
Three palettes that consistently read summer rather than winter:
- Yellow + white + green — the lemon classic. Works for Italian and Mediterranean themes.
- Blue + white — coastal and nautical. Works for beach houses and seaside-inspired kitchens.
- Yellow + blue + white — combines both palettes. Reads coastal Italian. Most versatile of the three.
Avoid for summer: deep burgundy, dark forest green, mustard, navy with black. These all read fall/winter.
Items to Pack Away for Summer
As important as what you add is what you remove. Pack these away for the season:
- Heavy wool or chunky-knit tea towels
- Burgundy, mustard, or dark forest green textiles
- Cinnamon, pumpkin spice, or evergreen-scented candles
- Heavy ceramic stoneware in dark colors
- Cookbook stacks featuring stews, roasts, comfort food
- Decorative gourds, pinecones, or other fall/winter accents
Pro Tip: Use clear plastic bins labeled ‘Summer Kitchen’ and ‘Fall/Winter Kitchen’ to store seasonal swaps. Switching takes 20 minutes twice a year and the kitchen feels genuinely seasonal, not generic.
How to Transition Smoothly
Summer kitchen decor doesn’t need to happen overnight. The best transitions happen gradually over 2-3 weeks, replacing one element at a time. This lets you live with each change before adding the next, and prevents the kitchen from feeling abruptly different. Start with textiles (towels, runners), add fresh elements (fruit, herbs, flowers), then swap accessories (utensil holder, spoon rest), and finish with curtains if you’re changing them.
Frequently Asked Questions
When should I switch to summer kitchen decor?
Most people make the transition between mid-April and early June, depending on climate. The signal is when you stop wanting heavy soups and start craving salads — that’s roughly when the kitchen should match. Switch back to fall decor between mid-September and mid-October. The goal is to align decor with how you’re actually cooking and eating.
Can I do summer kitchen decor in a small kitchen?
Yes — small kitchens benefit even more from seasonal swaps because each element has higher visual impact. Stick to 3-4 changes maximum: lighter textiles, fresh fruit on the counter, one small herb pot, and lighter window treatments. Beyond that, the kitchen feels cluttered.
What’s the cheapest summer kitchen update?
The cheapest meaningful update is a $6 bag of lemons in a bowl you already own, plus $4 for a small bouquet of yellow flowers from the grocery store. Total: $10. The change is dramatic — the bright color shifts the entire kitchen mood and the lemons last 2-3 weeks before needing replacement.
Should I get summer-themed dishware?
Generally no — buying separate summer dishware doubles your dish storage requirements and costs significantly. Better to keep neutral white or cream dishes year-round and seasonalize through textiles, accessories, and centerpieces. The dishes are the most expensive kitchen element to swap and the easiest one to keep neutral.
Start This Weekend
The best summer kitchen refresh is the one that takes 30 minutes and costs under $40. Pick three changes from this list — typically lighter textiles, a bowl of fresh citrus, and one bouquet of seasonal flowers — and execute those this weekend. The kitchen will feel summer-ready immediately, and you can add more elements over the following weeks if you want to commit further. By July, your kitchen will feel like a different room entirely.
Related Articles
- Lemon Kitchen Decor Pillar: https://stylicia.com/lemon-kitchen-decor — the lemon-specific kitchen guide.
- Yellow Kitchen Ideas: https://stylicia.com/yellow-kitchen-ideas — 15 ways to add yellow to any kitchen.
- Italian Themed Wedding Guide: https://stylicia.com/italian-themed-wedding — taking summer Italian style off the counter and into events.
Leave a Reply